AWS-hosted resources like S3 buckets, Elastic Container Registry, etc, can be connected to Vision Copilot using Delegated role setup. This section describes the steps to create a secret that captures the necessary configuration for AWS Delegated role access. You must have sufficient privileges on your AWS account to create IAM policies and cross-account roles.
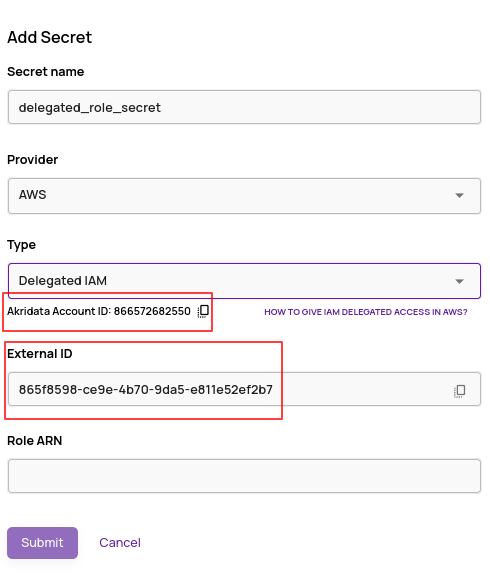
On the Secrets page, click '+Add Secret' and select 'AWS' provider and 'Delegated IAM' type.
Note the Akridata Account ID and the External ID information displayed since this information is needed to set up the necessary role in your AWS account. The External ID is a randomly generated UUID by default, and you can update it to any string of your choice.
Log in to your AWS account. Go to the IAM service and follow the 'Add Role' process.
Select the trusted entity as 'AWS account' and 'Another AWS Account'.
Enter the Account ID and External ID displayed in step 2.
Attach a policy based on the resource for which the access is being created. For access to an S3 bucket, a sample policy statement is as below. Replace 'myBucket' with the name of your bucket.
KMS Policy
If the S3 bucket is encrypted with a custom KMS key, add the following to the KMS policy on the custom KMS key.
{
"Sid": "Allow use of the delegated IAM role to read S3 data",
"Effect": "Allow",
"Principal": {
"AWS": "arn:aws:iam::<your-aws-account-id>:role/<role-name-of-above-created-role"
},
"Action": [
"kms:Decrypt",
"kms:GenerateDataKey*",
"kms:DescribeKey"
],
"Resource": "*"
}
JSON
{
    "Version": "2012-10-17",
    "Statement": [
        {
            "Effect": "Allow",
            "Action": [
                "s3:GetObject",
                "s3:GetBucketLocation",
                "s3:ListBucket"
            ],
            "Resource": [
                "arn:aws:s3:::s3://my-bucket/",
                "arn:aws:s3:::s3://my-bucket/*"
            ]
        }
    ]
}
Save the role created above.
Click on 'Edit role', change the session duration time from the default 1 hour to 12 hours, and save the changes.
Copy the Role ARN.
Go back to the Data Explorer 'Add Secret' flow and paste the Role ARN from step 9.
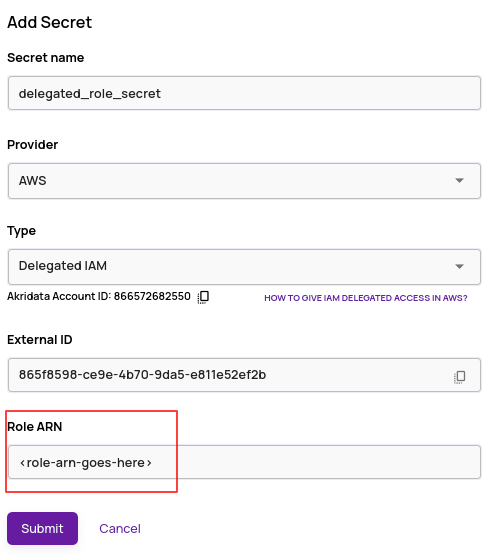
Click 'Submit' to save this secret.