This feature requires Organization Admin role.
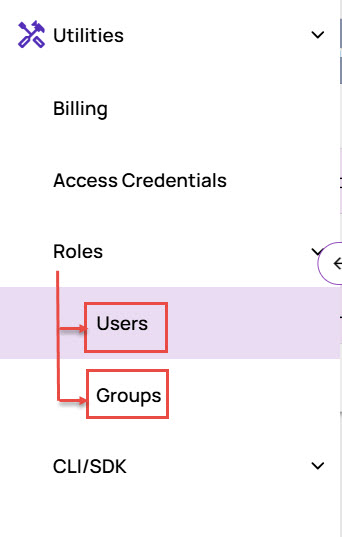
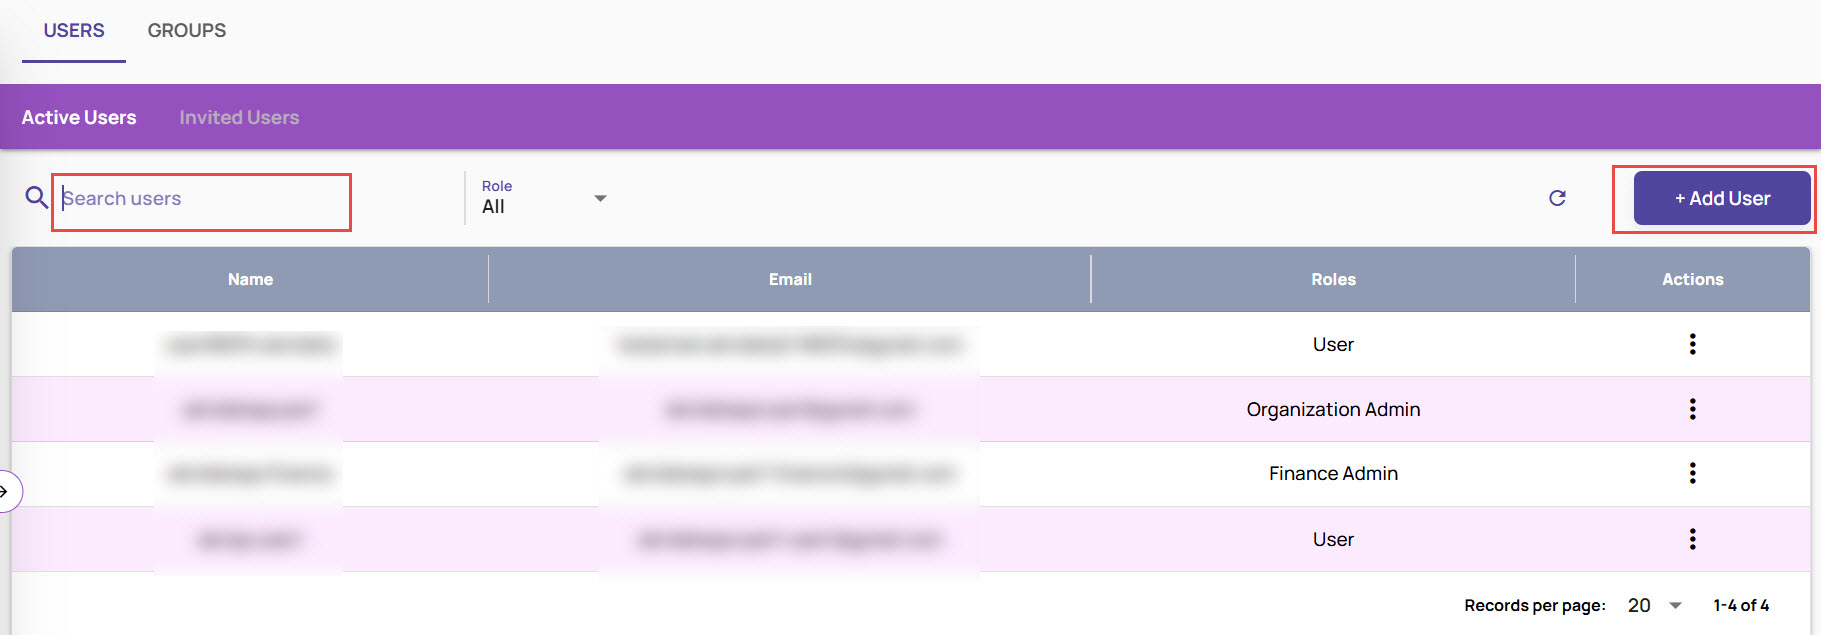
User and group management capabilities are available under Utilities > Roles > Users and Groups on the left navigation panel.
 User management
Add User
To invite a new user to the organization, click the Add User button.
Fill in the information as requested in the form below. Assign one or more roles to the user and optionally add the user to one or more existing groups. There are 3 roles available
Organization admin - A super user role with access to all operations on the portal.
User - A role that has access to all capabilities except billing and the Admin operations menu.
Finance Admin - A role with access only to the billing menu.
.png)
Add User
Click Send Invitation.
The invited users are listed under the 'Invited Users' tab as shown below.
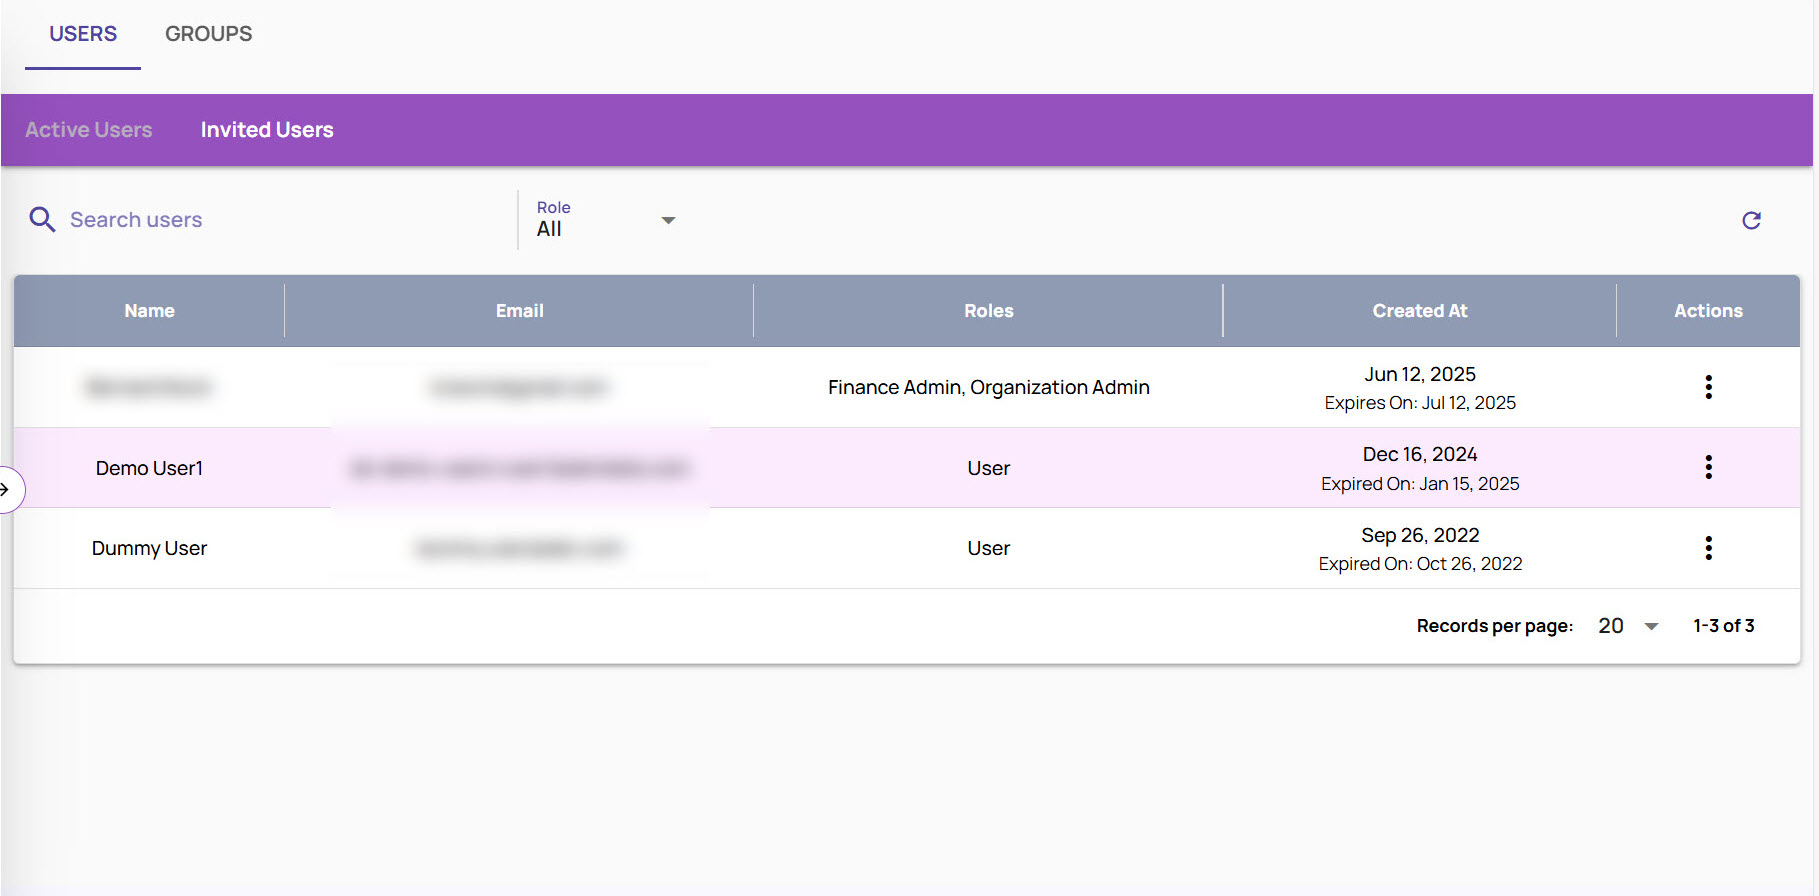
Invited Users
The following actions are available for invited users:
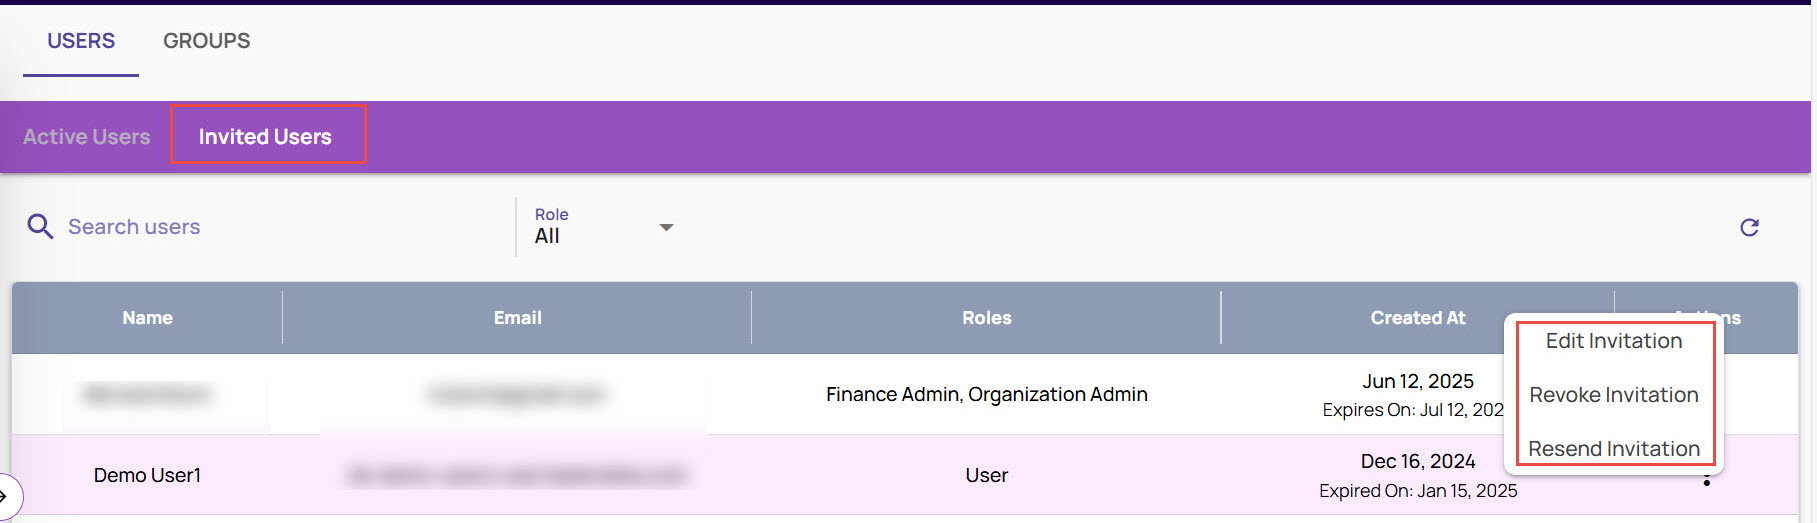
Edit Invitation - To change name, role, or group assignments.
Revoke Invitation - To cancel an invitation.
Resend Invitation - If the invitee has not received the invitation email, this option allows you to resend it.
The invited user receives an email with a link to accept the invitation and join the organization.
After the user joins the organization successfully, the user is listed in the 'Active Users' tab
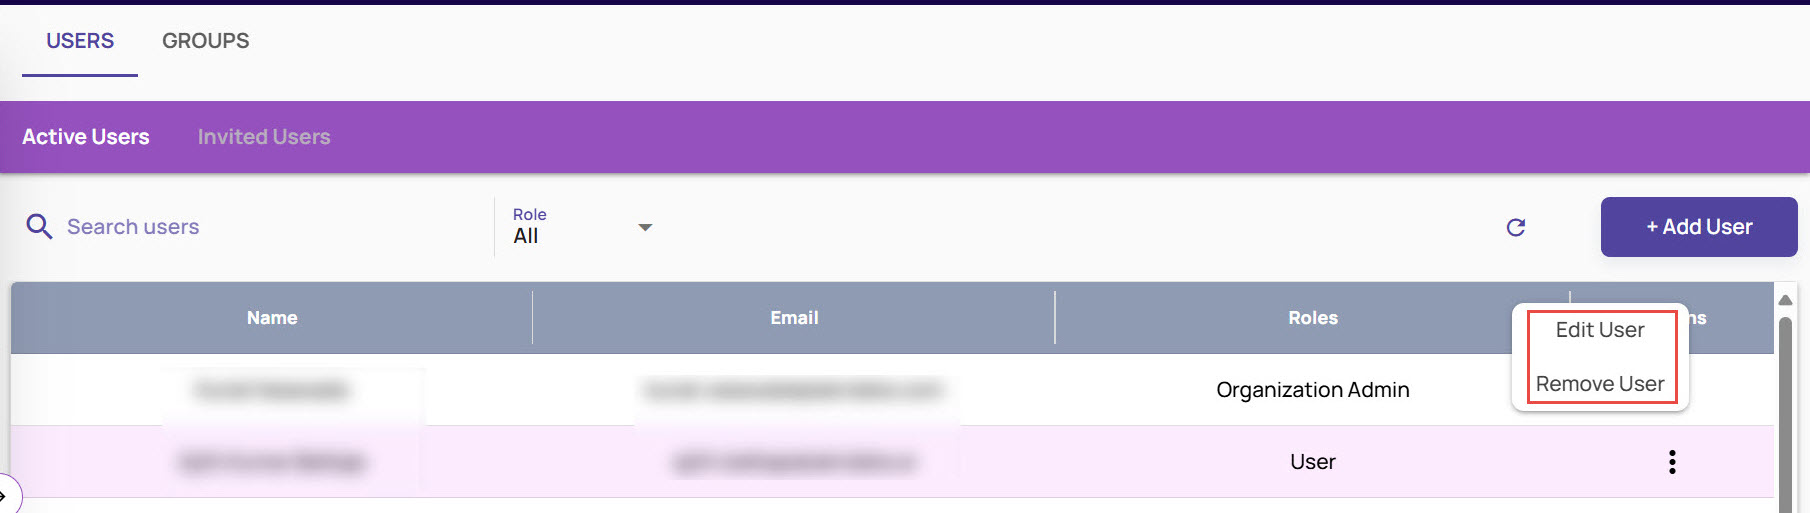
Active users
On this page, 'Edit' and 'Remove' actions are available for each user. The 'Edit' action can be used to perform actions like changing the role and group assignment for the user.
Group management
A group represents a set of users with a common role in the organization. The members of the group inherit the roles assigned to the group thus allowing easier administration of roles.
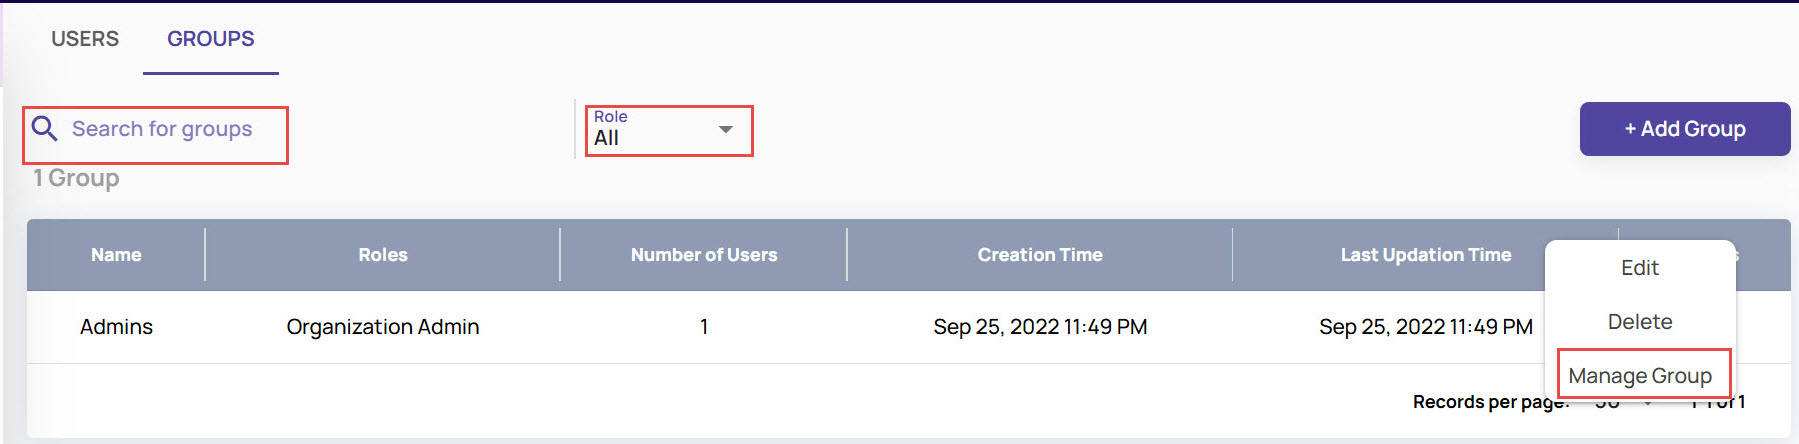
Groups page
Add Group
To create a new group, click the 'Add Group' button.
Enter a group name and the role(s) to be assigned to the group.
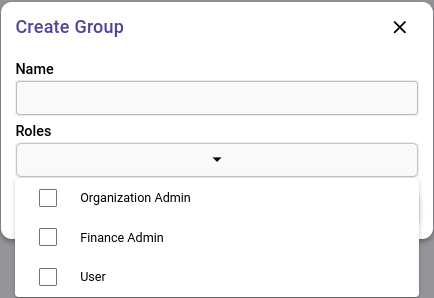
Create Group
Edit group user list
Click the 3-dots icon in the 'Actions' column corresponding to the group to be edited.
Click the Manage Group option.
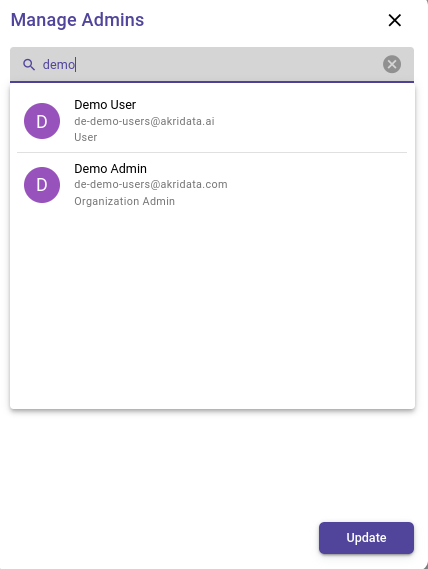
Manage group
Start typing the user name or email id of the user to be added and select the user from the drop-down list.
manage-user-in-group
To delete an existing user, click on the 'Delete' icon marked below.
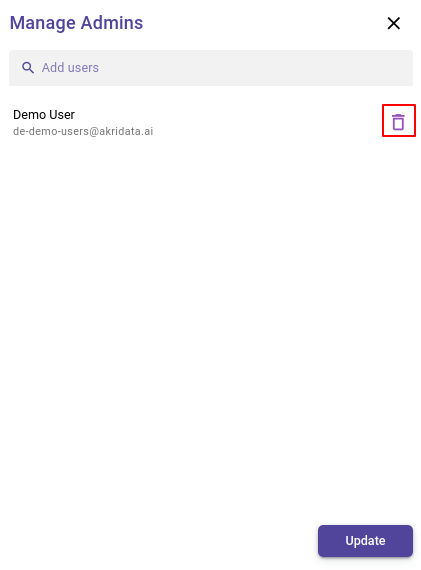
delete-user-in-group
After all add/remove changes are complete, click on the 'Update' button.
Edit group
Click on the 3-dots icon in the 'Actions' column corresponding to the group to be edited.
Click the 'Edit' option.
Update Name and/or Roles and click 'Submit'.
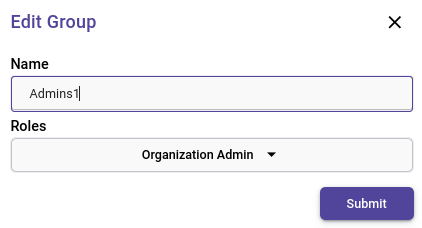
Edit group
Delete Group
Click on the 3-dots icon in the 'Actions' column corresponding to the group to be deleted.
Click the 'Delete' option.
Review the confirmation popup and click 'Ok'.
Warning
Deleting a group can result in users belonging to the group losing access if any user had all their roles inherited from the group.