A Resultset is a collection of curated data objects that the user has selected through different explore and refine capabilities provided by Data Explorer. Once the resultset is created, you can do the following to connect the results from data curation to the rest of Vision Copilot's capabilities and external systems.
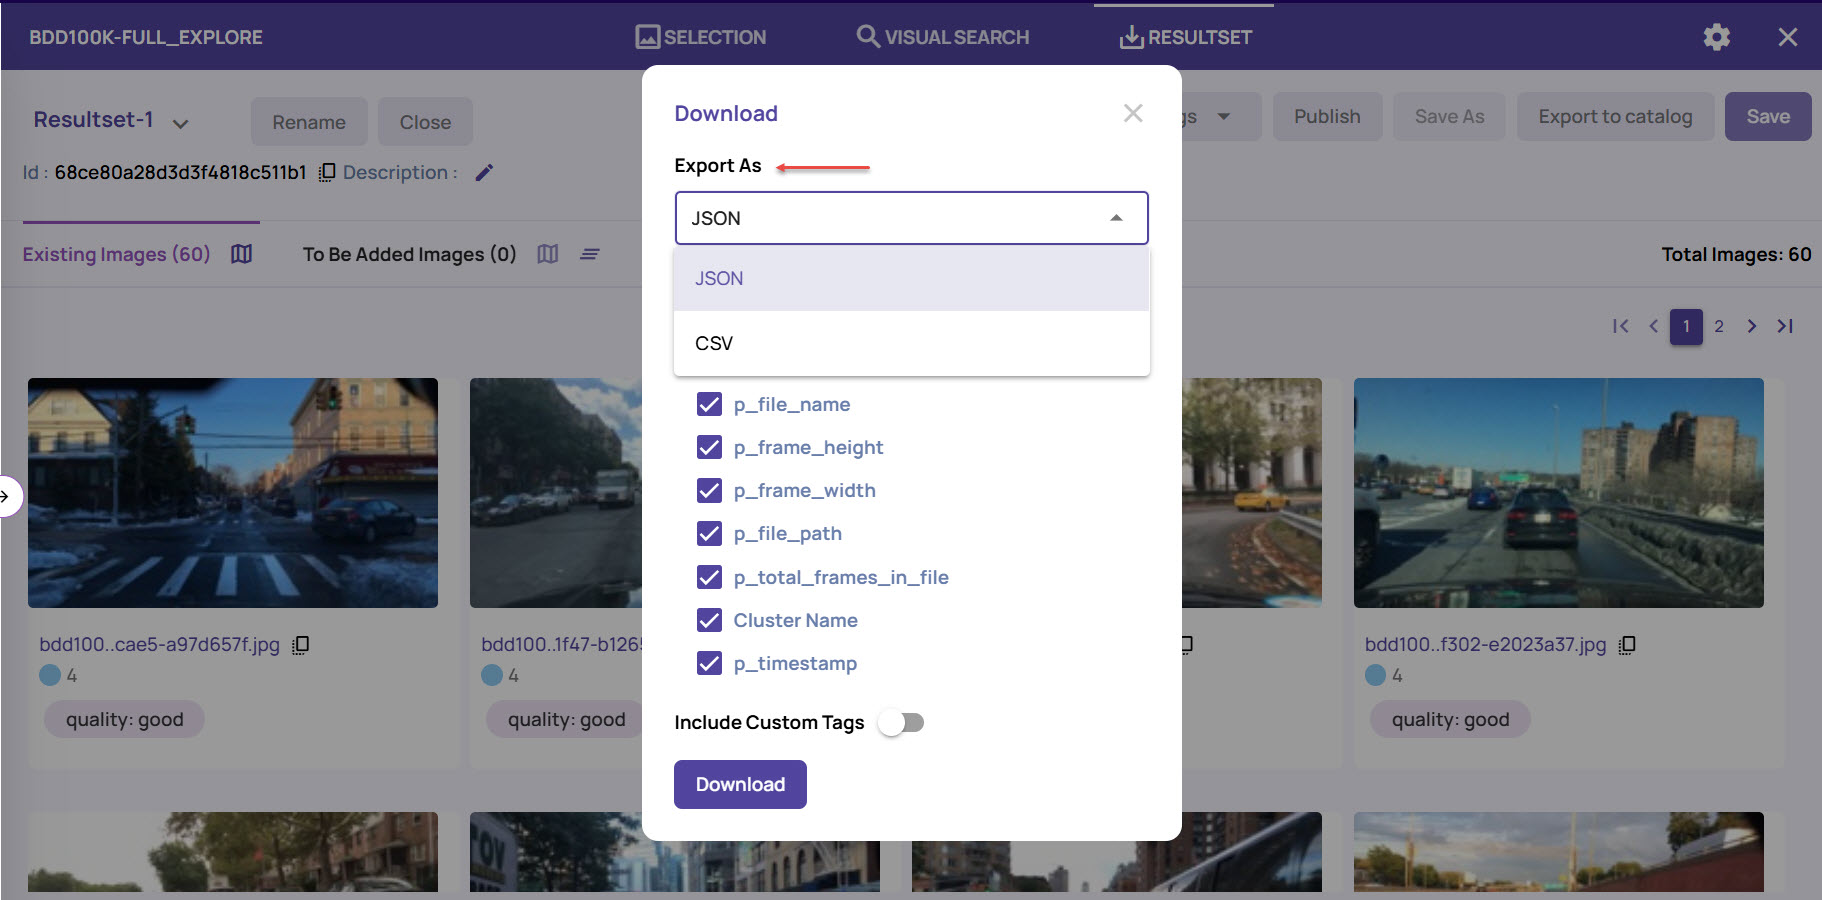
Download the resultset file list as a JSON or a CSV.
Export attributes associated with resultset files to the catalog. The attributes produced within the job (such as labels in a labeling job, image tags, etc.) are allowed for export, thereby enhancing the catalog.
Use resultset files as a curated list of images for creating an anomaly detection job or training job.
Create a Resultset for an Image-based job
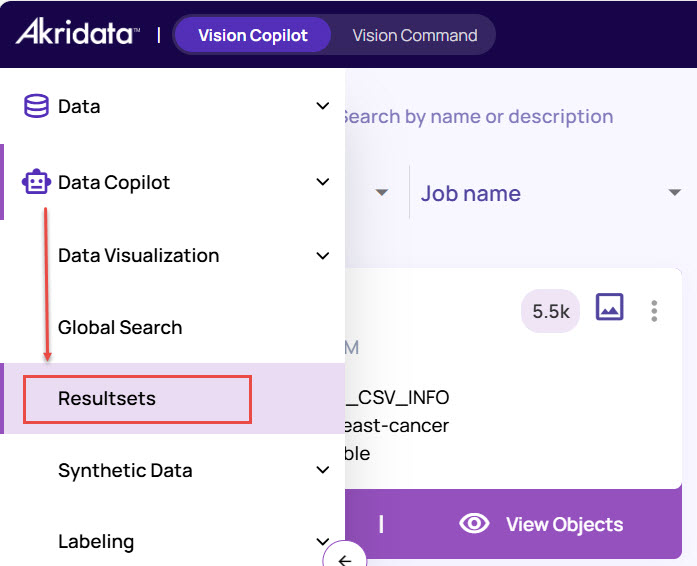
Navigate to Data > Data Copilot > Data Visualization > Explore in the left navigation panel.

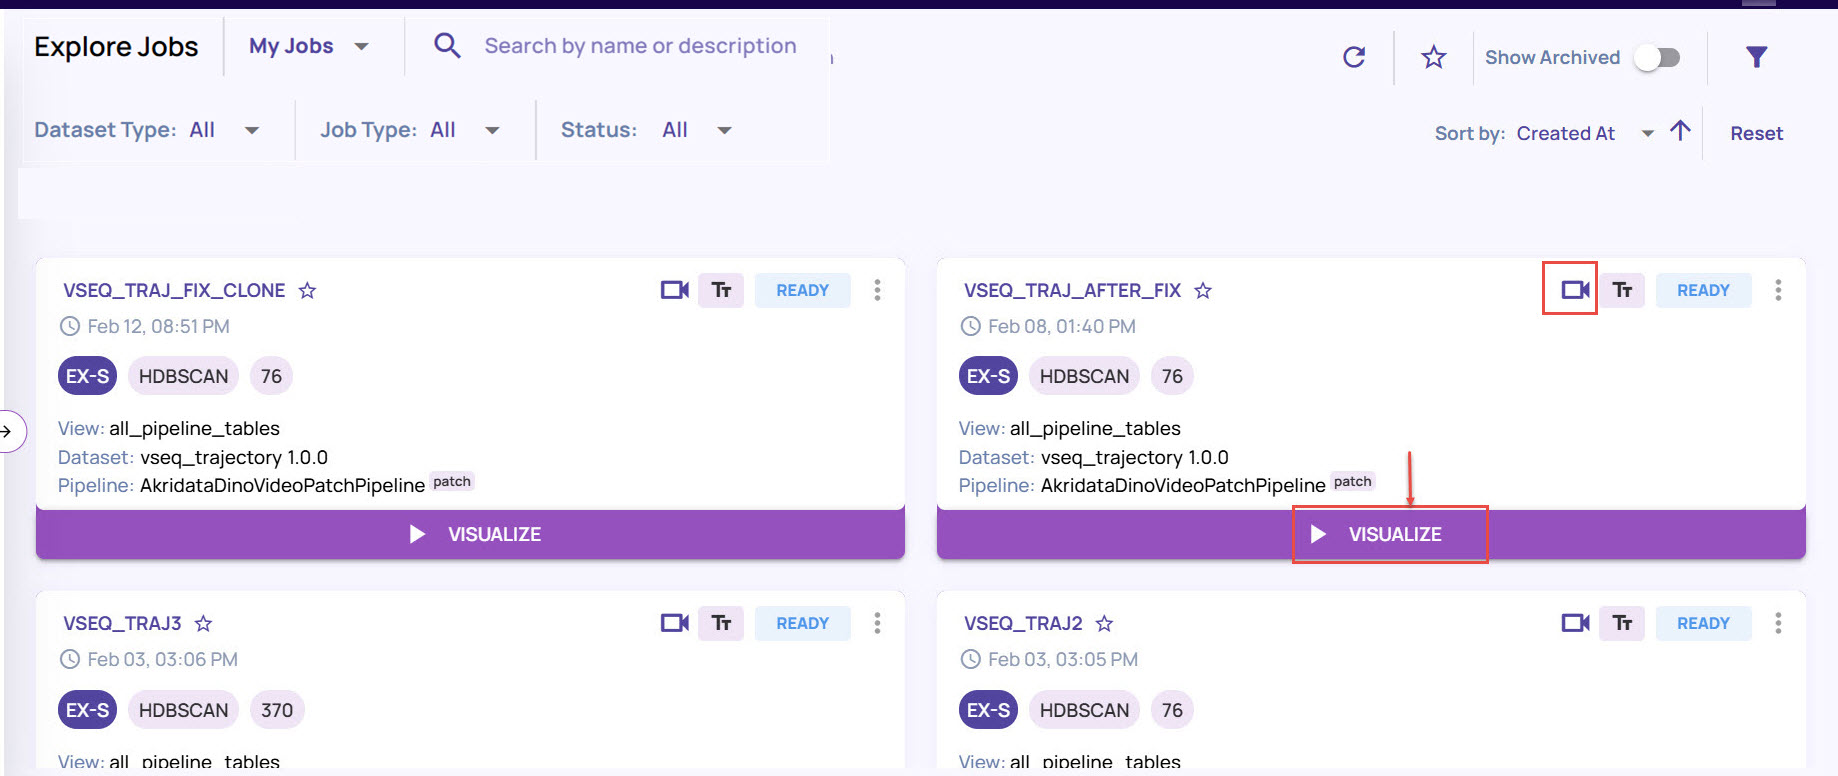
Select the job that you want to query and save as a resultset, and click Visualize.
.jpg)
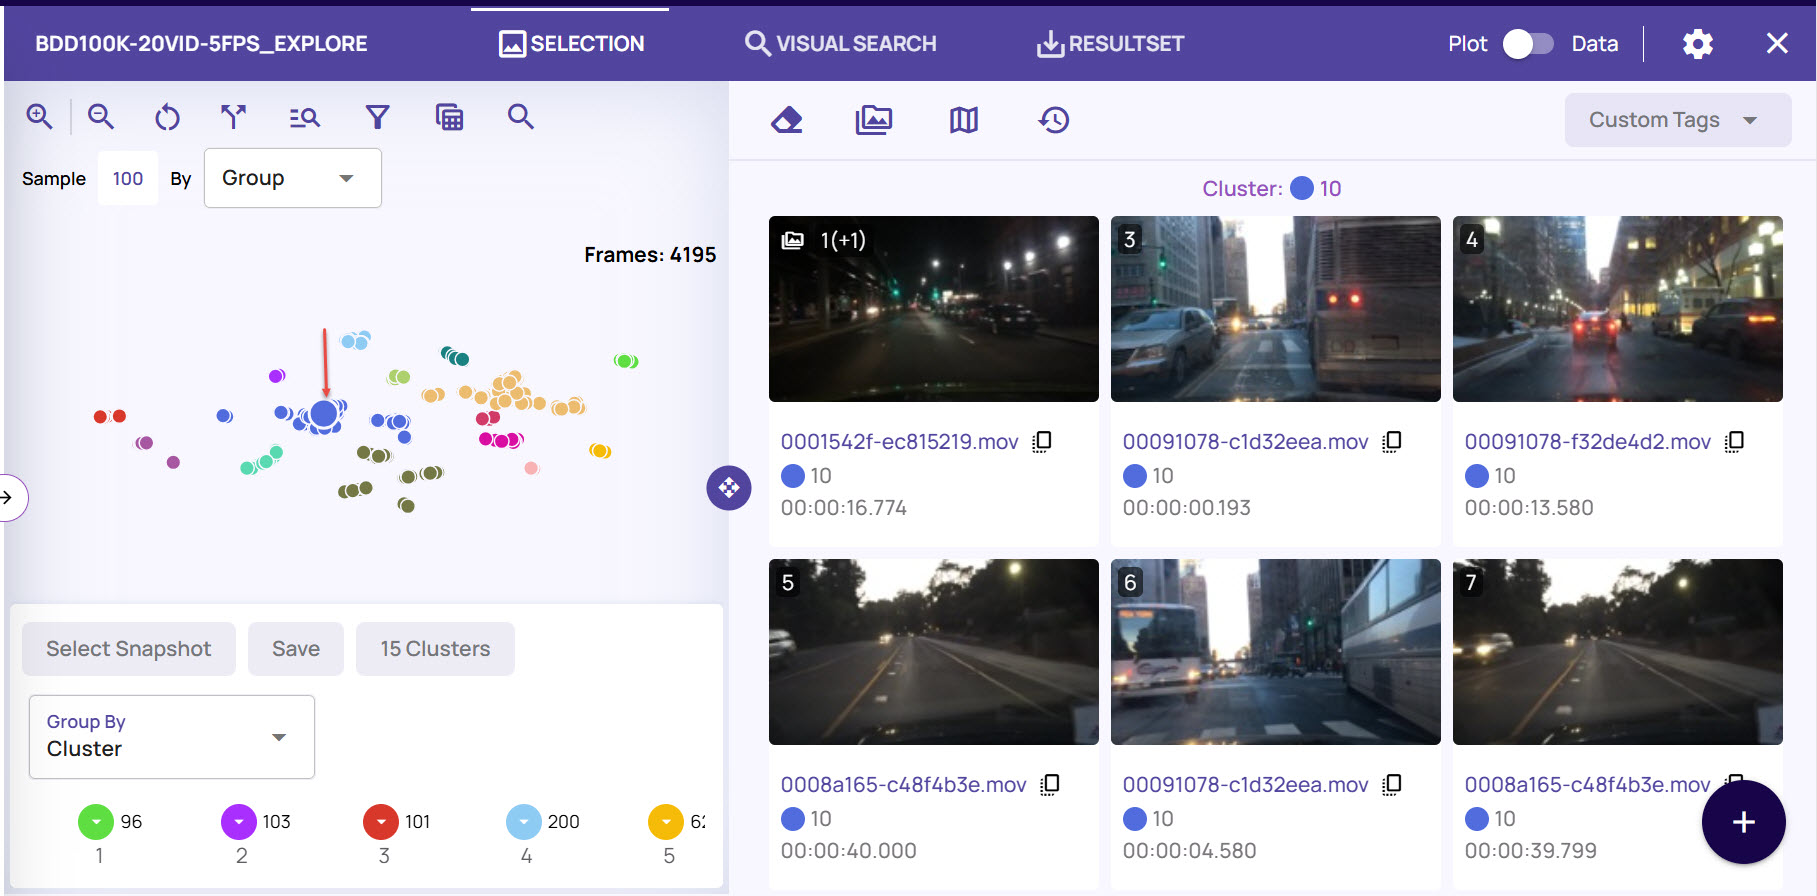
On the dataset screen, click one of the cluster points to view the frames.
Click the + (plus) icon at the bottom-right corner to save the frame results as a resultset, for future reference.
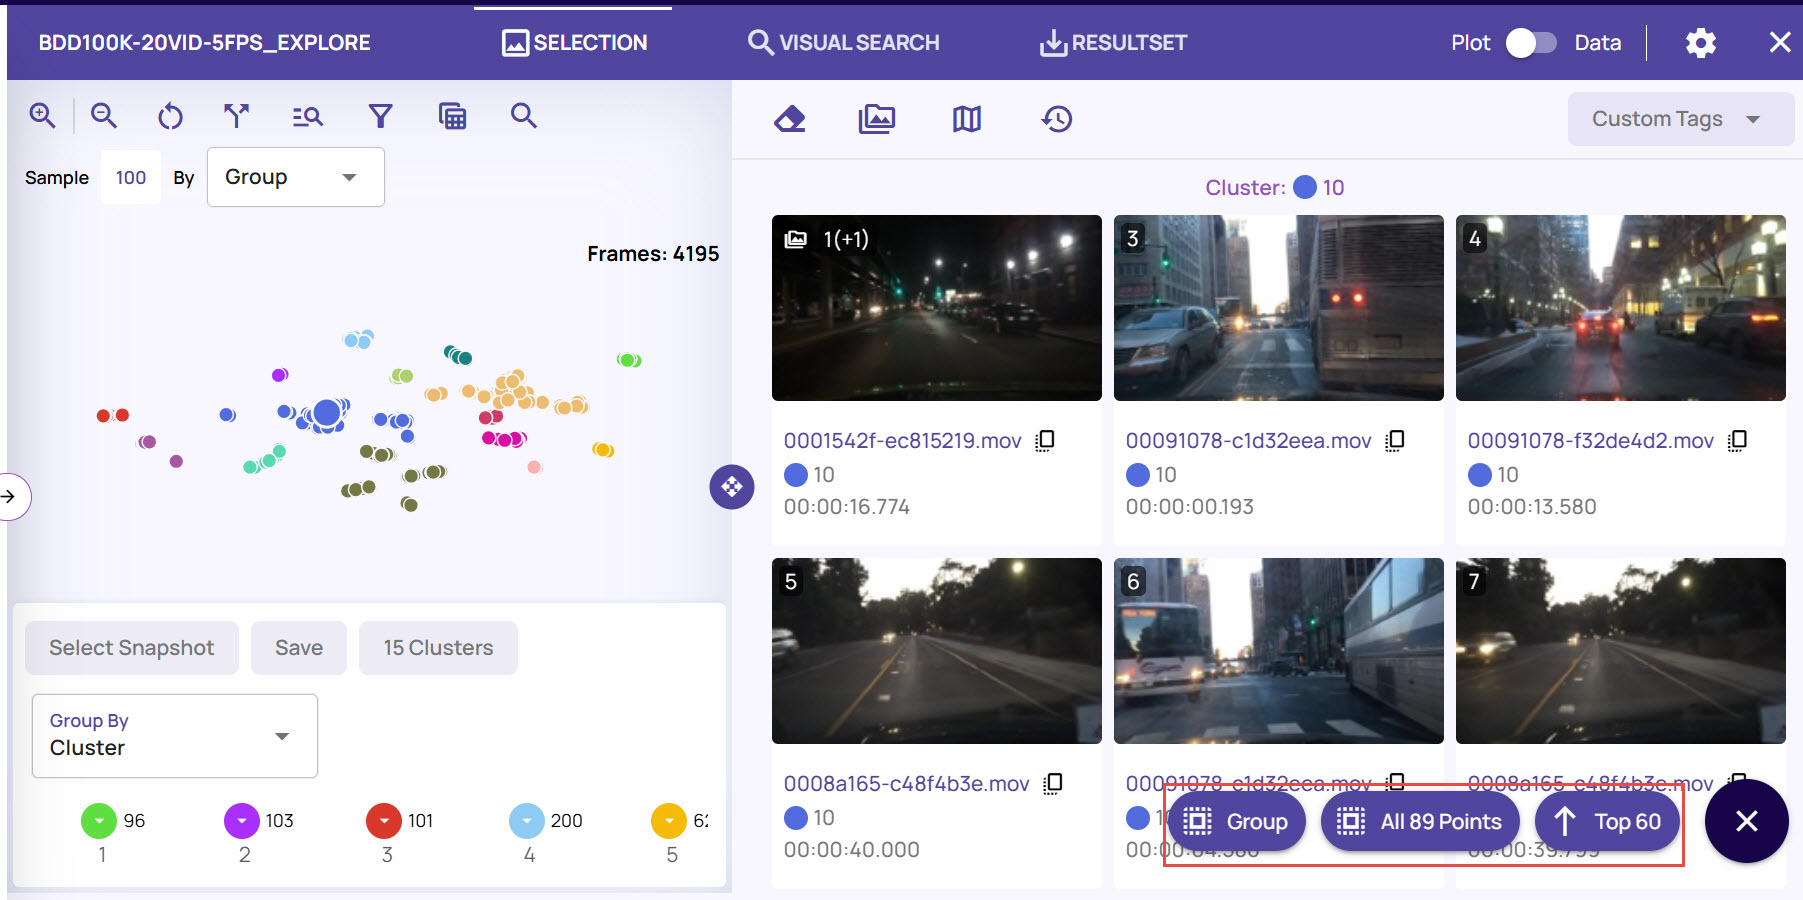
You can select the top 60 image frames (or all the images that you have scrolled through), all 100 frames, or the cluster group to save as a result set.
Save the results, by either adding to an existing resultset or creating a new resultset.
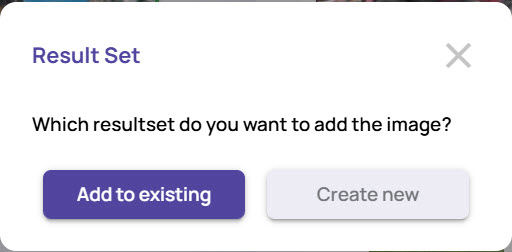
Click Add to existing to add the results to an existing resultset, if there is already an existing one.
In the Select Resultset window, enter the name of an existing resultset
Click the Select button.
.jpg)
Click Create new, if you want to create a new resultset
In the Create Resultset window, enter Name and Description
Click the Submit button.
.jpg)
The result set gets created successfully.
The resultset listing page, as shown below, provides a list of all resultset created. This page provides sorting, filtering, and search capabilities to reach the specific resultset of interest.

Add Objects to the Resultset
.jpg)
Click the '+' icon against each thumbnail to add the image frame to the resultset individually.
Click the '+' icon at the bottom-right corner for bulk addition of the image frames to the resultset.
If there is no resultset in an opened state (when adding to the resultset for the first time), a form to enter the name of the resultset will be presented.
You can also search for video sequences and save as resultset.
Create Resultset for Video Sequence Job
Navigate to Repo > Dataset, and click the Visualize button on the job card for the video sequence dataset.
Click a data point to view all image frames with associated video sequence, select an image, and click the thumbs-up icon.
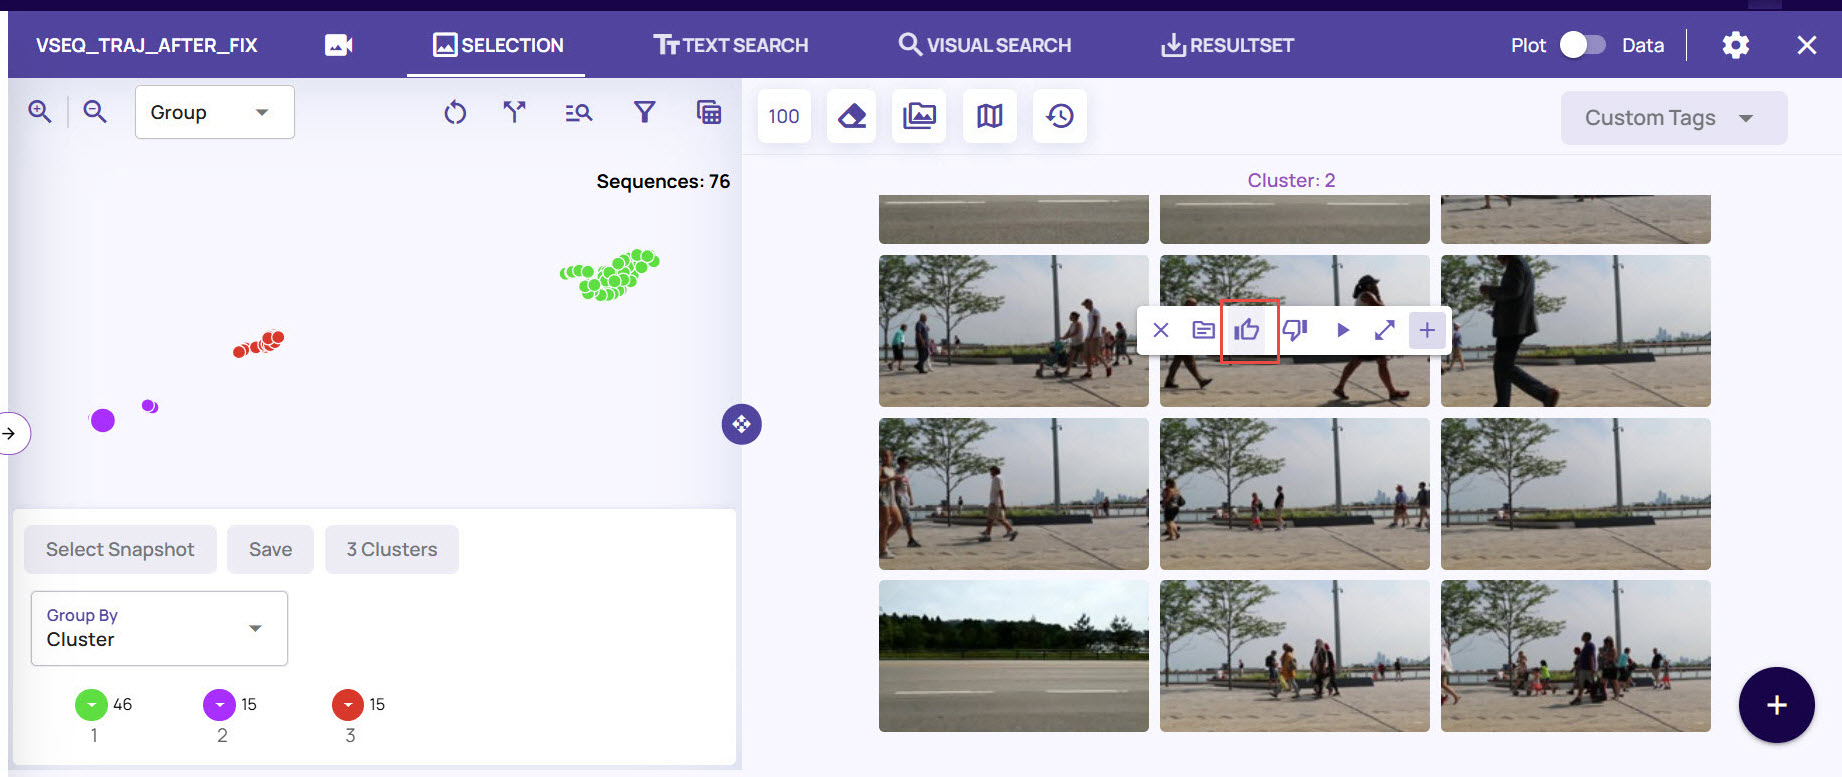
Click an image frame and enable the Patch option.
.jpg)
By default, the Trajectory mode is enabled for the selected frame for which the patch pipeline is already run on the video sequence..jpg)
Select the Frames icon on the selected images to open the series of image frames.

Select the key frames to mark the objects and define the trajectory path.
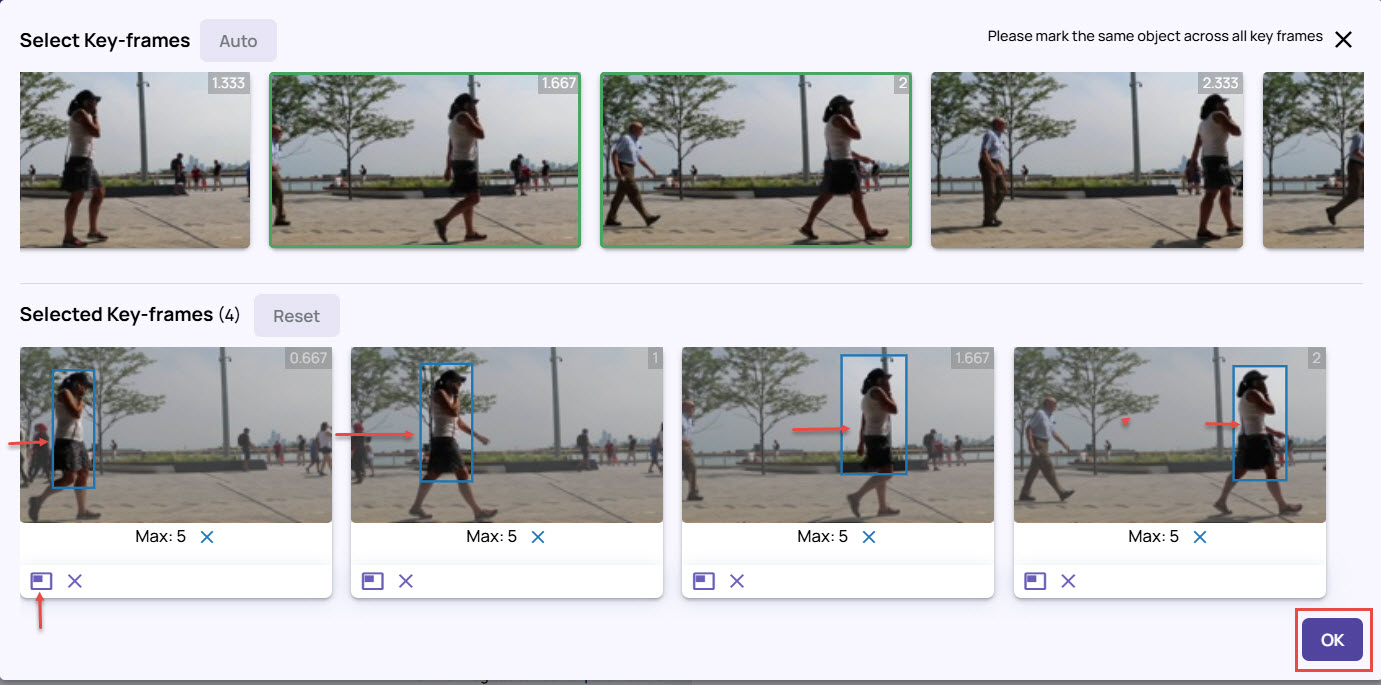
Draw the bounding box to mark the same object in a specific direction, say from Left to Right, in the frames.
Click OK.
Click Search on the dataset page to search for the frames based on the defined trajectory mode.
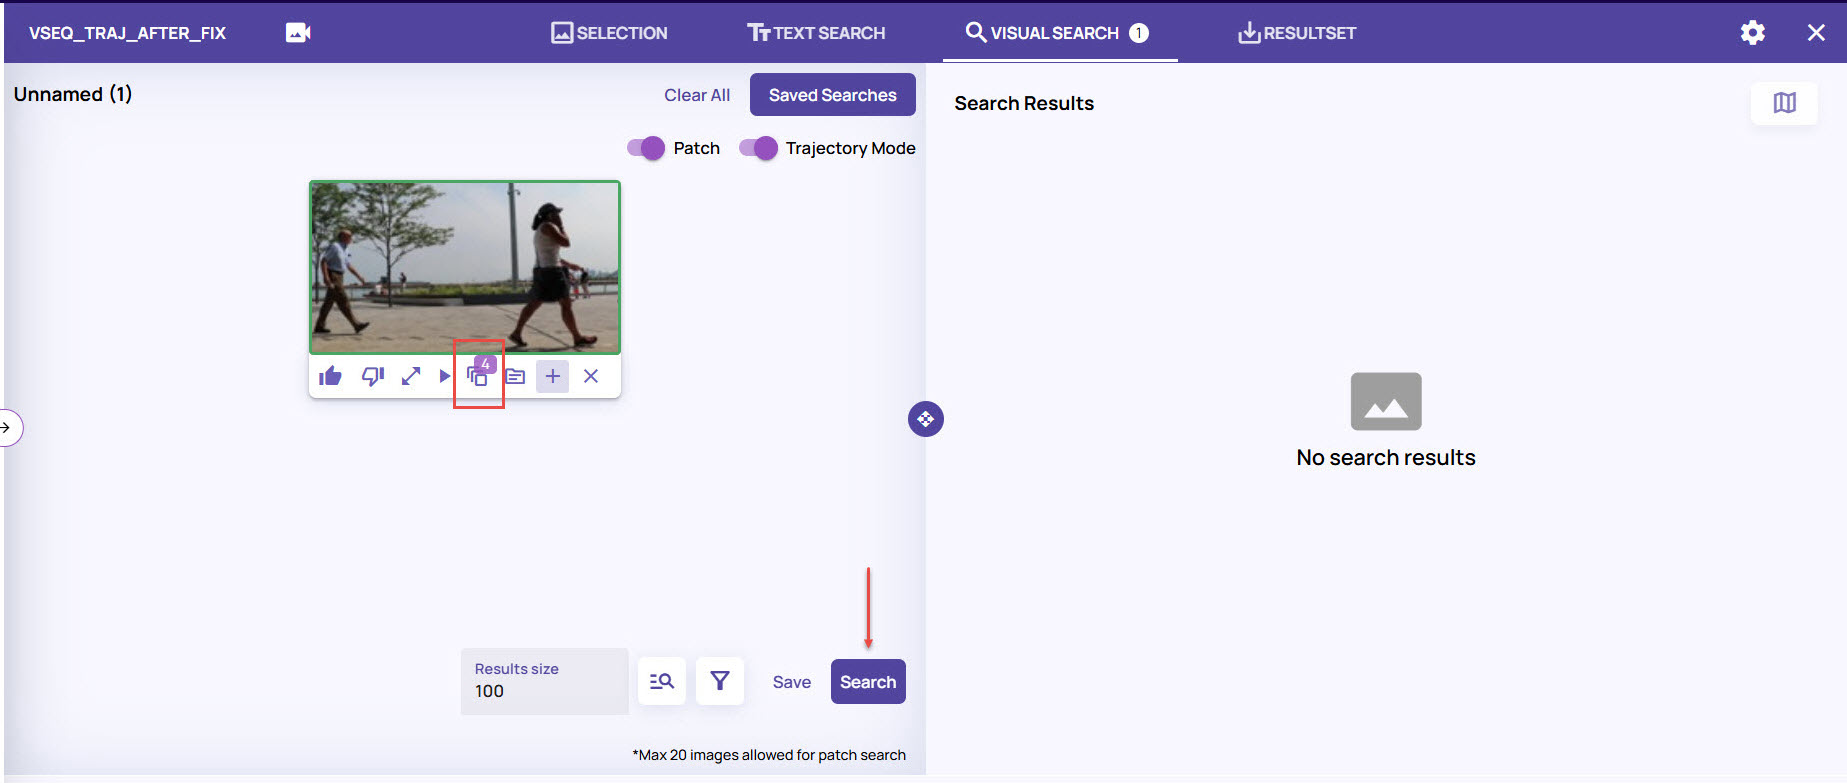
From the search results, select an image frame. and click the Frames icon to view the results with the matching trajectory as per the key frames.
.jpg)
The page displays the number of matched keyframes.
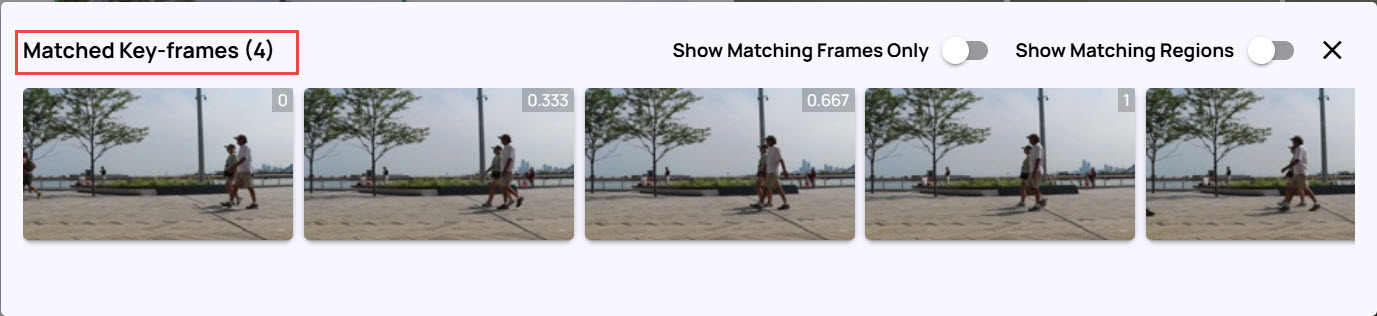
Enable the options Show Matching Frames Only and Show Matching Regions.
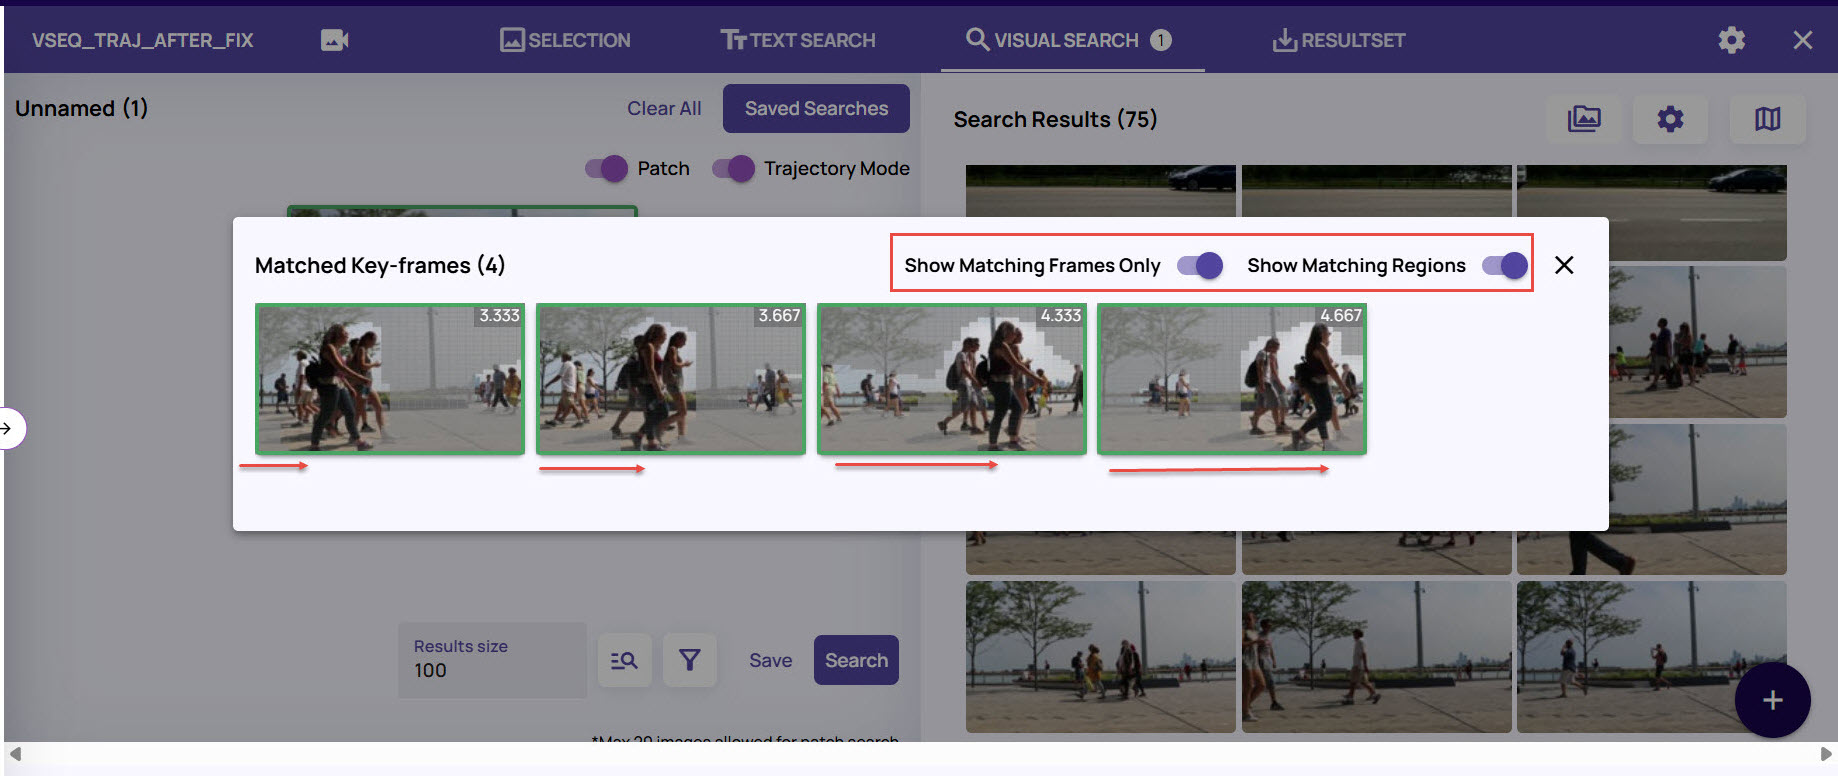 As you can see that the image frames displays the matching regions as per the trajectory you had defined with the bounding box for search.
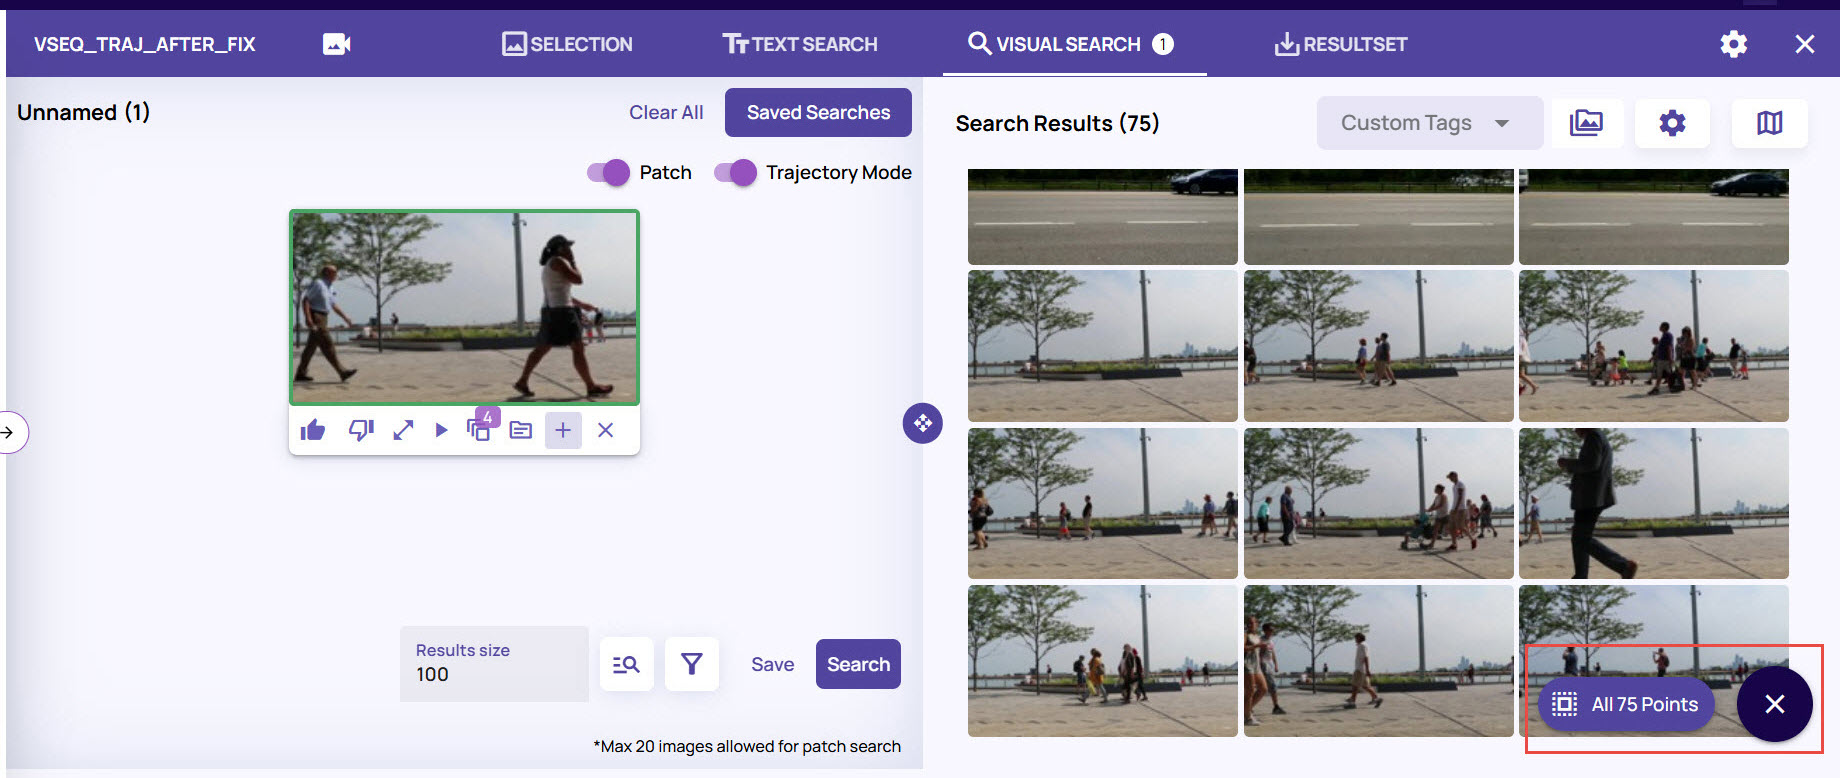
You can review each such frame from the search results.Once you are satisfied with the search results, click the + (plus) sign at the bottom-right corner of the page, and select all points to save the results as a result set.
You can save the result to an existing resultset or create a new result set as explained under the Create a ResultSet section.
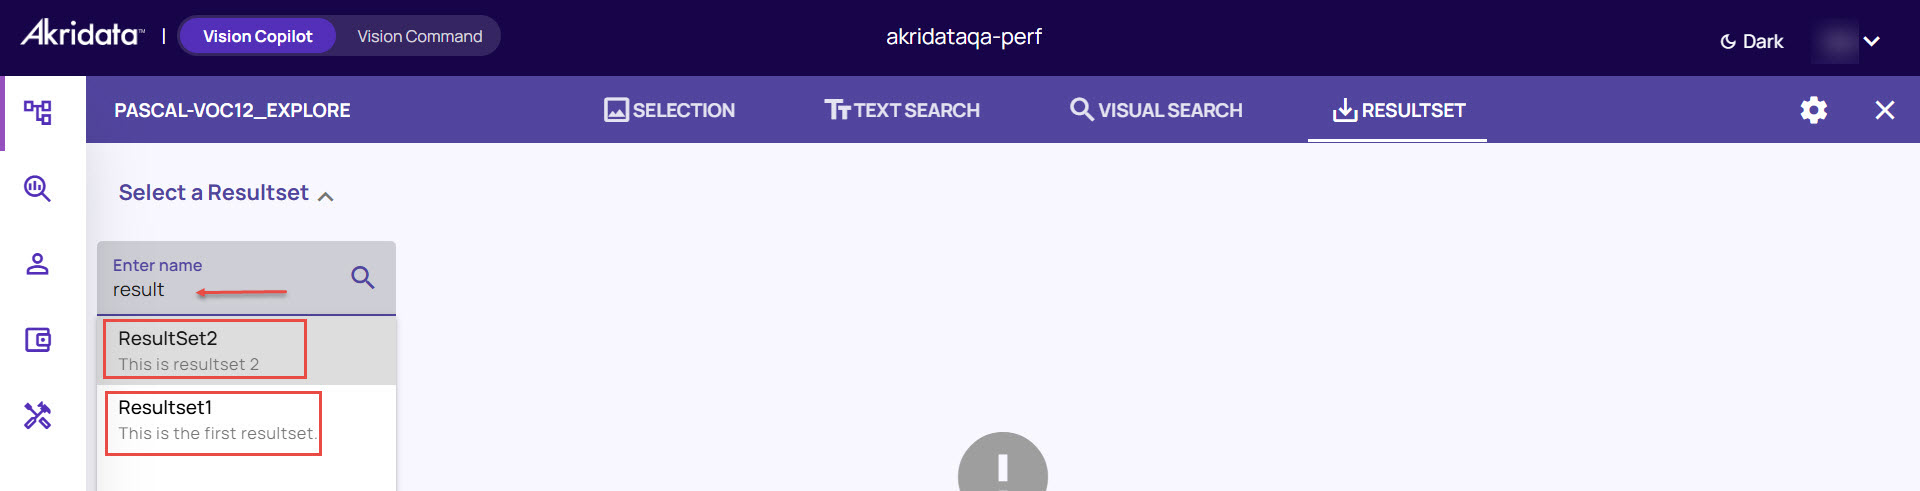
Open an Existing Resultset
In the resultset tab, click the Select a Resultset drop-down arrow as shown in the below image and choose a resultset,
Explore Resultset Actions
The ResultSet page provides information about the image objects, displays the ID for the resultset, and allows you to perform various actions.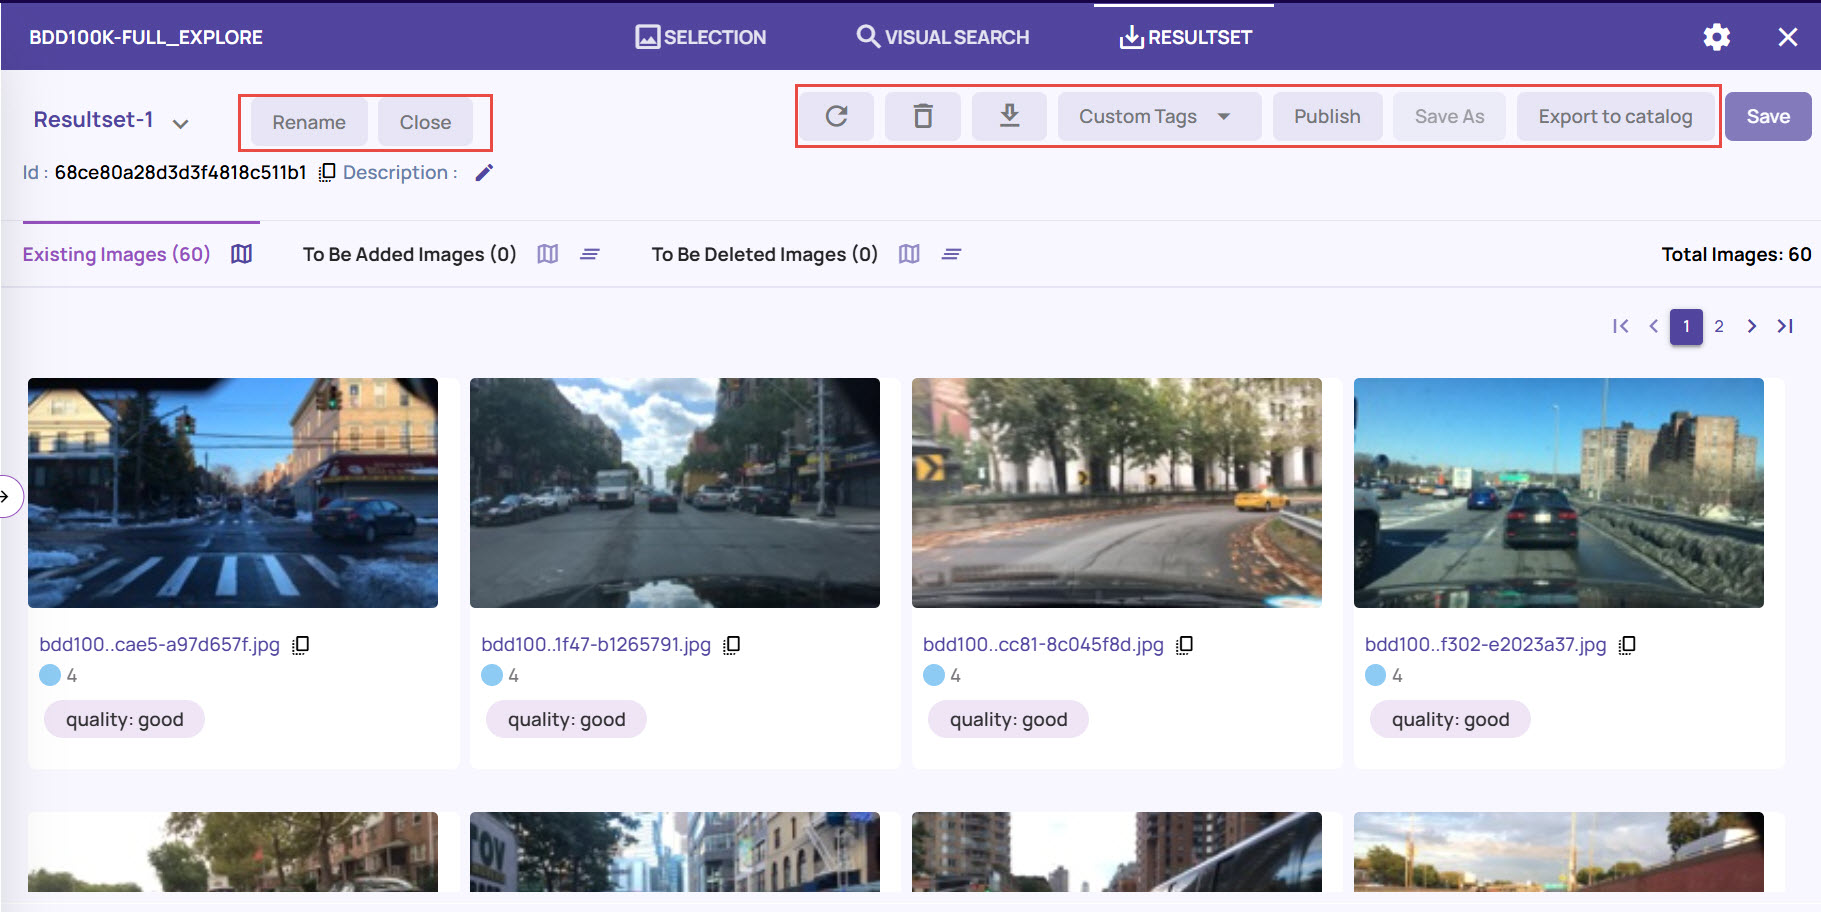
Existing Images: Represents the total number of objects in the resultset.
To Be Added Images: Represents the number of objects that are added to the resultset but not yet saved.
To Be Deleted Images: Represents the number of objects that are deleted from the resultset but not yet saved.
On the Resultset page, you can perform the following actions.
Edit Description: Click the pen icon adjacent to the label Description to change the description of the resultset.
.jpg)
Rename resultset: Click the Rename button on the top to rename the resultset, as needed.
.jpg)
Close resultset: Click the Close button to close the resultset.
Refresh resultset: Click the Refresh icon on the top-right corner to refresh and add or remove you had marked any image frames for addition or deletion.
Delete resultset: Click the Delete icon to delete the Resultset. This action cannot be undone.
Download resultset: Click the download icon to download the resultset locally, in JSON or CSV format, as needed.
Custom Tags: You can add custom tags to one or more image frames and use the tags as search parameters while searching for the images. For more information, refer to Image Tagging.

Publish a resultset
You can publish a resultset for all users to access it outside the job.
On the resultset page, click the Publish button available on the top right.
Click Publish on the confirmation message window.
.jpg)
A resultset can be published for access outside the job context. The published resultsets are available on the 'Resultsets' page, accessible from the left panel, as shown below.
Note
A publish operation cannot be reverted.
Any edits to the resultset after publishing will reflect in the resultset when accessed from the Resultset listing page.
Save and Save As: If you make any changes to the resultset, such as deleted a few images, or renamed the resultset, you can save it, as needed.
Adding to a new resultset when a resultset is in the open state
If resultset A is in the open state, and you want to add some objects to a new resultset B, click 'close' in the resultset tab to close the current open resultset A before adding the object to the new resultset. The 'close' operation will prompt if you want to save the changes made to resultset A or discard the changes.
Export to catalog
On the Resultset page, click the Export to catalog button on the top-right corner.
Select an existing table or create a new table where you want to export the results.
If you had set any custom tags for the images, enable the Include Custom Tags option. This will export the image results along with the custom tags to the catalog.
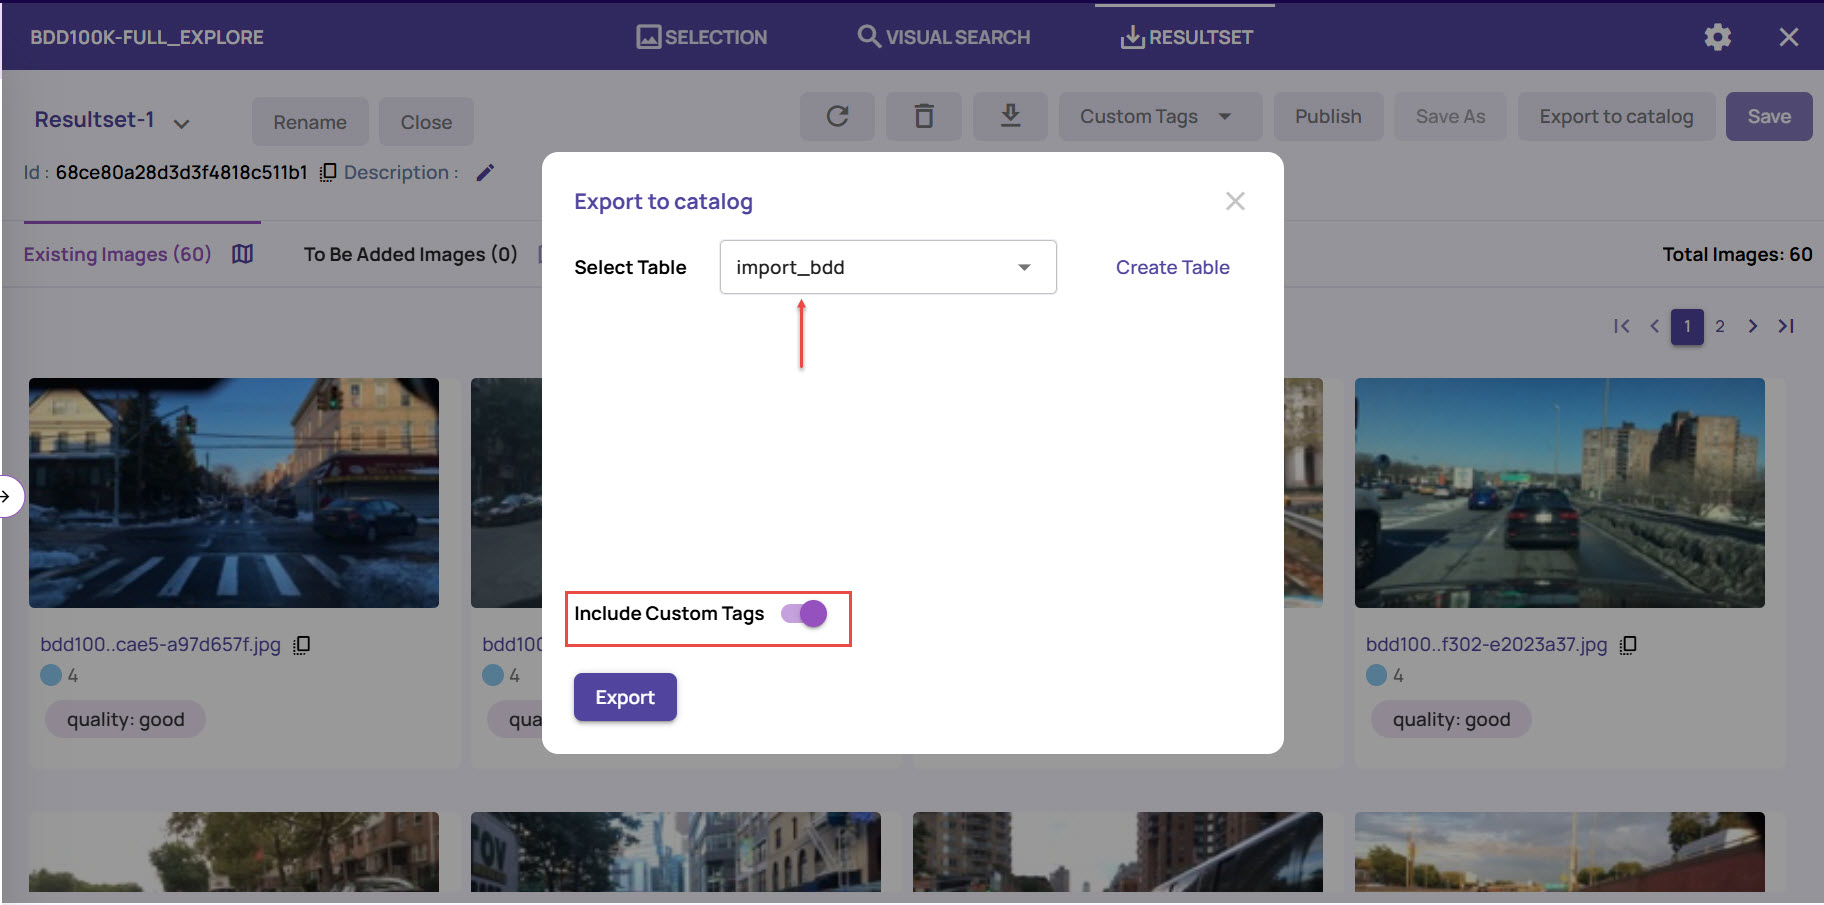
Click Export to export the resultset. This will populate the selected table with the result file names alongwith their attributes.