Providing inputs is a critical phase in the synthesis process to ensure the accuracy of the Dataset being created. In this phase, you can provide inputs about the concept to be synthesized and run a preview session.
Refer to the following video for step-by-step instructions on providing inputs with images and previewing the session.
Prerequisites
At least six images to represent the concept with a bounding box drawn around the concept to be generated.
If the generation must be restricted to a specific object/area within the image, then at least six images with a segment polygon identifying the location of generation.
At least six background images covering the variety of backgrounds on which the concept must be generated. For optimal results, we recommend having 50 background images.
Provide input and generate preview
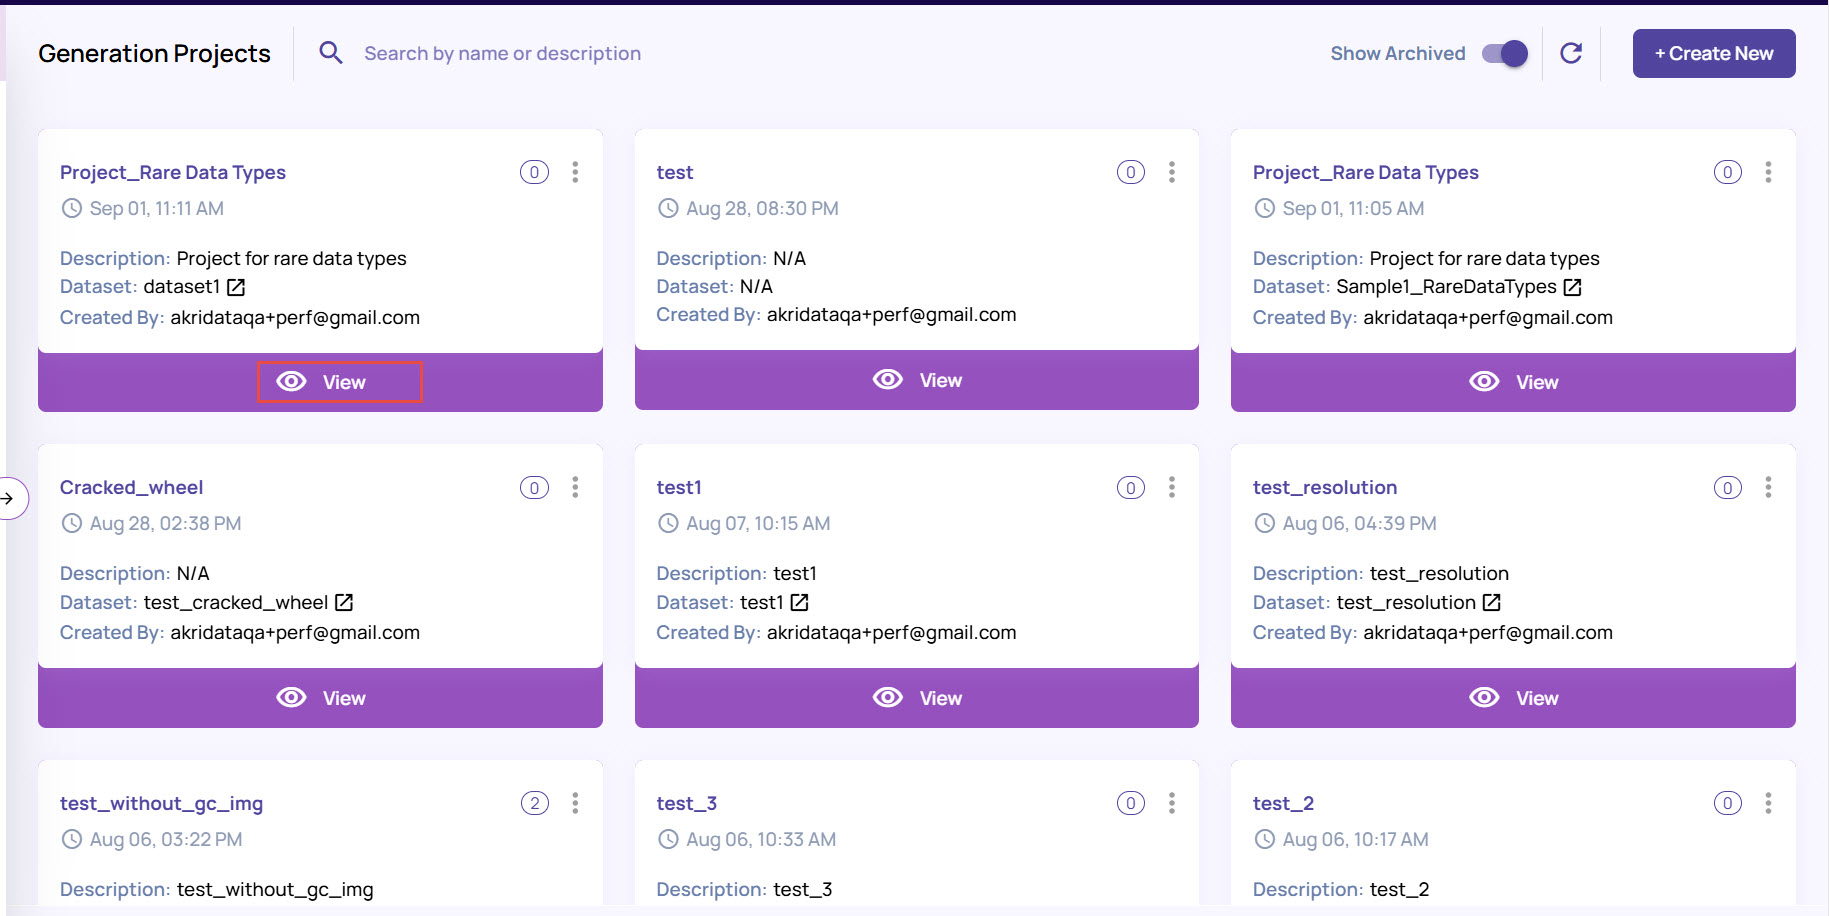
In the Generation Projects screen, click the View button on the project card.
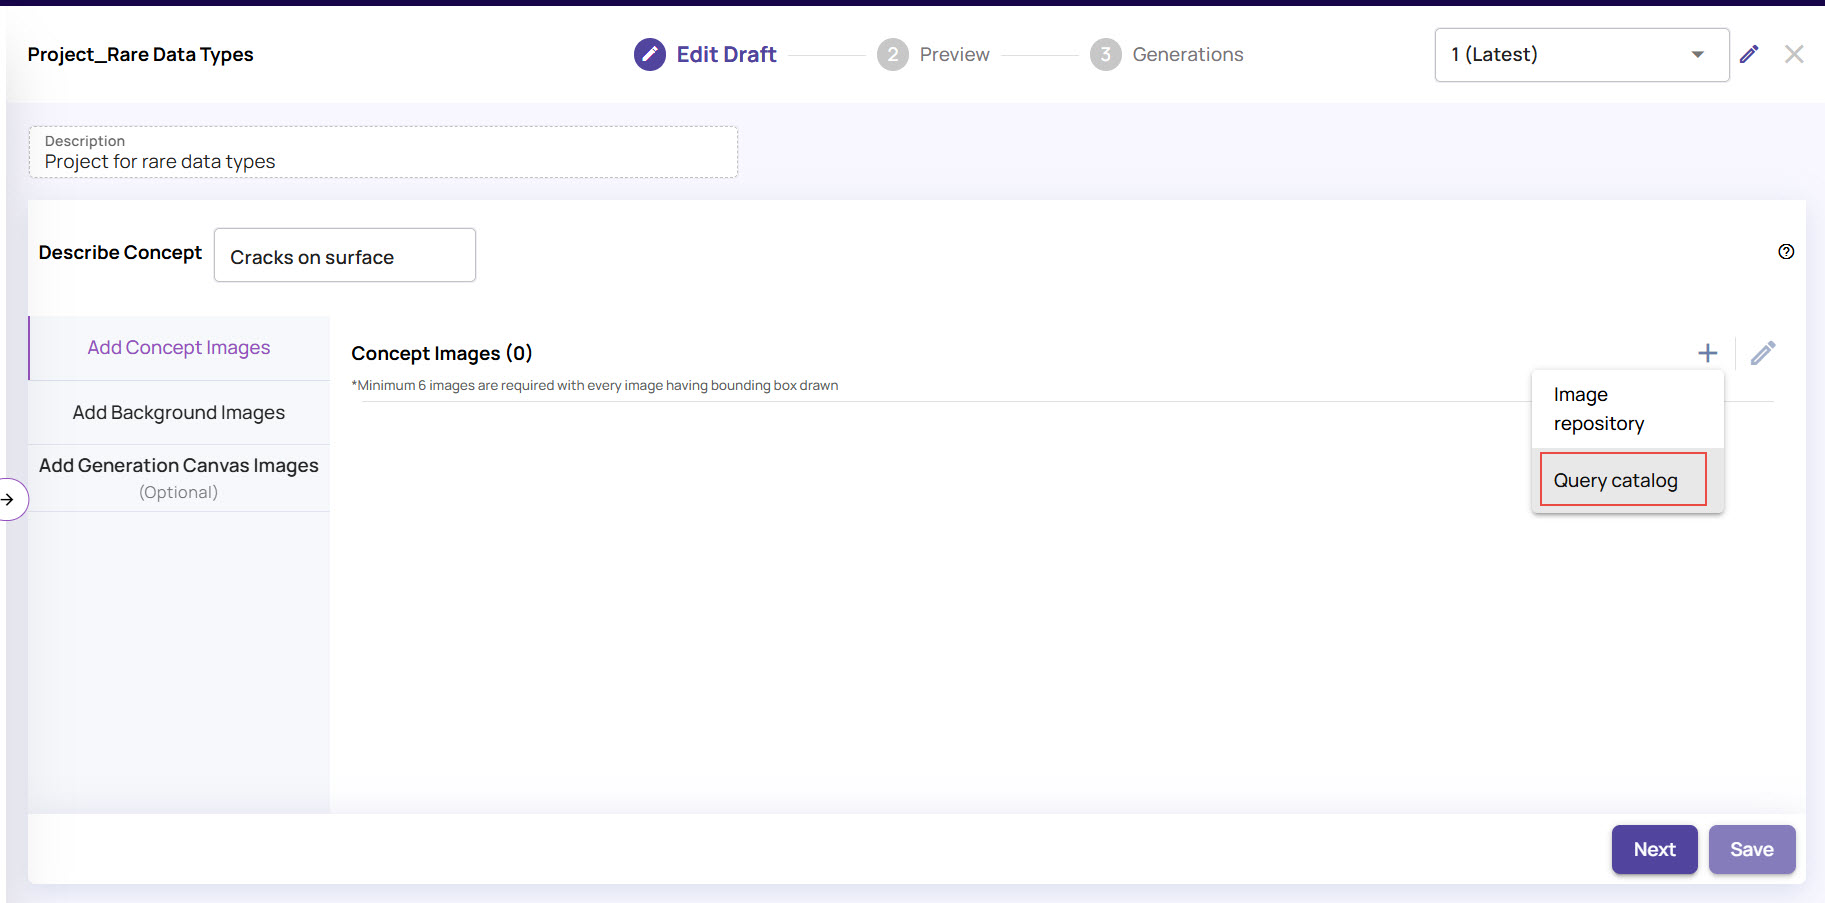
Under Edit Draft, enter a description for the concept. For example, “Cracks on Surface”.
.jpg)
Note that the spec version at this stage is marked with a pen icon, indicating that the Edit Draft is enabled for this version. In the stage, the session is marked as “Draft”. Once the sessions moves to the Preview stage, the session is marked as “Review”; and in the Generation stage, it is marked as “Accepted”.
Add concept images and mark the concept for synthesis.
Click the + (plus) sign against the Concept Images section, and click Image Repository.
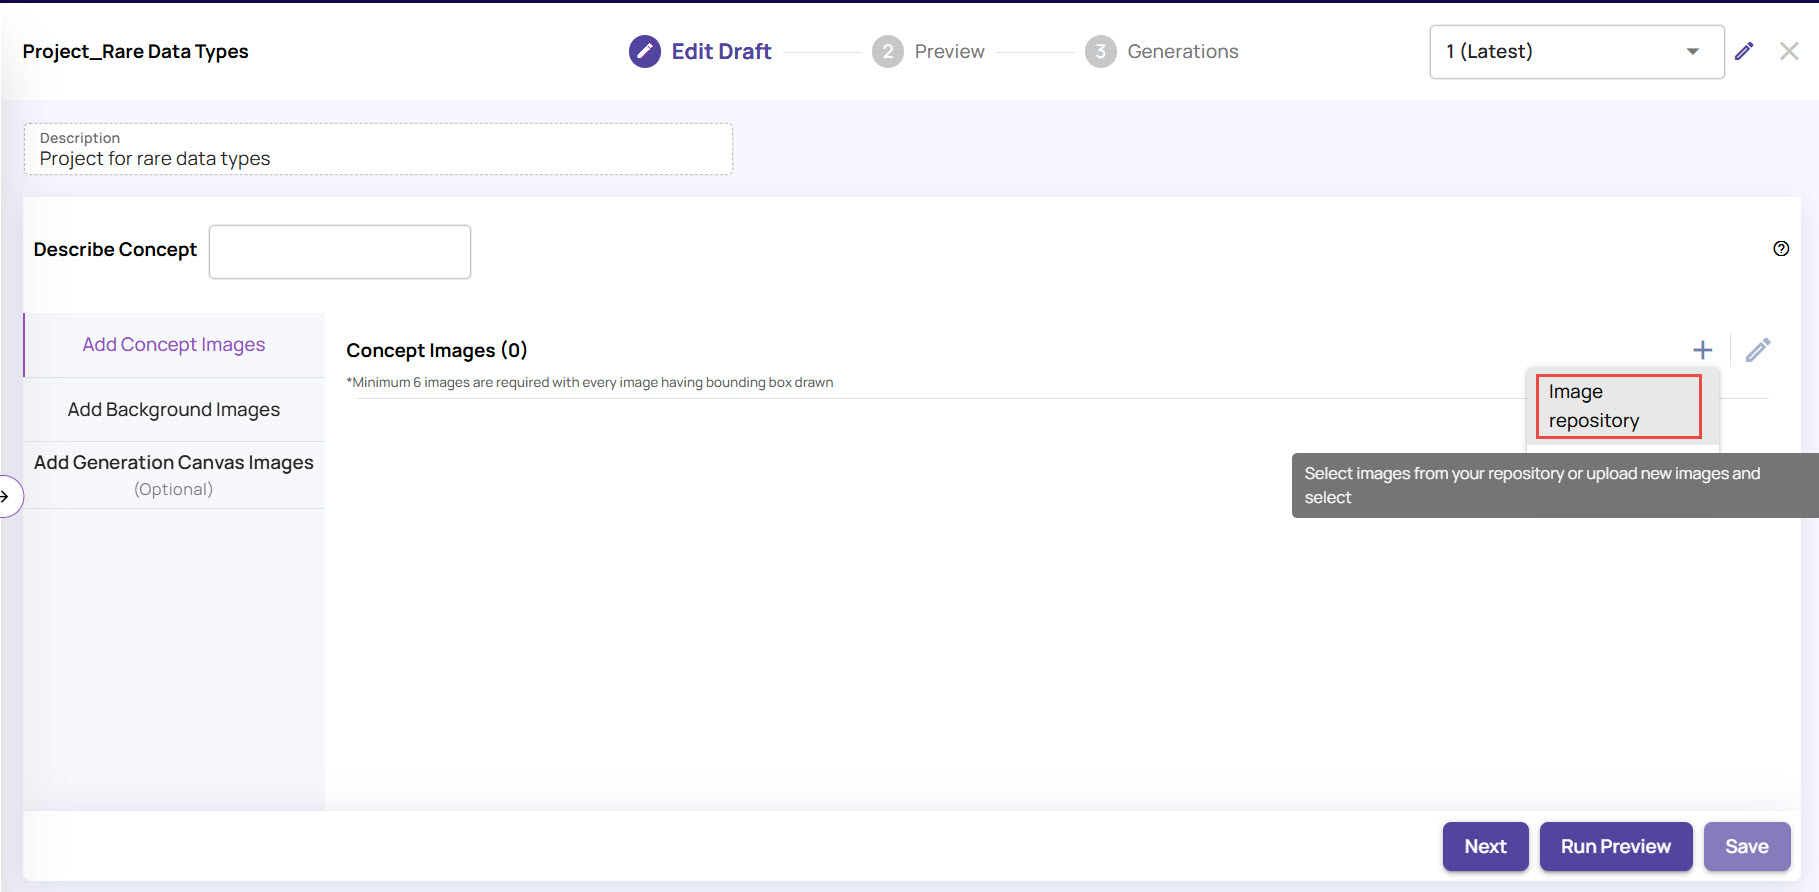
You can also select Query Catalog to search for images that match specific conditions.Select the images that you want to provide as input and click OK.
You can use the existing images or click Upload to add new images..jpg)
Double-click at a location on the image and draw a bounding box around the area of interest to mark the concept, then click OK.
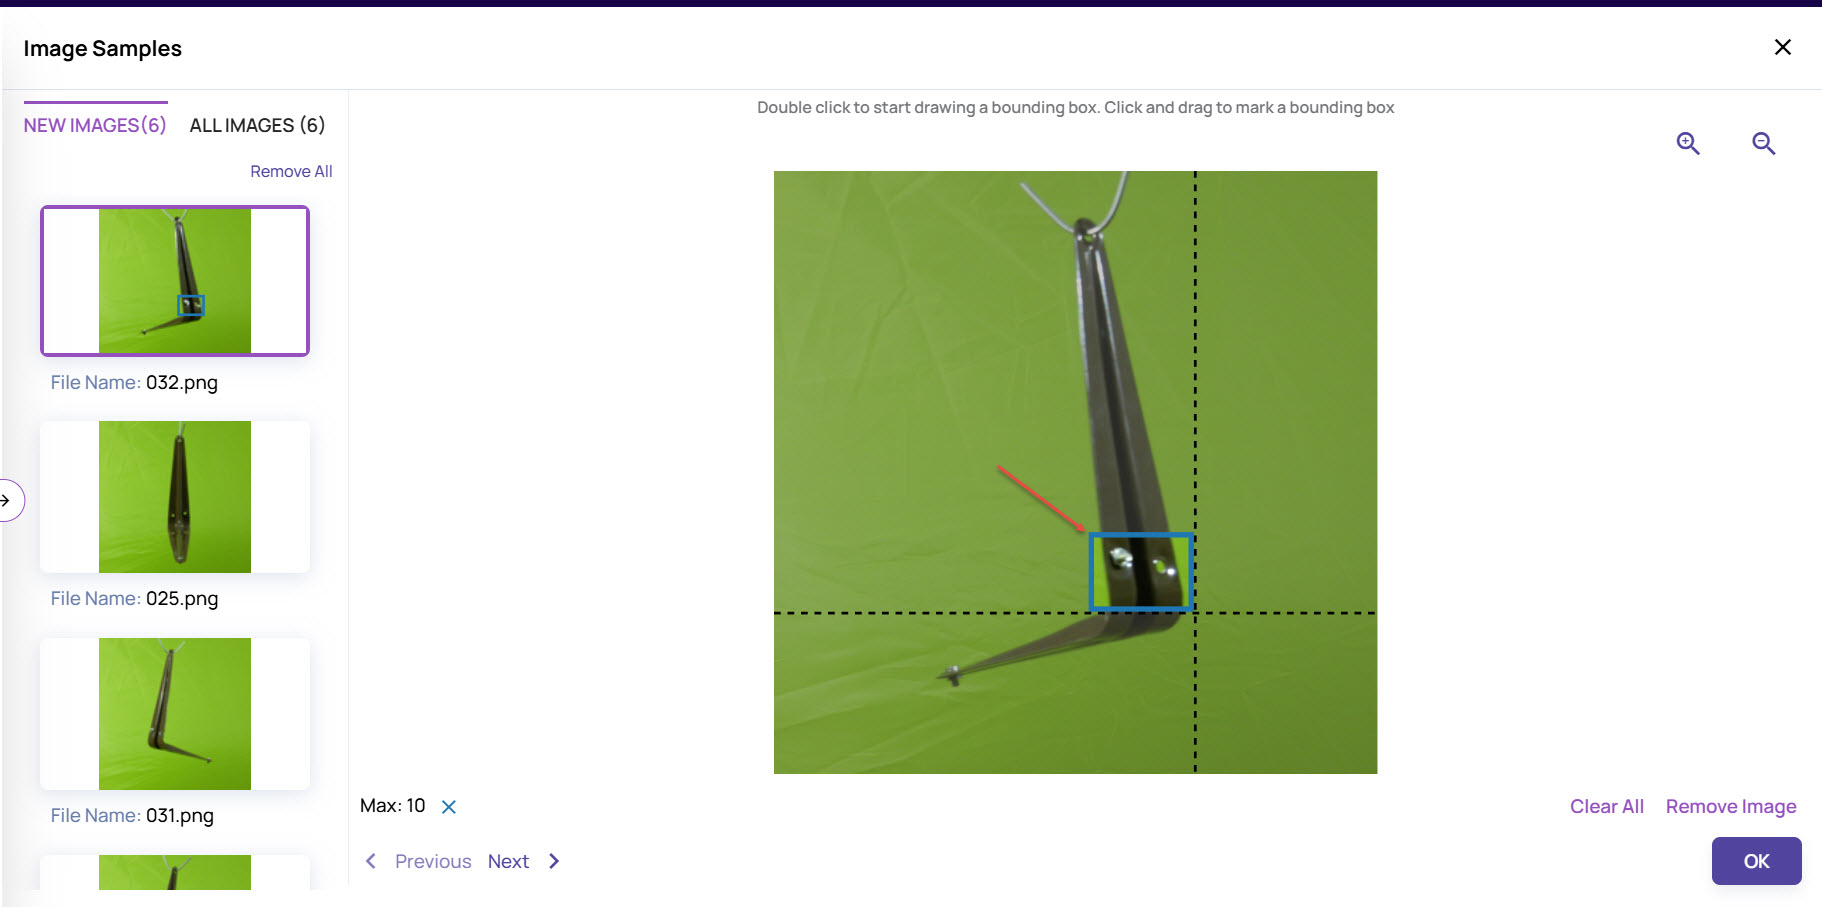
Repeat the step for all images to create the bounding box.
Add background images from the repository to create synthesized image samples.
Background images
It is recommended to add at least 50 images representing a variety of backgrounds for the synthesis to take place
Click the + (plus) sign next to the Background Images section, and then click Image Repository.
You can also select Query Catalog to search for images that match specific conditions.Select the required images for the background, and click OK.
.jpg)
Add generation canvas images and mark the locations where the concept must be generated. This is optional and needed if the intention is to synthesize the concept over a specific object/pattern in the image. You will require a minimum of 6 generation canvas images. Skip this step if the full image should be the target of generation.
Click the + (plus) sign against the Generate Canvas section, and click Image Repository.
You can also select Query Catalog to search for images that match specific conditions.Select the required images to generate the canvas, and click OK.
Locate the area where the concept must be synthesized, and double-click to start drawing segment polygons to mark the locations, and click OK.
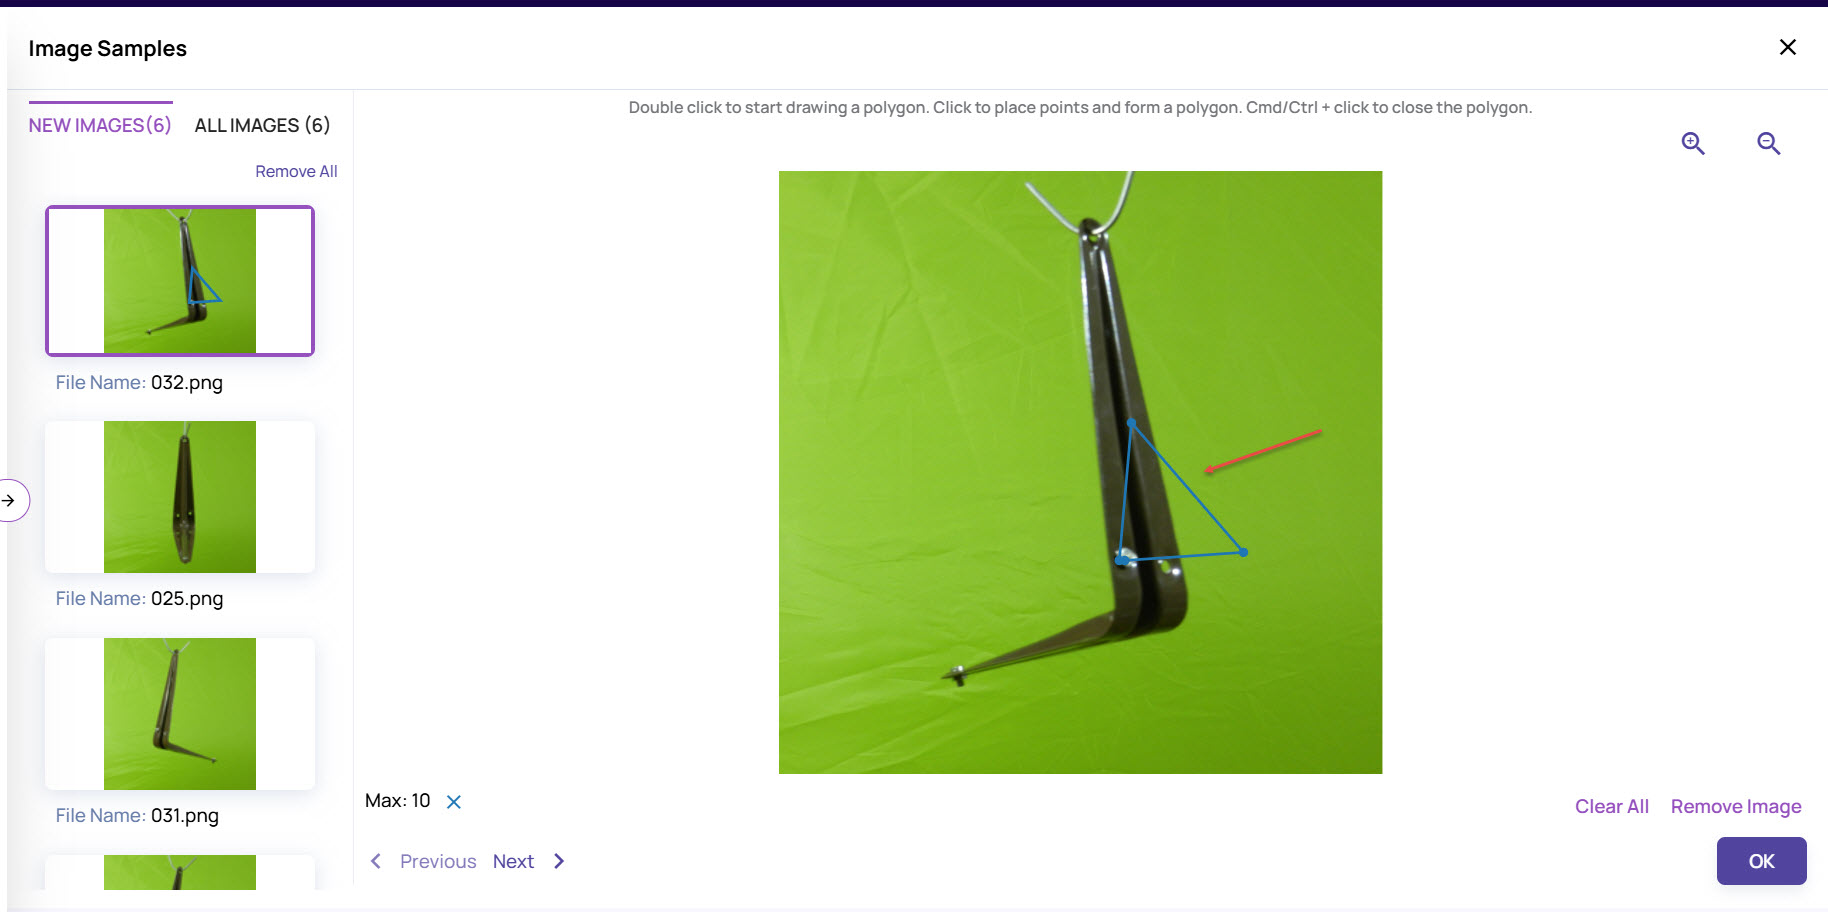
Press Ctrl on the keyboard and click to close the polygons. Ensure that all the images have the polygons.
Click Save to record all the images uploaded for synthesis.
Click Run Preview.
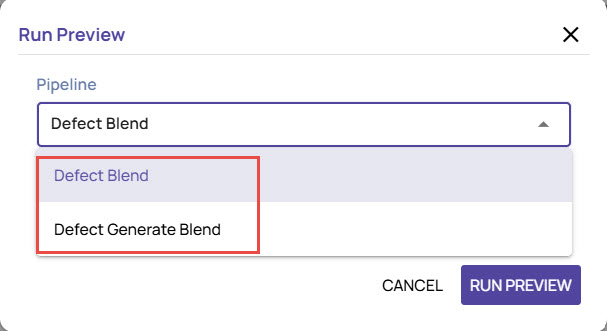
Select Defect Blend or Defect Generate Blend, as needed
Click RUN PREVIEW to create a preview session based on the selection.
.jpg)
Query Catalog for Concept, Canvas, and Background Images
While adding images for the Concept, Canvas, or Background, you can also search for images by specifying conditions in the Query Catalog.
In the project screen, click the + (plus) sign against the respective image section, and select Query catalog.
In the Query Catalog screen, select Dataset and then choose Table/View.
Click Add Conditions, if needed, and select the required Column, Operation, and Values.
.jpg)
Click Submit Query.
Review the results and click ‘Add’ to add these images to the respective section.
.jpg)
The images get added to the respective image section. You can follow the remaining steps as explained in the Create a Datagen Project topic.