Once the training is complete, you can export the model locally or on a different system. The export model option helps you download and run the model on your system.
Refer to Create model training for the step of creating a training session.
Export the Model
On the left navigation panel, navigate to Model Copilot > Training Projects, and click View on the project card.
On the Training Sessions screen, click the Export Model button in the top-right corner.
.jpg)
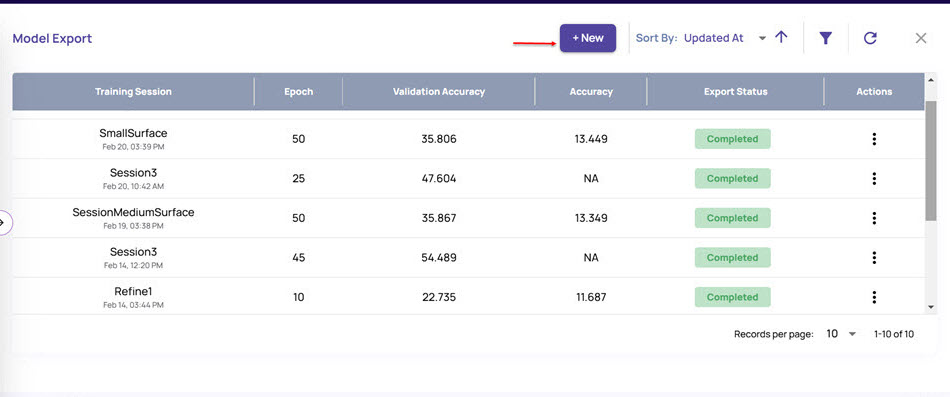
The Model Export window displays the list of all completed trainings.
.jpg)
Click the +New button that appears at the top.
In the Select epoch for export window, select the session for which you want to export the model.
Based on the session you select, the graph displays the epoch points and the validation accuracy at each epoch.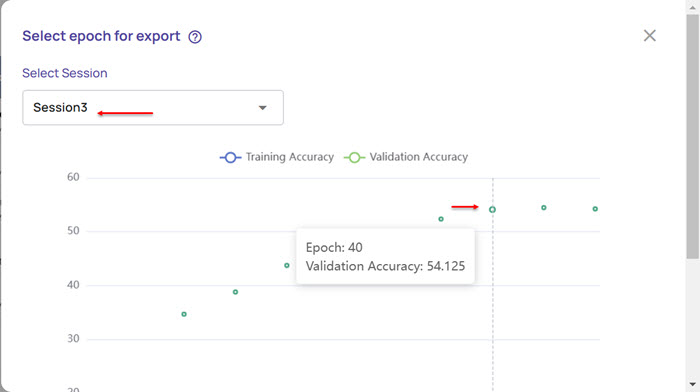
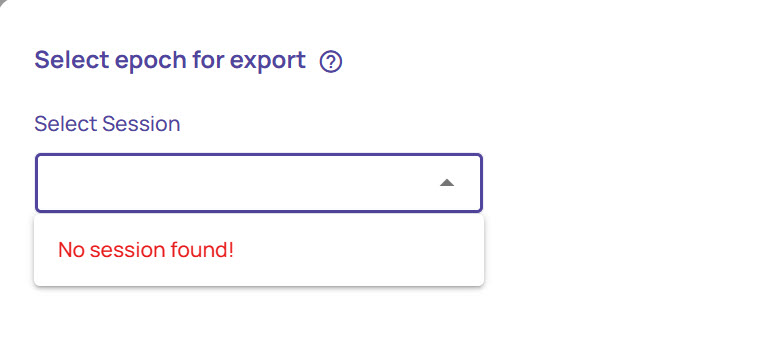
If no sessions are available, the following screen appears:
Click an epoch point (say, epoch 35) to export the model.
In the query box that appears, click Export.
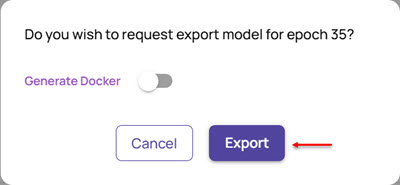
In case you also want to generate Docker for the model, enable the Generate Docker option.
The export status for the selected session appears as Submitted. Once the Export is completed, you can download the export model.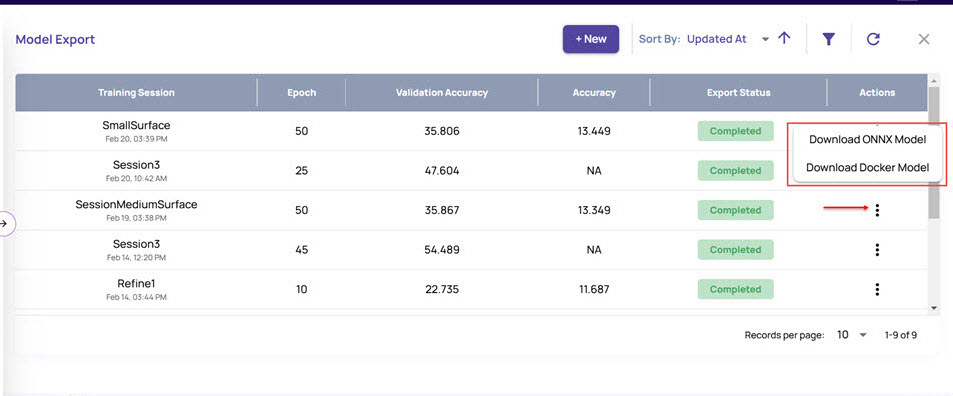
Click the 3-dots icon appearing on the right of each completed export model. It displays
Download the ONNX Model once the export is completed.
Download the Docker Model if you had enabled the Generate Docker option during export.
Please select the required option to download the model and use it.
Download ONNX Model
In this process, you can download the model as a .tar file to your local system. You can then untar the downloaded file using a command prompt on your system and follow the instructions to run the model.
Click Download ONNX Model to download the model.
The Download Model window displays the following options:
Copy URL: Click the copy icon to copy the URL of the export model and download it on a different machine.
Download: Click this option to download on the same system.
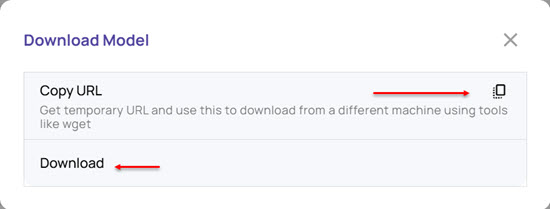
The model gets downloaded to your local system in a .tar file format.
Download Docker image using Copy URL
Click the copy icon to copy the URL of the export model and download it on a different machine.
.png)
To untar the file, run the untar command line in your system's command prompt, as shown.
$ tar xvf model.tar
inference/model.savedmodel/variables/variables.data-00000-of -00001
inference/model.savedmodel/variables/variables.index
inference/model.savedmodel/saved_model.pb
inference/model.savedmodel/fingerprint.pb
inference/docker_spec.json
inference/inference.py
inference/akri_processor.py
inference/README.md
inference/requirements.txt
inference/labels.txt
Once extracted, the inference folder gets created, containing the required files to run the model.
Open the inference/README.md file and follow the instructions.
The README file describes the steps to run the model on your system.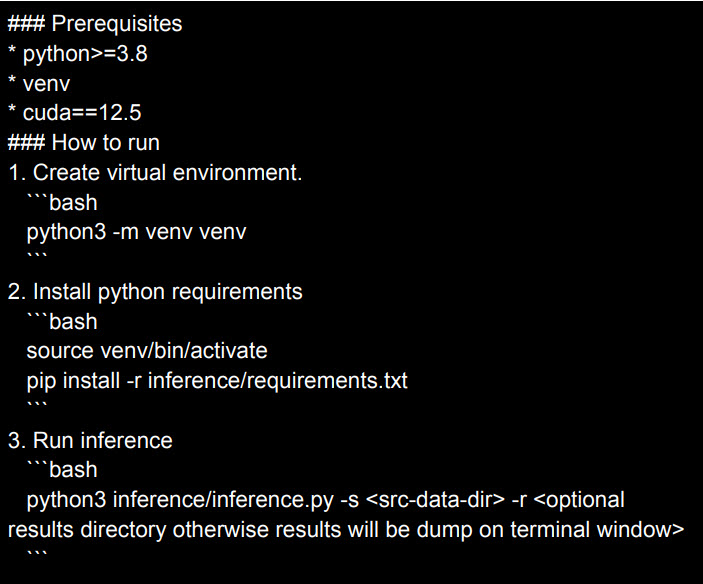
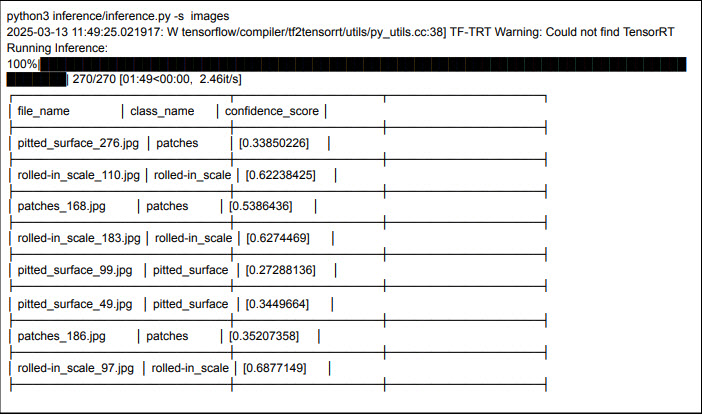
A sample output of the model is shown below:
A sample CSV output of the above model will appear as follows: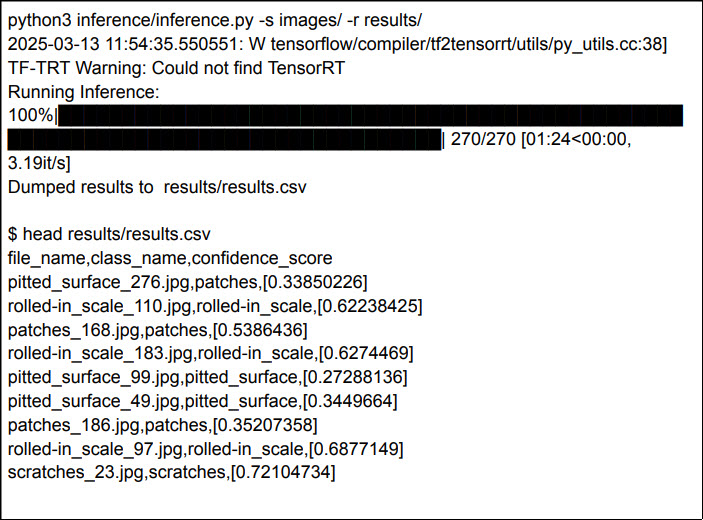
Download Docker Model
If you enabled the Generate Docker option during export, you can download the model as a Docker image.
Click Download Docker Model to download the docker.
.jpg)
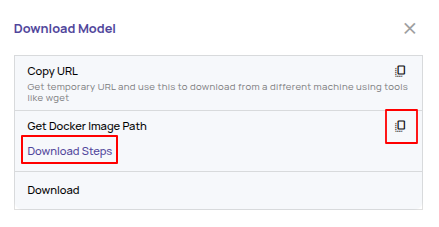
This provides the following options for downloading.
.png)
Copy URL: This option provides a URL that can be used to download the Docker image as a tar file using tools like ‘wget’. This is useful for downloading the docker image on a different machine.
Get Docker Image Path: This option provides a path to the Docker image in the AWS Elastic Container Registry, from which the image can be pulled directly. A set of temporary credentials is used to pull the image.
Download: Download the docker image through the browser on the same machine.
Download Docker image using Copy URL
Click the copy icon to copy the URL of the export model and download it on a different machine.
.jpg)
Load the docker image, as shown.
.jpg)
Verify that the docker images are successfully added by running the “docker images” command. The command prompt displays the docker image name under REPOSITORY.
.jpg)
Note that the docker image name is the same as the docker tag.
Download Docker image using Get Docker Image Path
Click the copy icon to copy the image path.
You can click the Download Steps link to know the steps to download the docker.
.jpg)
Download Docker
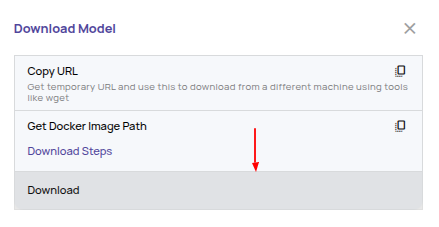
Click this option to download the model to the same system.
Run the downloaded docker image as Inference Server
Once you have the docker image, you must run the Akridata Inference server.

Run the Object Detection Inference
Verify if the model is available for running the object detection inference, by using the following command:

Create input.json for the inference. A sample input is shown below:
{
  "id": "inference_request_001",
  "parameters": {
    "frame_height": 1000,
    "frame_width": 2048,
    "frame_type": "jpg",
    "topk": 1
  },
  "inputs": [
    {
      "name": "INPUT_IMG",
      "shape": [
        494617
      ],
      "datatype": "UINT8",
      "parameters": {},
      "data": [
        255,
        216,
        255,
        225,
        0,
        212,
        69,
        ...,
        255,
        217
      ]
    }
  ]
}
In this case:
id: Any string to identify this specific inference.
parameters
frame_height and frame_width: Image height and width in pixels
frame_type: Input image file format (e.g., jpeg, png)
topk: How many top predictions to return
inputs
name: Must be “INPUT_IMG”
shape: 1-D array with size of the image file. In the below example, the image file size is 35581 bytes.
datatype: Must be UINT8
data: The bytes array filled by reading the image file.
Run the Inference by invoking the REST endpoint. A sample curl command is shown below:
curl -X POST http://localhost:8000/v2/models/detection/infer \
     -H "Content-Type: application/json" \
     -d @${HOME}/Downloads/input.json > result.json
A sample output is shown below:
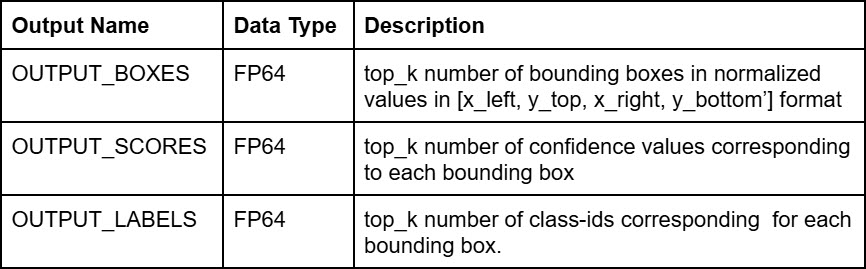
"outputs": [
    {
      "name": "OUTPUT_BOXES",
      "datatype": "FP64",
      "shape": [
        1,
        4
      ],
      "data": [
        0.26157793402671814,
        0.06080674743652344,
        0.4113985598087311,
        0.4725228271484375
      ]
    },
    {
      "name": "OUTPUT_SCORES",
      "datatype": "FP64",
      "shape": [
        1
      ],
      "data": [
        0.2304372489452362
      ]
    },
    {
      "name": "OUTPUT_LABELS",
      "datatype": "FP64",
      "shape": [
        1
      ],
      "data": [
        1
      ]
    }
]
The output names and descriptions are as follows:
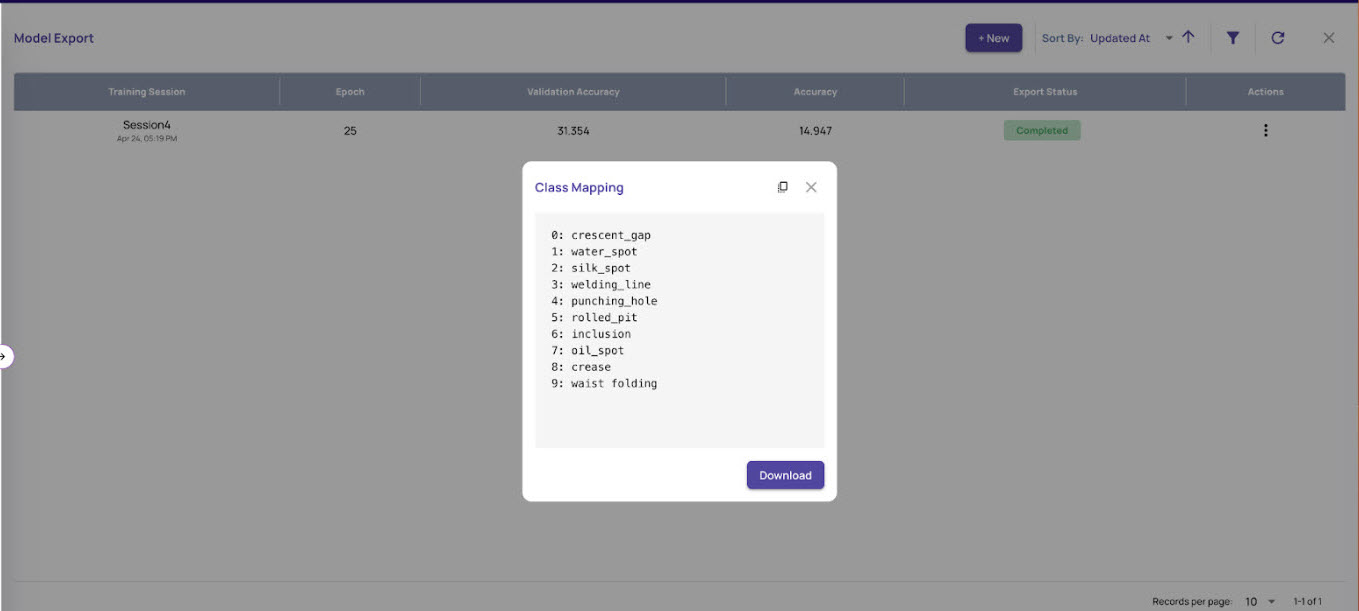
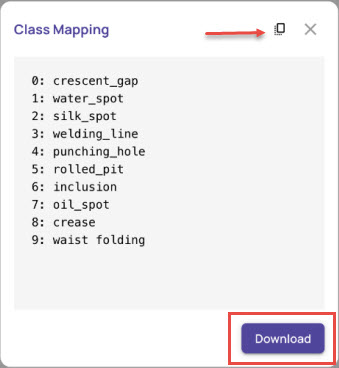
Get Map Class
To map the class ID to the class name
On the Model Export page, click Get Map Class.
.jpg)
Click the copy icon or the Download button to get the class map ids.
Run Classification Inference
Verify if the model is available to run the classification inference by using the following command:
curl http://localhost:8000/v2/models/classification
{"name":"classification_pyt","versions":["1"],"platform":"ensemble","inputs":
[{"name":"INPUT_IMG","datatype":"UINT8","shape":[-1]}],"outputs":
[{"name":"OUTPUT_SCORES","datatype":"FP32","shape":[-1]}
]}
Create input.json for the inference.
id: Any string to identify this specific inference
parameters
frame_height and frame_width: Image height and width in pixels
frame_type: Input image file format (e.g., jpeg, png)
inputs
name: Must be “INPUT_IMG”
shape: 1-D array with size of the image file. In the below example, the image file size is 35581 bytes
datatype: Must be UINT8
data: The bytes array filled by reading the image file
Run the inference by invoking the REST endpoint. A sample curl command is shown below:
curl -X POST http://localhost:8000/v2/models/classification/infer
     -H "Content-Type: application/json"
     -d @${HOME}/export_model_od_101/input1.json > result1.json
A sample output is shown below:
 "outputs": [
    {
      "name": "OUTPUT_SCORES",
      "datatype": "FP32",
      "shape": [
        6
      ],
      "data": [
        0.14129173755645752,
        0.2858140170574188,
        0.12364951521158218,
        0.14250728487968445,
        0.12272501736879349,
        0.18401245772838593
      ]
    }
  ]
The output name and description are as follows:

To get the predicted class, choose the index with the highest score and map the index to the class name.