Model Training offers a comprehensive and easy-to-use solution for training a model using labeled data.
This article lists the steps to create a model training project and start a model training session. A project can hold multiple training sessions for experiments with different dataset versions and model parameters.
Refer to the following video to start a model training session.
In the left navigation panel, navigate to Model Copilot > Training Projects.
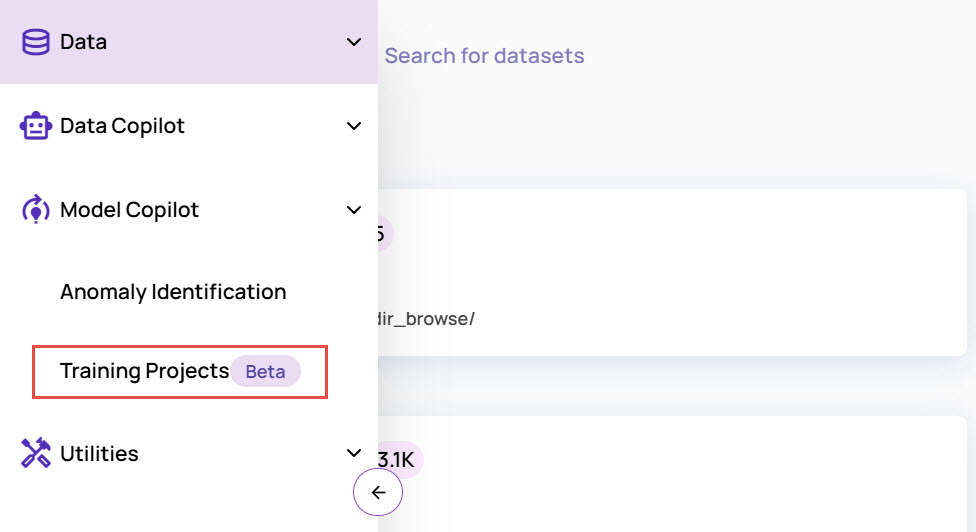
The Training Projects page opens..jpg)
Click the Add Project button.
In the Add Project window:
Enter Name and Description for the project.
Select the type of model, and click Submit.
Currently, Classification, Object Detection, and Semantic Segmentation types of models are supported.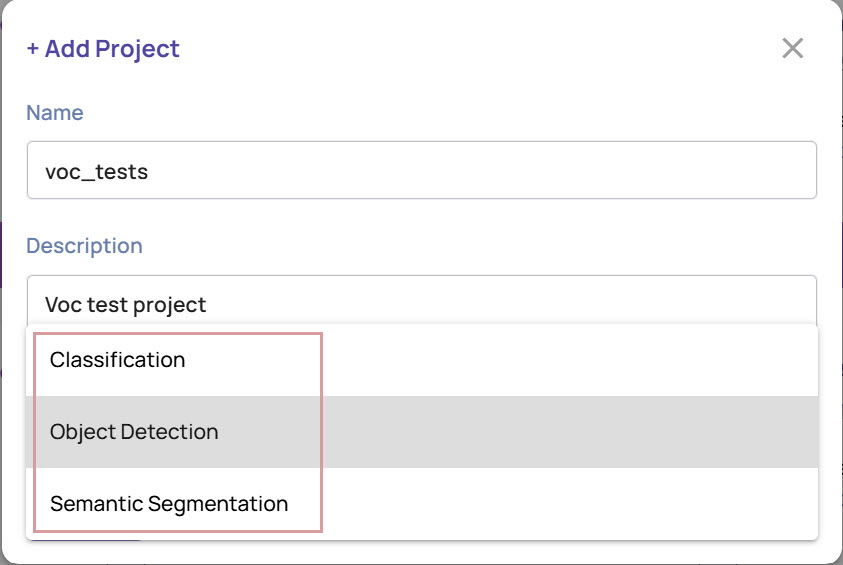
For illustration purposes, Object Detection type is selected here. Click Submit.

The project gets created and listed on the Training Projects page.
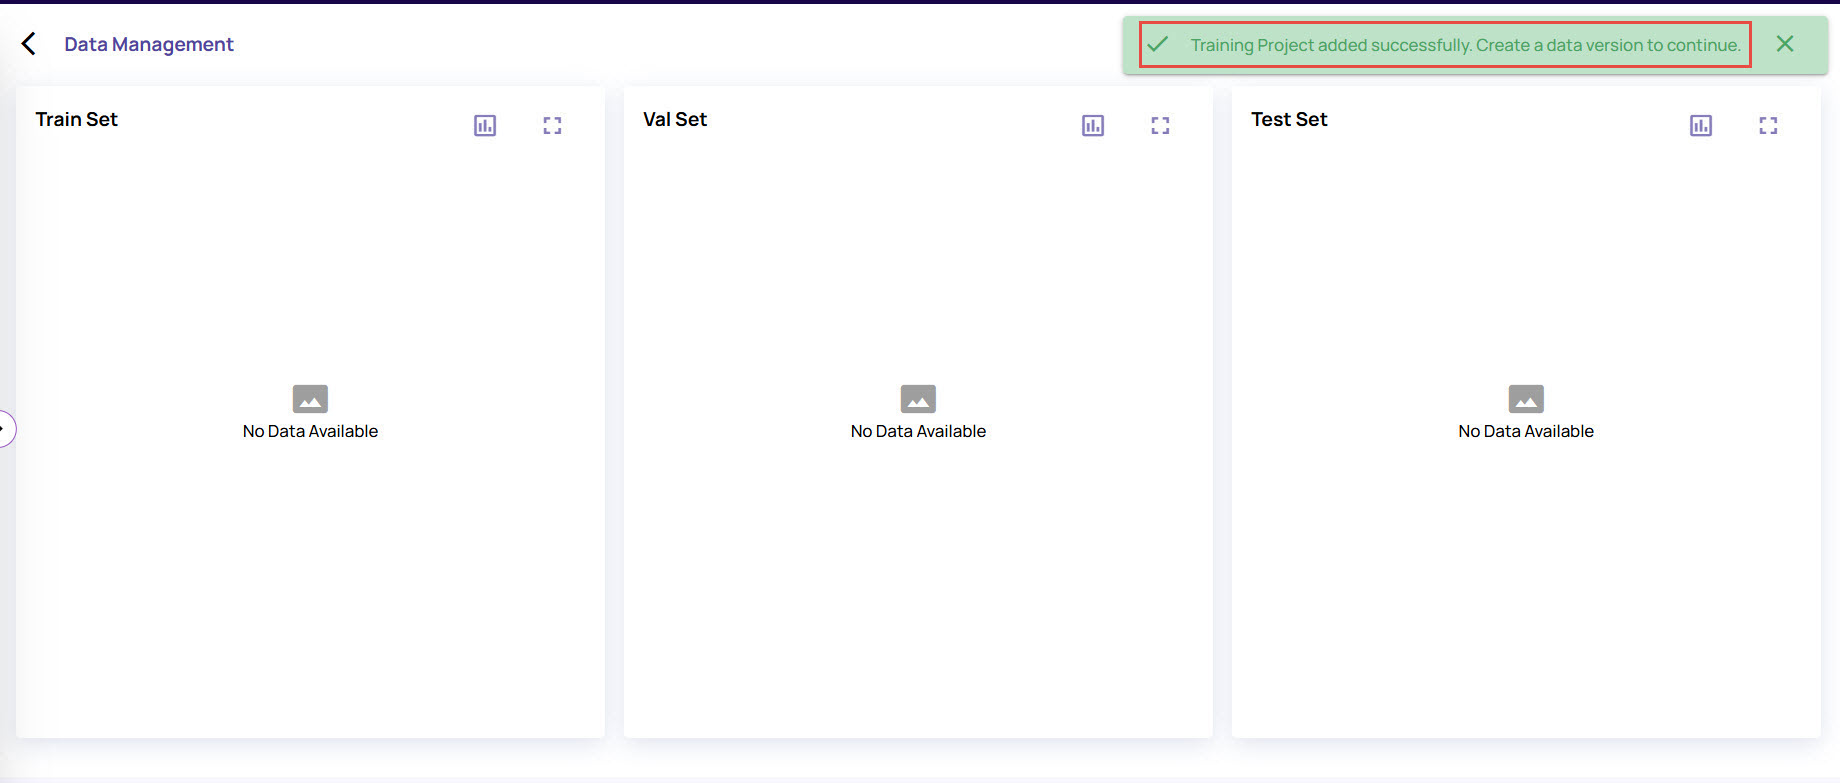
You can now create a data version to continue.
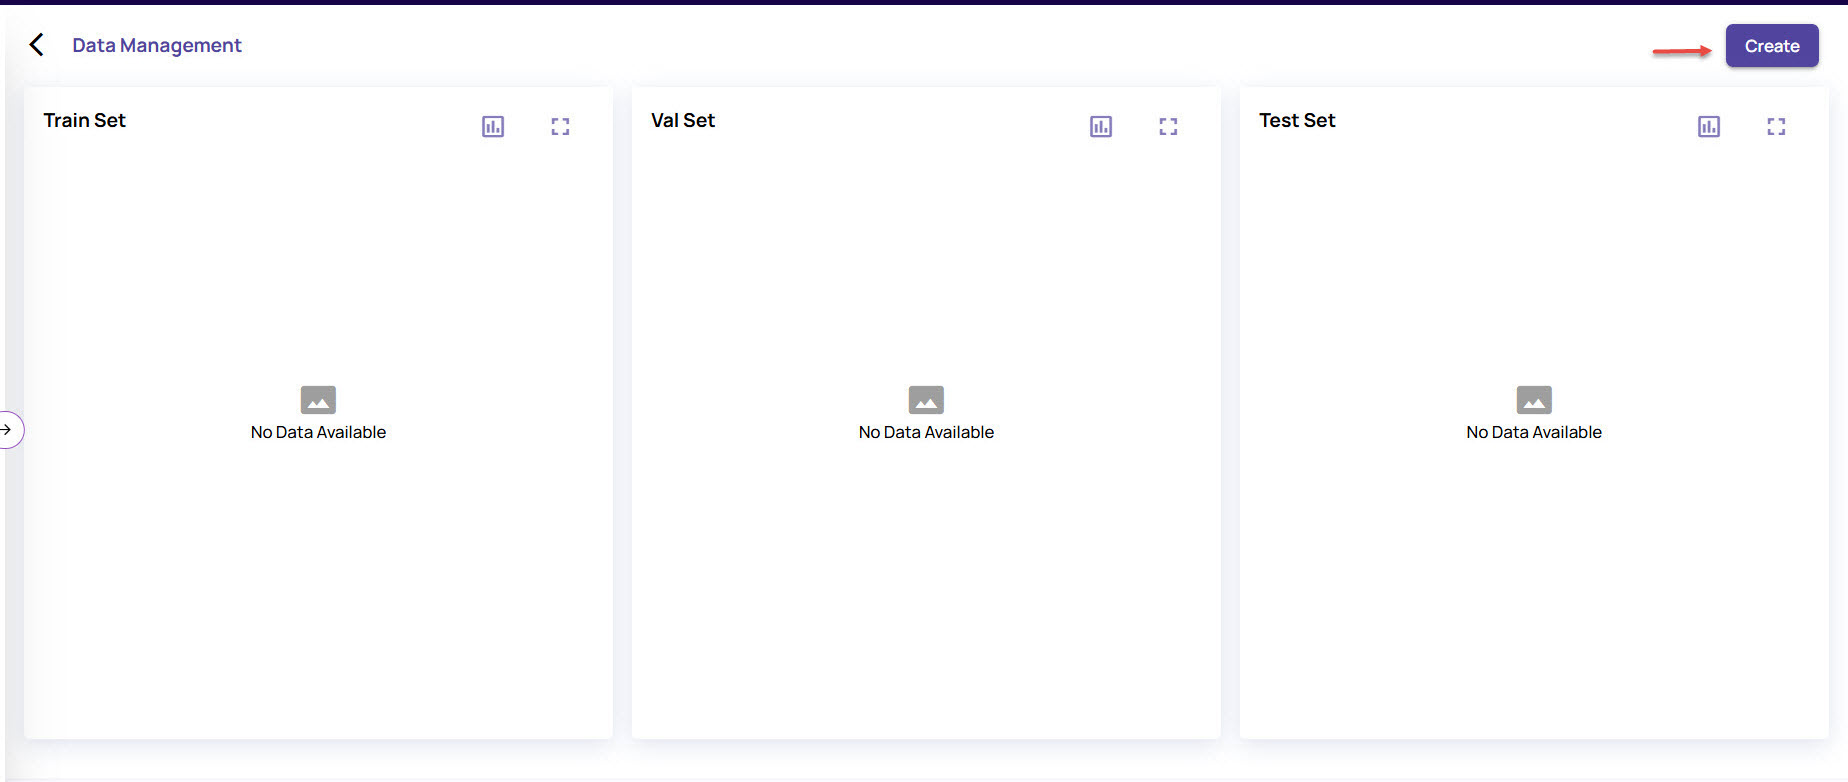
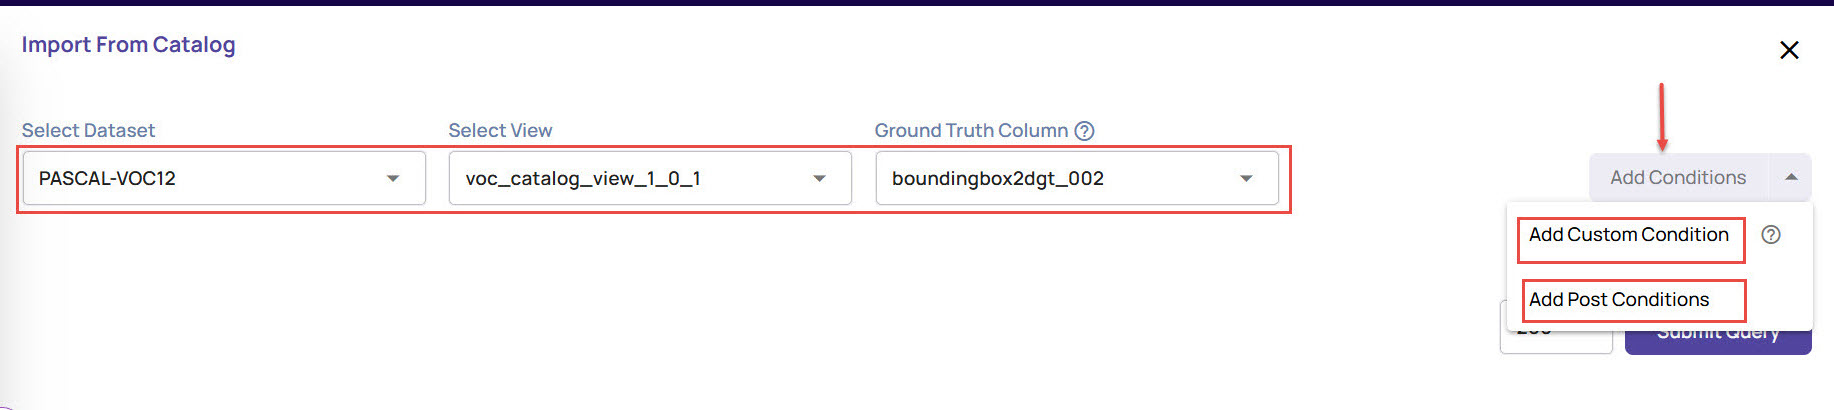
Click the Create button on the top-right corner to open the Import from Catalog screen.
Select Dataset, View, and the column with the ground truth and bounding box information.
For model training, datasets created with images of the .tif, .pgm, .jpeg, .ppm, .jpg, .bmp, and .png file types are only supported. Additionally, the selected dataset must have a minimum of two classes for the training to be successful.
For Object detection, the column should be of type boundingbox2dgt or boundingbox2dpred virtual column types.
For Classification, the column should be of type classlabelgt or classlabelpred.
For Semantic Segmentation, the column should be of type segmentgt, segmentpred, segmentmask, binarymaskgt, binarymaskpred, or categoricalmask.
Refer to Virtual Columns for details on virtual column types.
Refer to Create view with classification data and Create view with object detection data to create views with Classification and Object Detection data, respectively.
Click the Add Conditions drop-down menu to add Post Conditions or Custom Conditions.
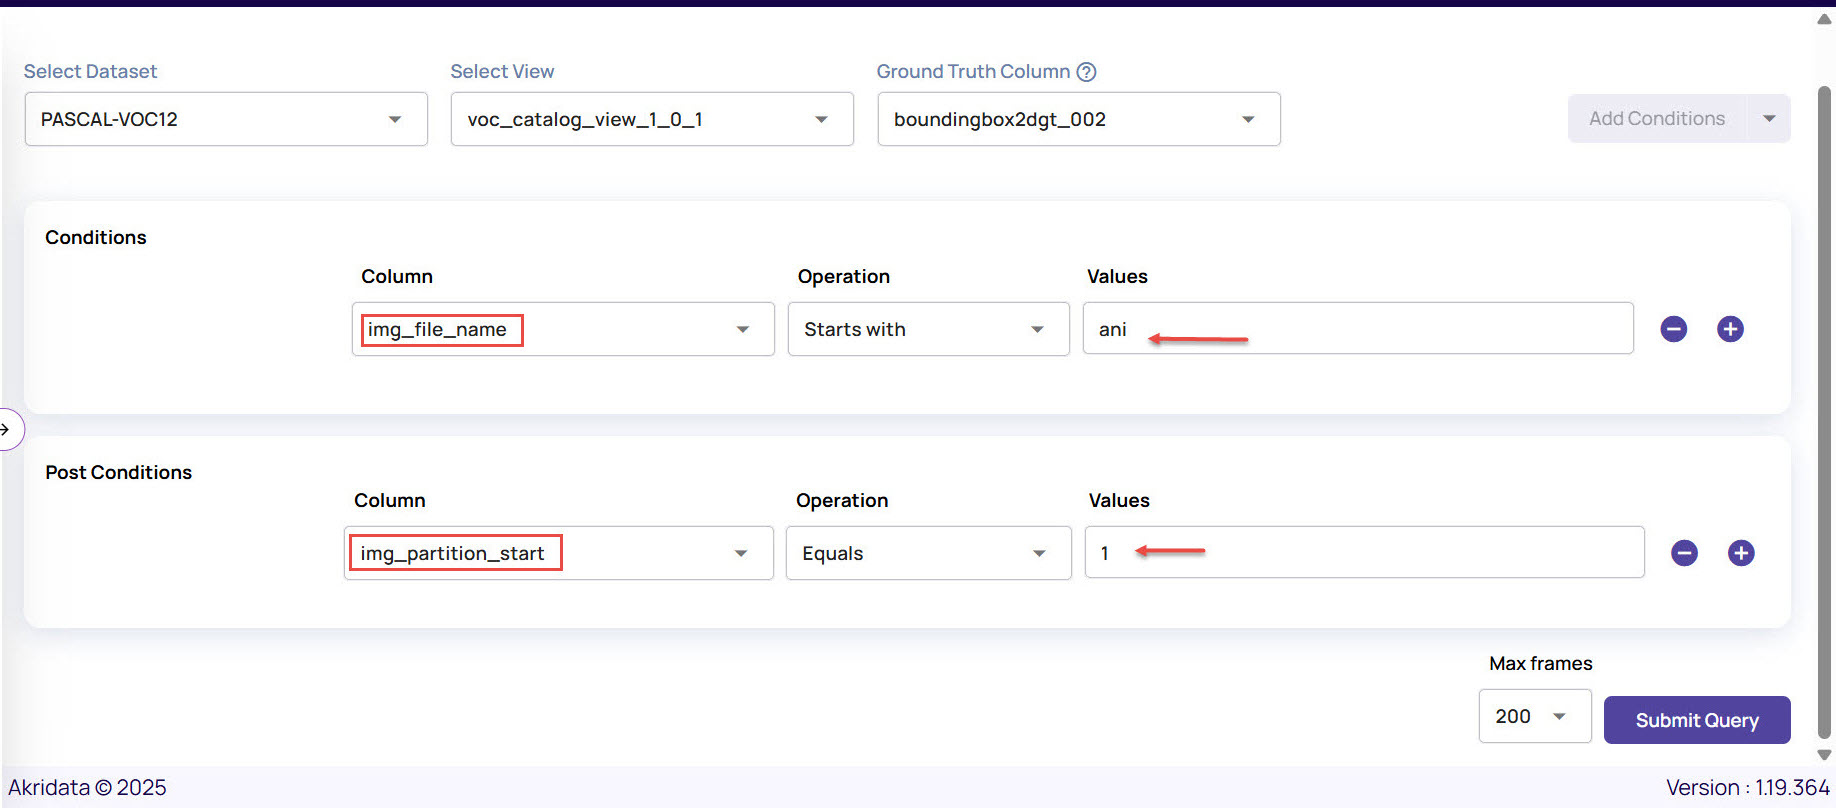
You can add Conditions and Post Conditions for the query. Depending on the Column you select, the Values field accepts the corresponding details, as shown.
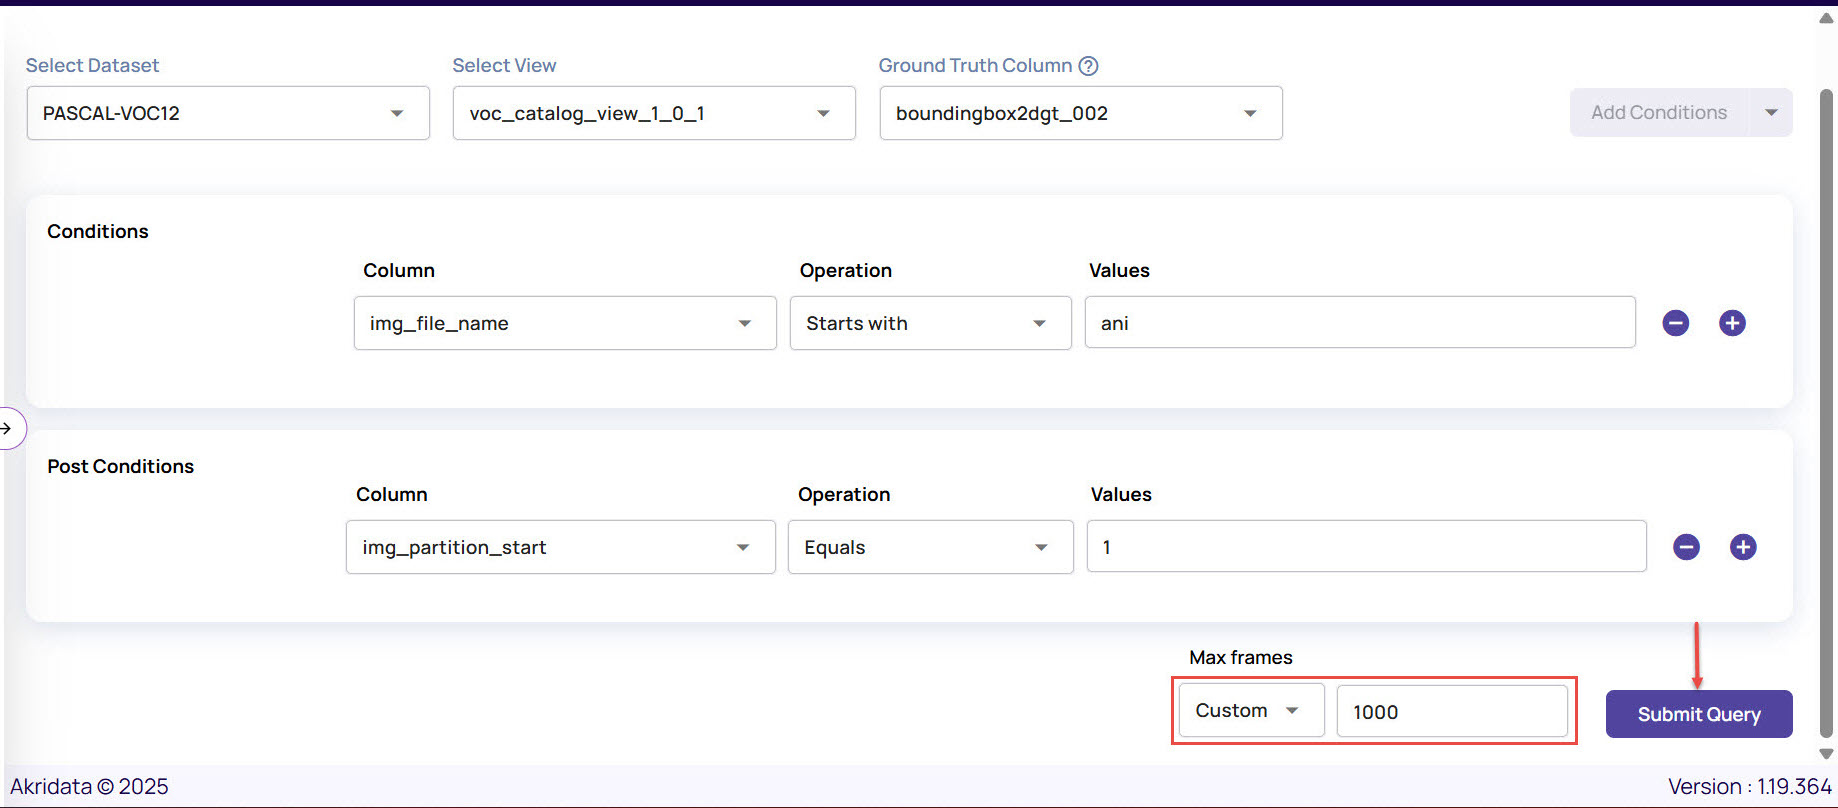
In the Max Frame drop down, select a number or enter a custom number for the images to be imported for the training.
The images are added to the training session screen.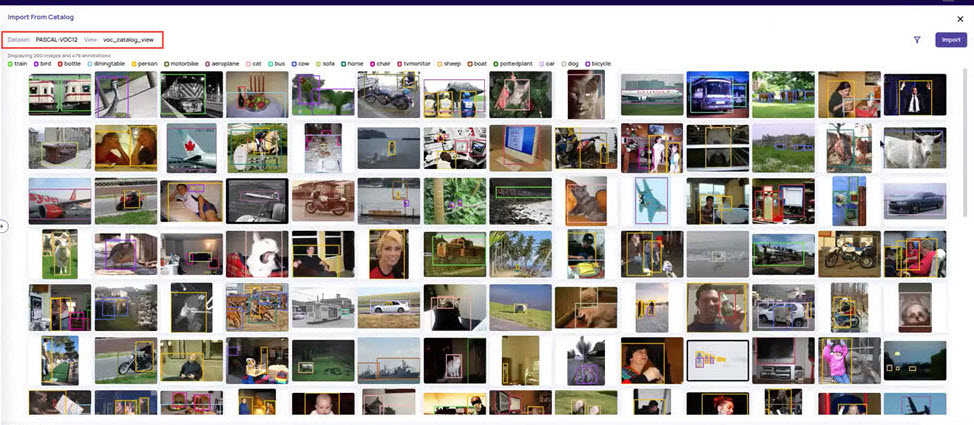
Click Import on the top-right corner, and specify the split ratio for the Train, Validation, and Test sets.
Select the applicable split-mode, and click Done.
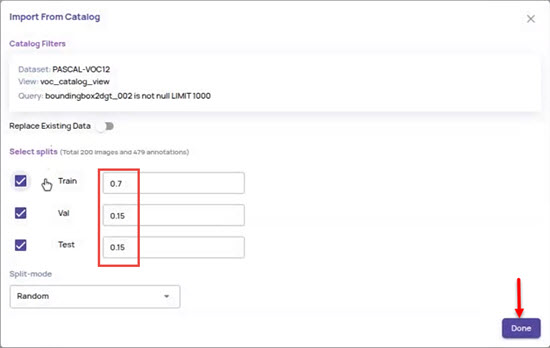
For object detection, only random split is supported.Review the images in each set.
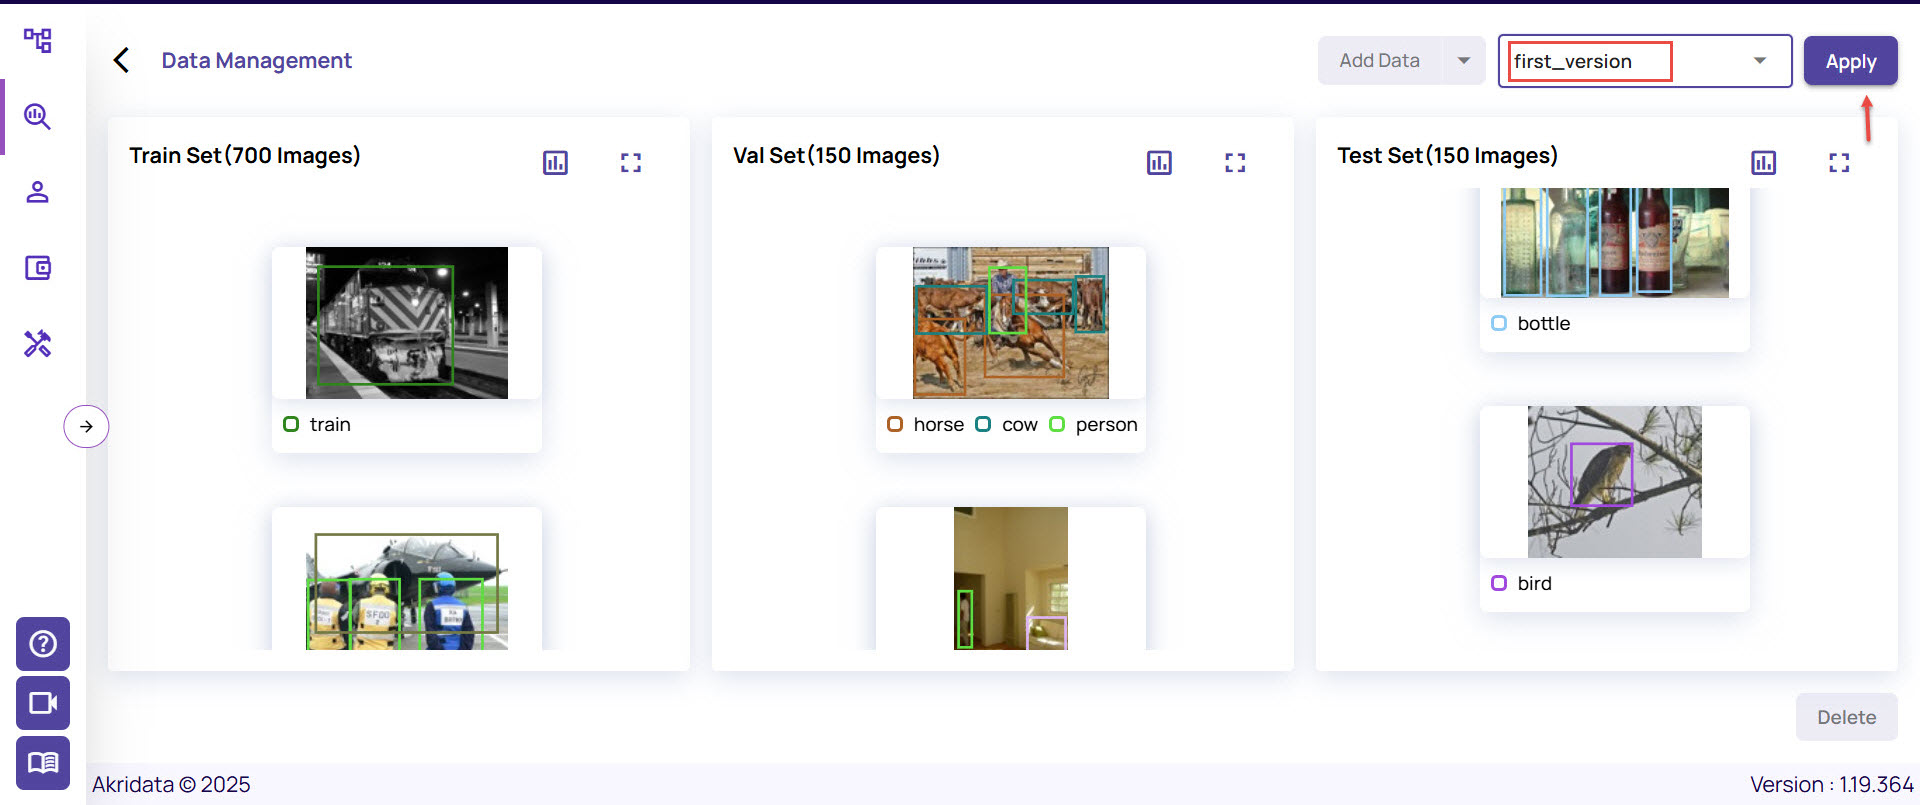
Scroll through each section to review the images.
Click the graph icon on the top right of each set to view the class distribution of the images.
Click the expand icon adjacent to the graph icon to view images of the selected set on a single page.

You can add more images by going through the Add Data steps again.
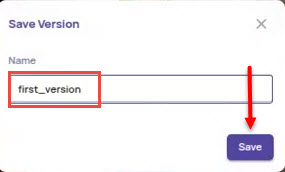
Click Save.
In the Save Version window, enter a Name and click Save to save this dataset version.
On the session creation page, select the data version that you just created, and click Apply.
In the next screen, click Unnamed on the top left corner, enter the Session Name and Description, and click Continue.
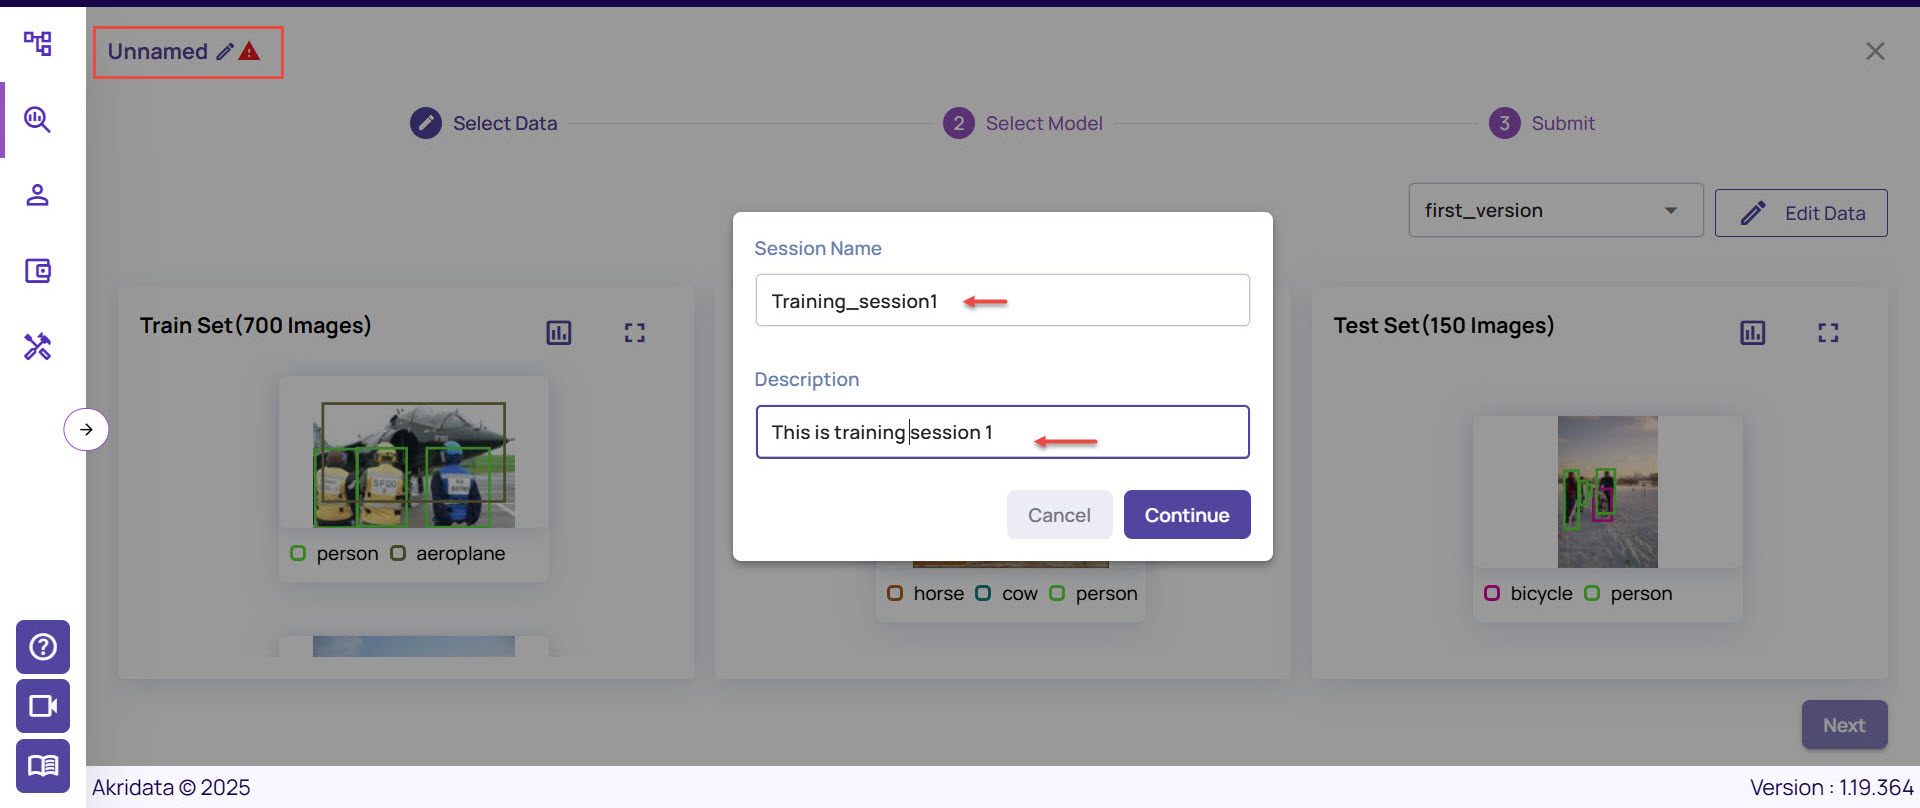
Click Next to open the Select Model tab.
Under the Select Model tab, select the Model Size, Dataset Type, and Max Epochs for the training.
These parameters will be used to select a suitable base model automatically.
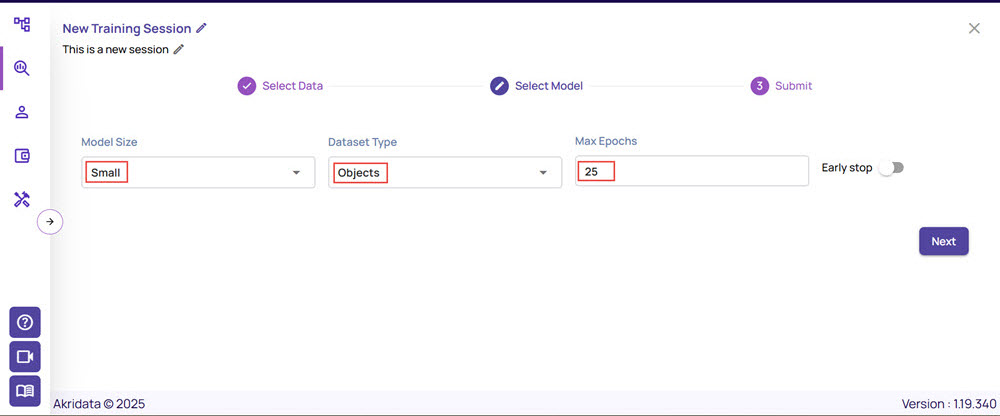
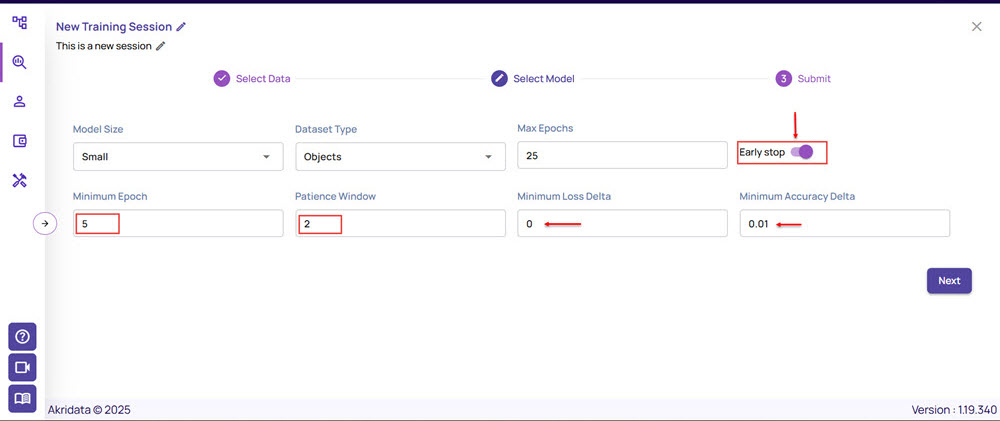
Enable Early stop, if needed, and set up the early stop parameters.
If there is not enough change in the loss or accuracy value within a given range for a specified number of epochs, you can trigger an early stop for the process to stop and generate results.
Minimum Epoch: This is the “Number of epochs after which early stopping will be monitored.” The default value is 10. You can enter the minimum number of epochs that must run before applying early stop condition.
Patience Window: This is the “Number of epochs to monitor for validation loss improvements.” The default value is 10. You can update this number to monitor for changes in validation loss or validation accuracy to trigger an early stop.
Minimum Loss Delta and Minimum Accuracy Delta: These represent the early stop if validation loss or validation accuracy do not improve by the value within patience window. The default values 0 and 0.01, respectively, are suitable for most cases. You can update these values, if needed, to trigger an early stop if the improvement in validation loss and validation accuracy is below this value over a epochs specified as ‘Patience Window’.
If the early stopped epoch is not a snapshot epoch, then the early stopped epoch is considered as the closest snapshot epoch with min val_loss.
Click Next.
Review the data version and model parameters, and click Submit to initiate a training session.

You can track the status of the session on the session listing page.
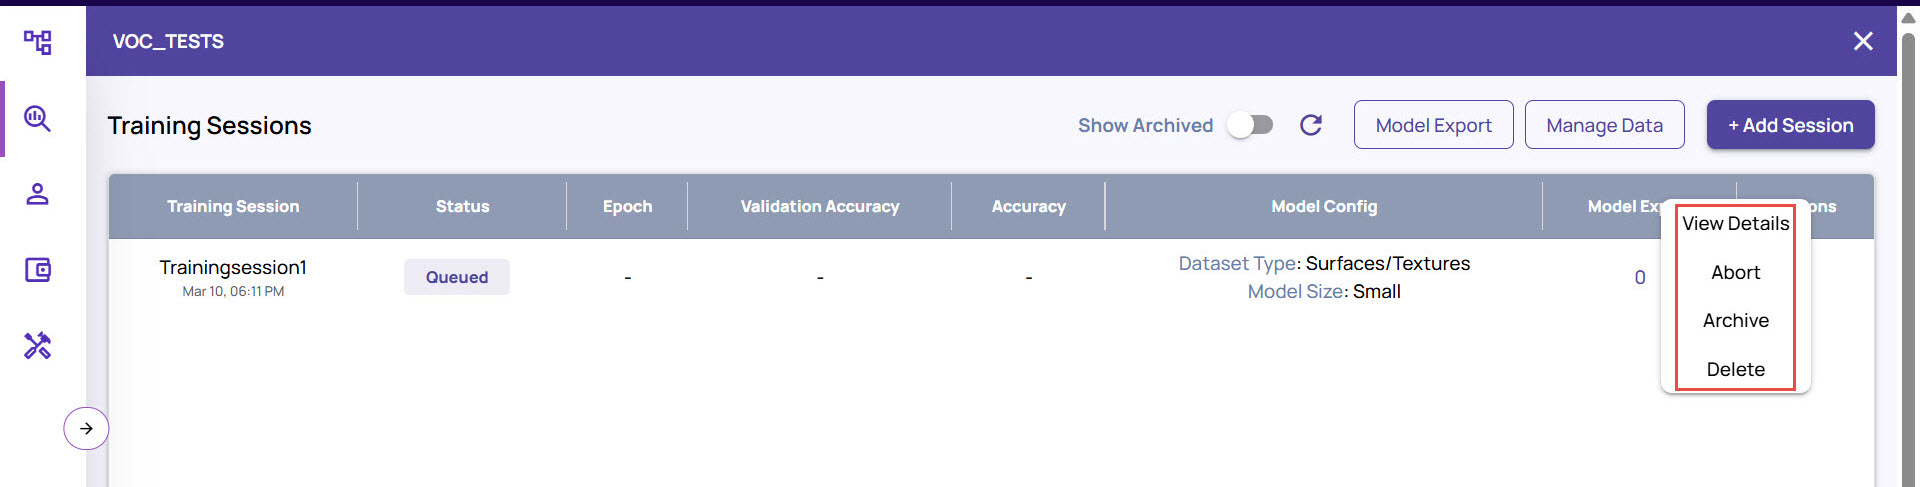 You can click View Details from the drop-down options to view the training sessions details.
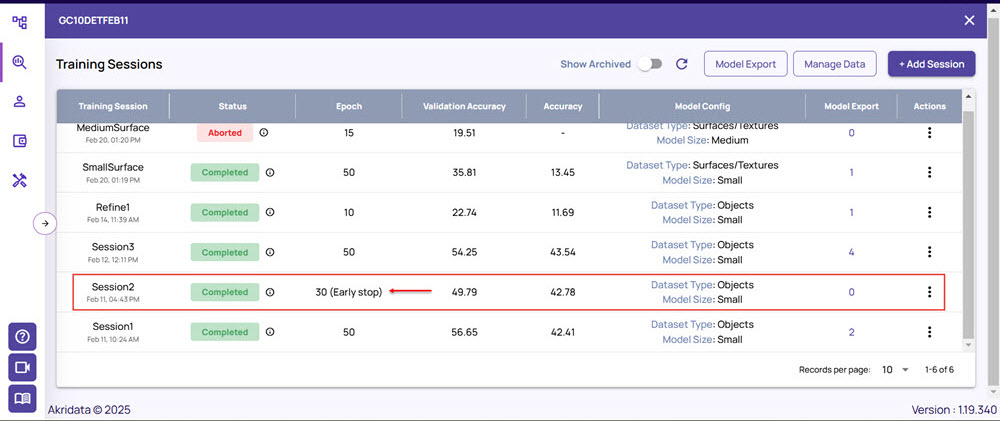
All the sessions are displayed in the listing page, along with the status. In case you had triggered an early stop for the training, it is indicated in the listing page as shown below:
Once the training project is created, you can navigate to Model Copilot > Training Projects to view the project card.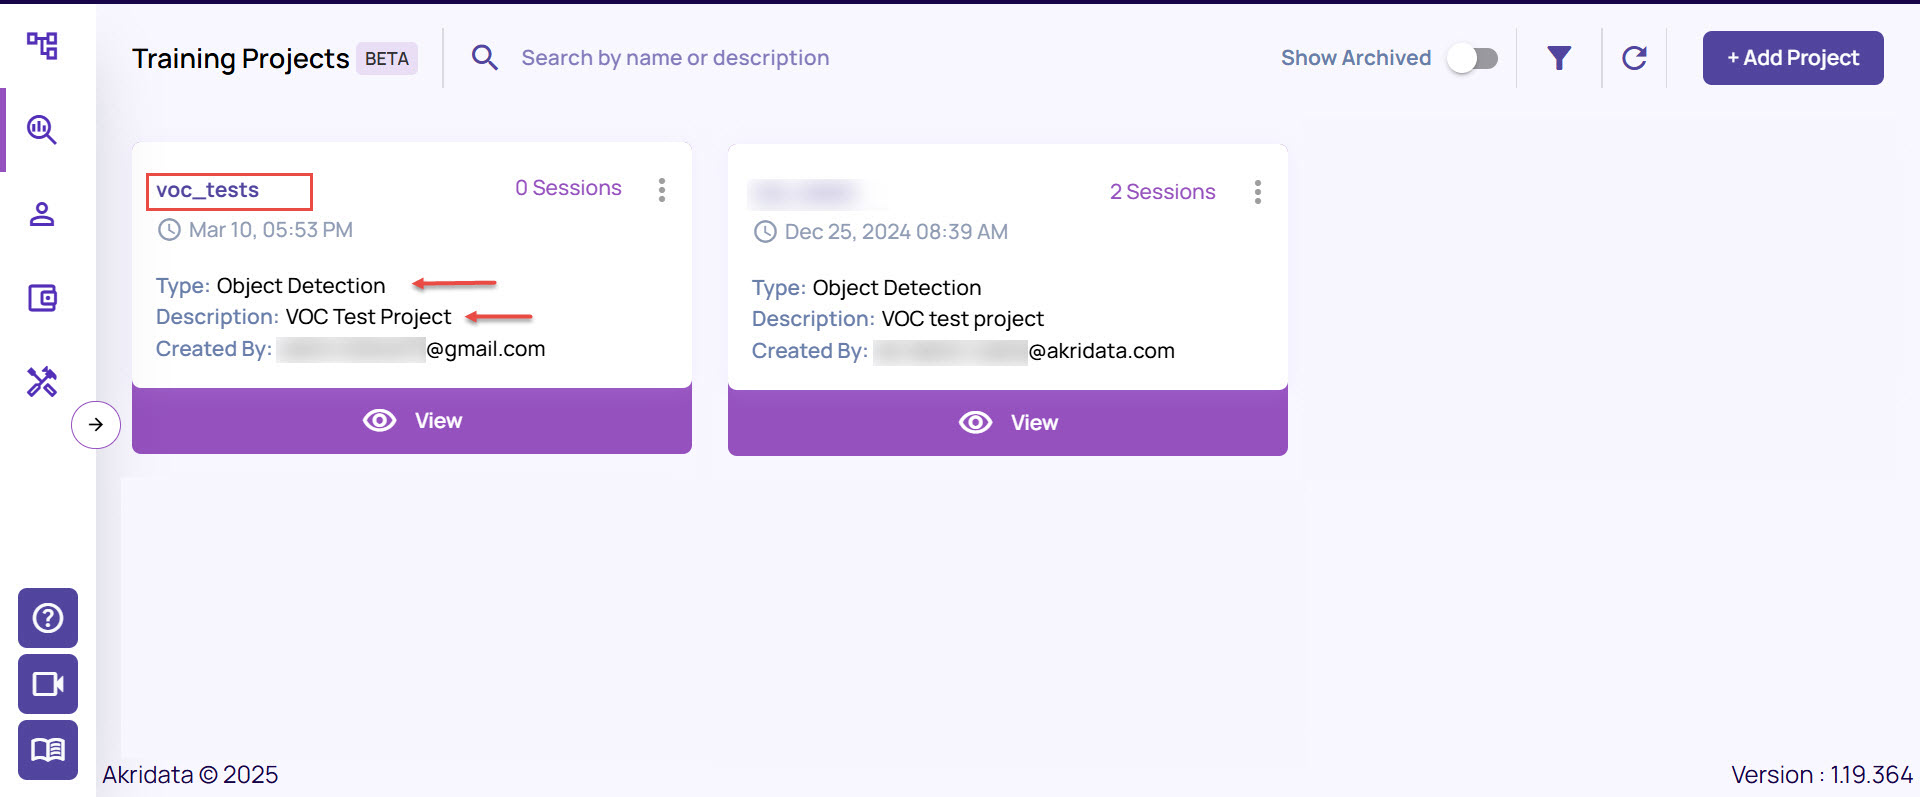
Type: Represents the project type as Object Detection or Classification, as you had selected.
Description: The project description as you had specified.
Created By: Displays the user’s e-mail address who created the project.