This article describes how to create an Analyze job using a dataset. The previous article details the overview of analyze jobs.
Create job
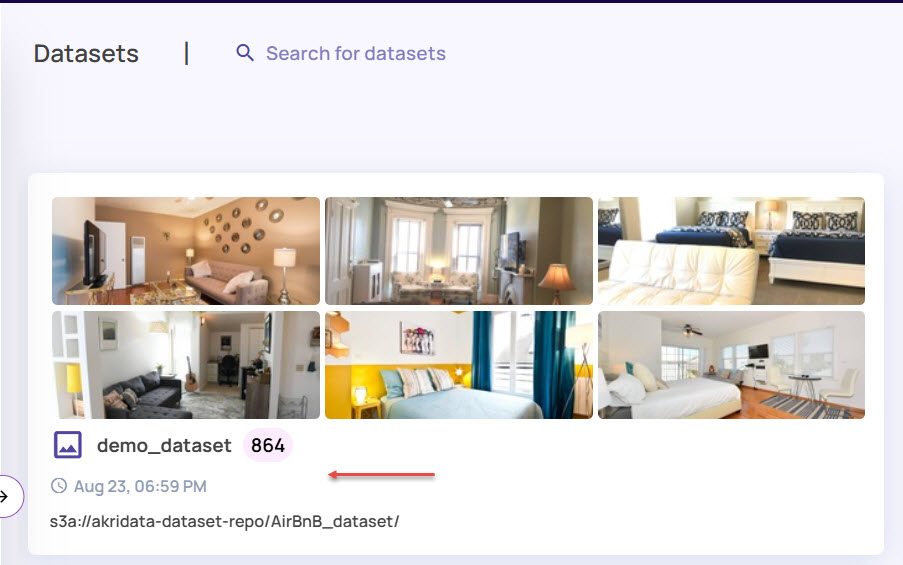
In the left navigation pane, click Data > Datasets.
.jpg)
Select a dataset card and click the card to open the dataset page.
For illustration purposes, let's consider creating an analyze job for the “PASCAL-VOC12” dataset.On the dataset page, click the Catalog button to open the catalog page.
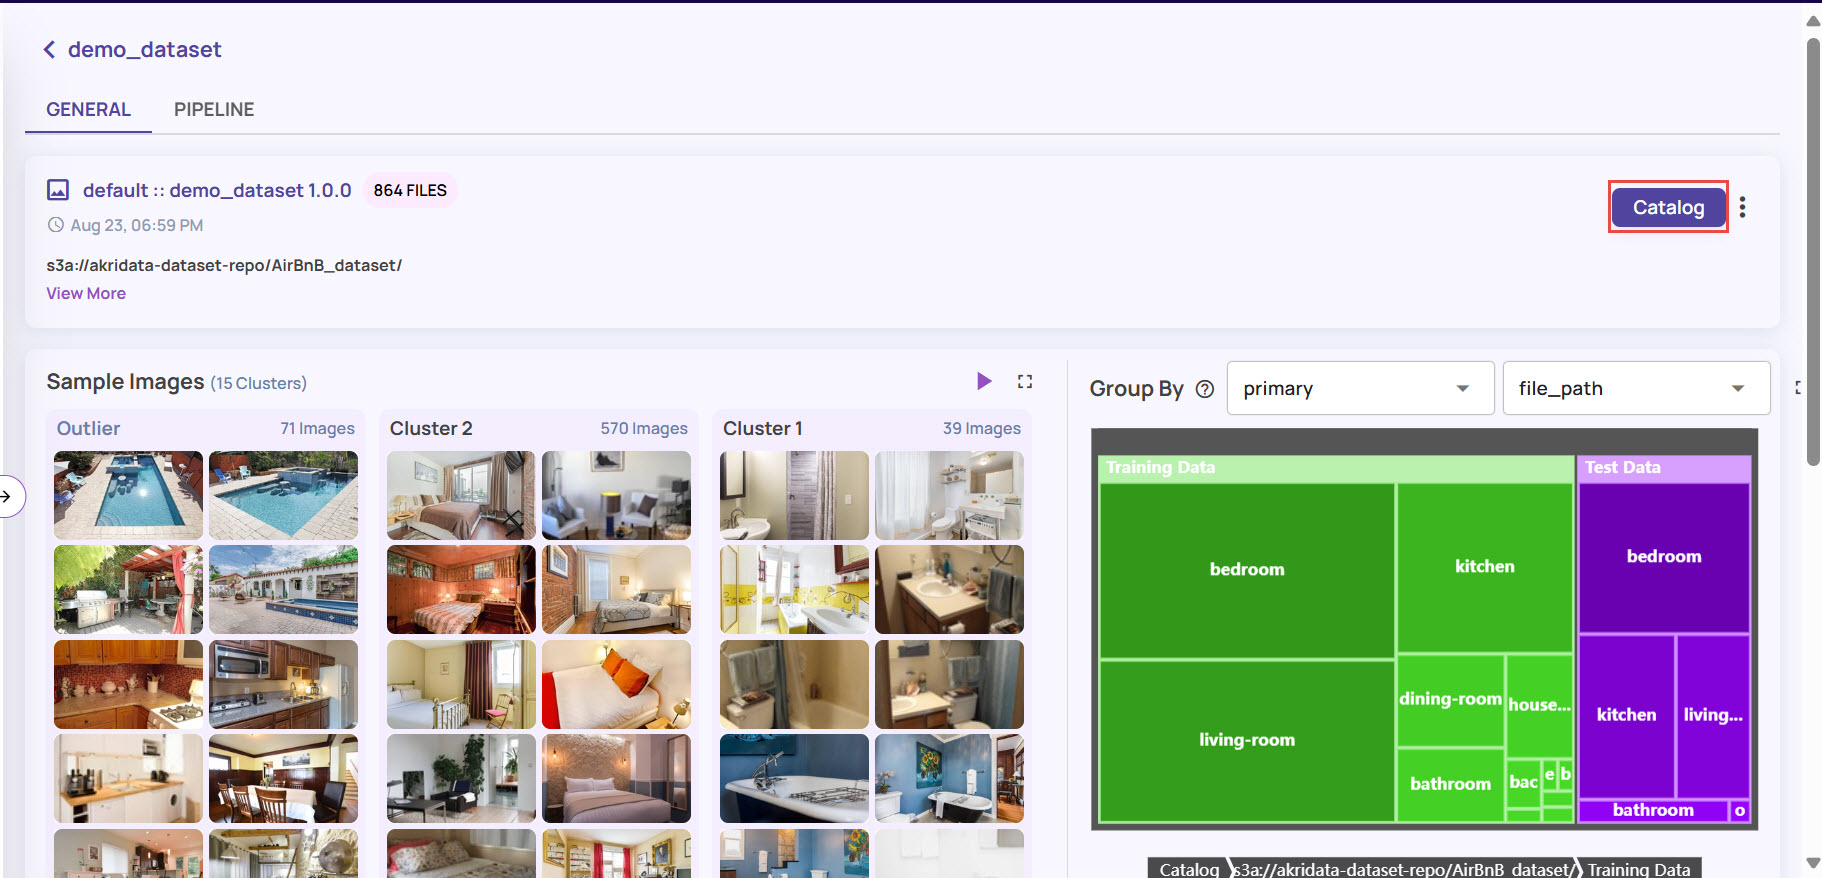
On the catalog page, click the Visualize button in the top-right corner, as shown.
.jpg)
You can customize the table view as needed.
In the New Visualization Job window, enter the Job Parameters.
Enter the Job Name and Job Description.
Provide Tags for the job. You can select one or more tags from the existing drop-down, or create new tags as needed.
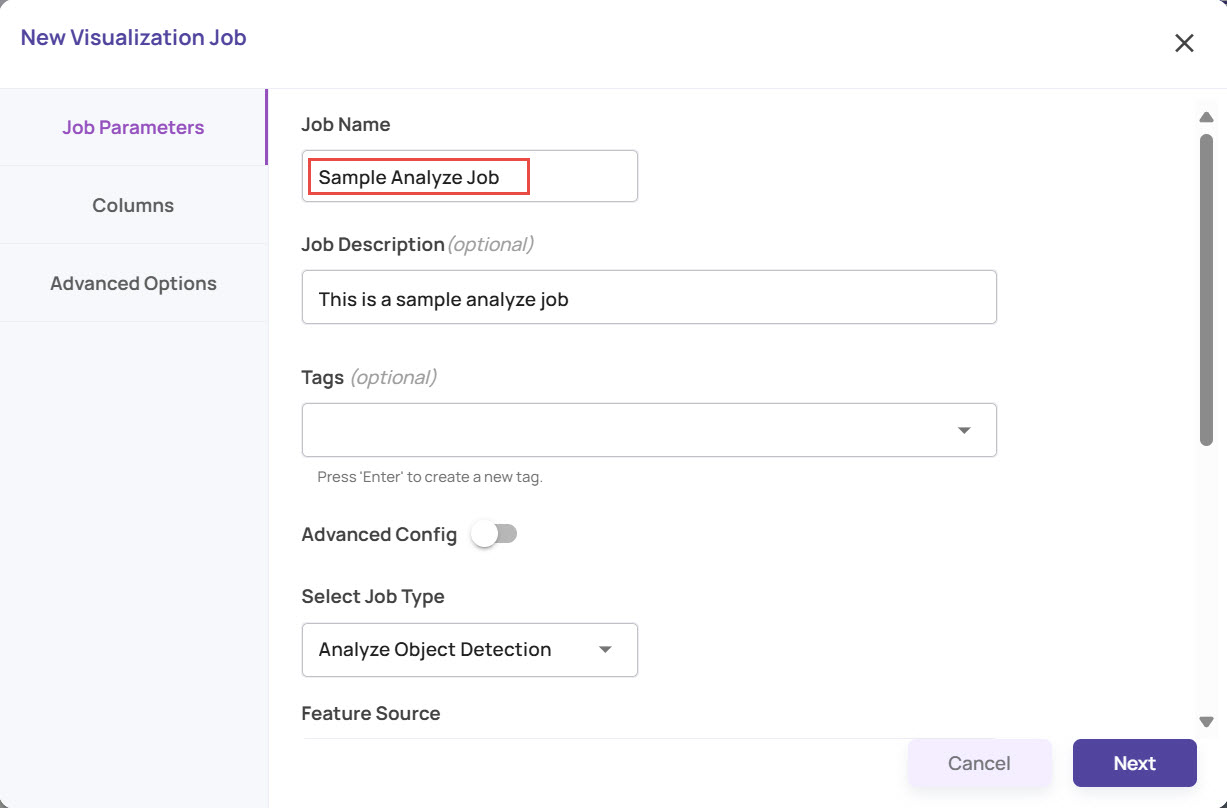
Select the Job Type.
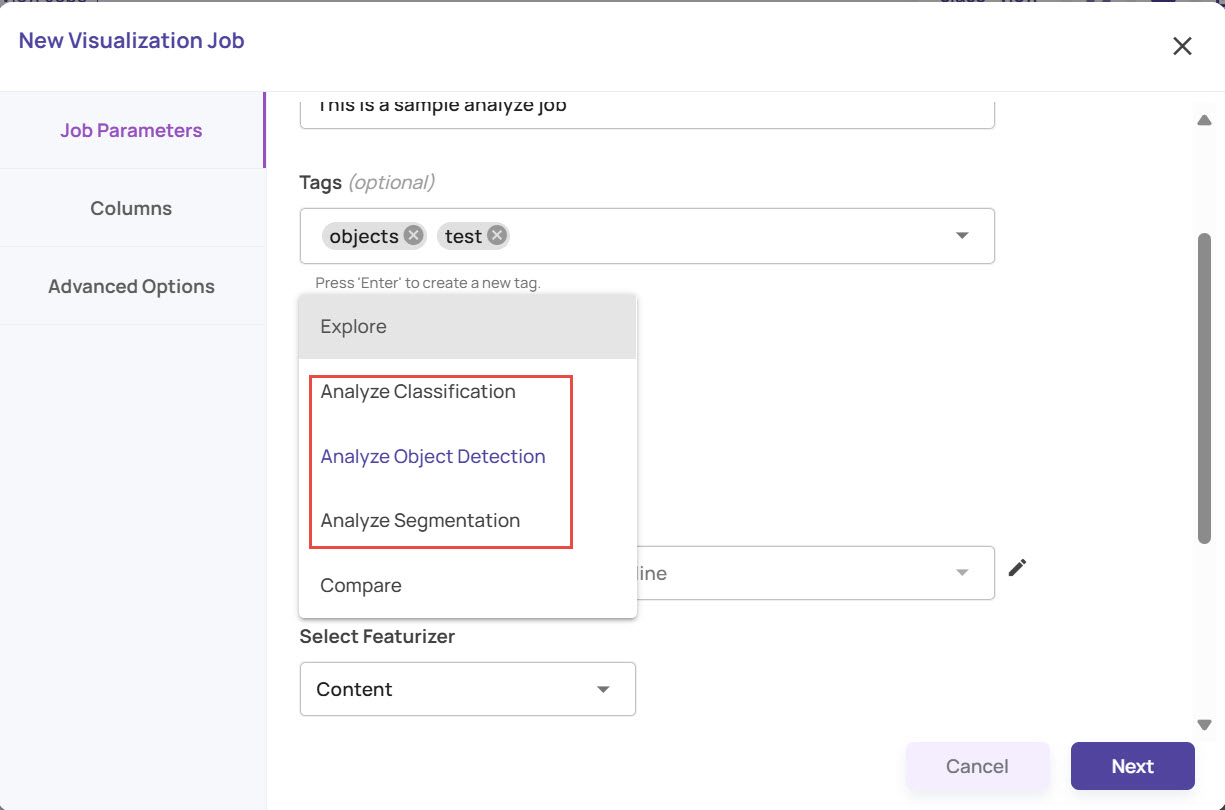
Analyze Classification: To analyze a single-class classification model
Analyze Object Detection: To analyze the object detection model output, which has class, bounding box, and confidence.
Analyze Segmentation: To analyze the output of an instance segmentation model, which has class, segments in the form of polygons, and a confidence score.
If you have selected the Analyze Object Detection job type, choose whether the job type is based on Model or Content as the Featurizer.
Model: The model inference results serve as the criteria for generating the plot view. The expectation is that similar model inference characteristics, such as misclassification of class A as class B, high-confidence misclassifications, etc., will be grouped into different clusters in the plot view.
Content: The image features are used to generate the plot view. This will generate plot view similar to an explore job where visually similar images are expected to get grouped.
Enter other details, such as Clusterer, Embedder, and others, as needed, and click Next.
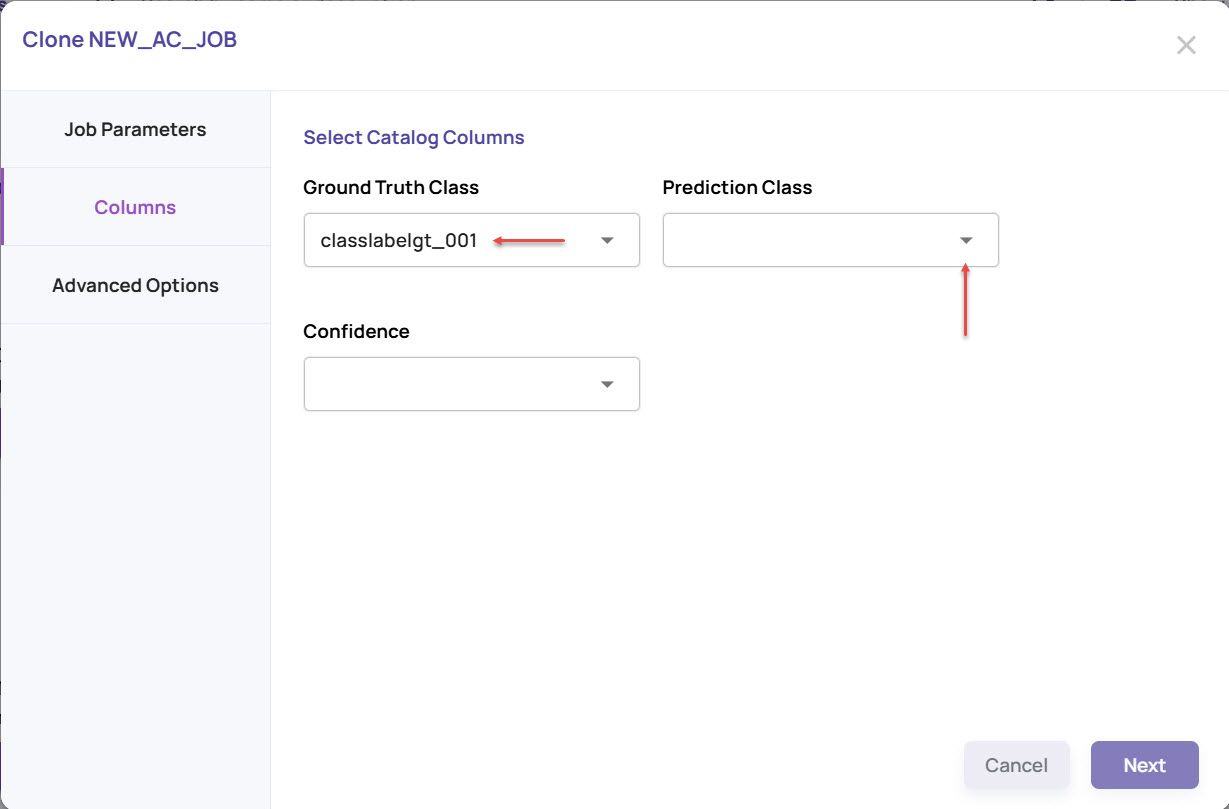
Select the catalog columns that hold the ground truth and prediction information, which will serve as the inputs for analysis. In the screenshot below, the fields for an analysis segmentation job are shown as an example.
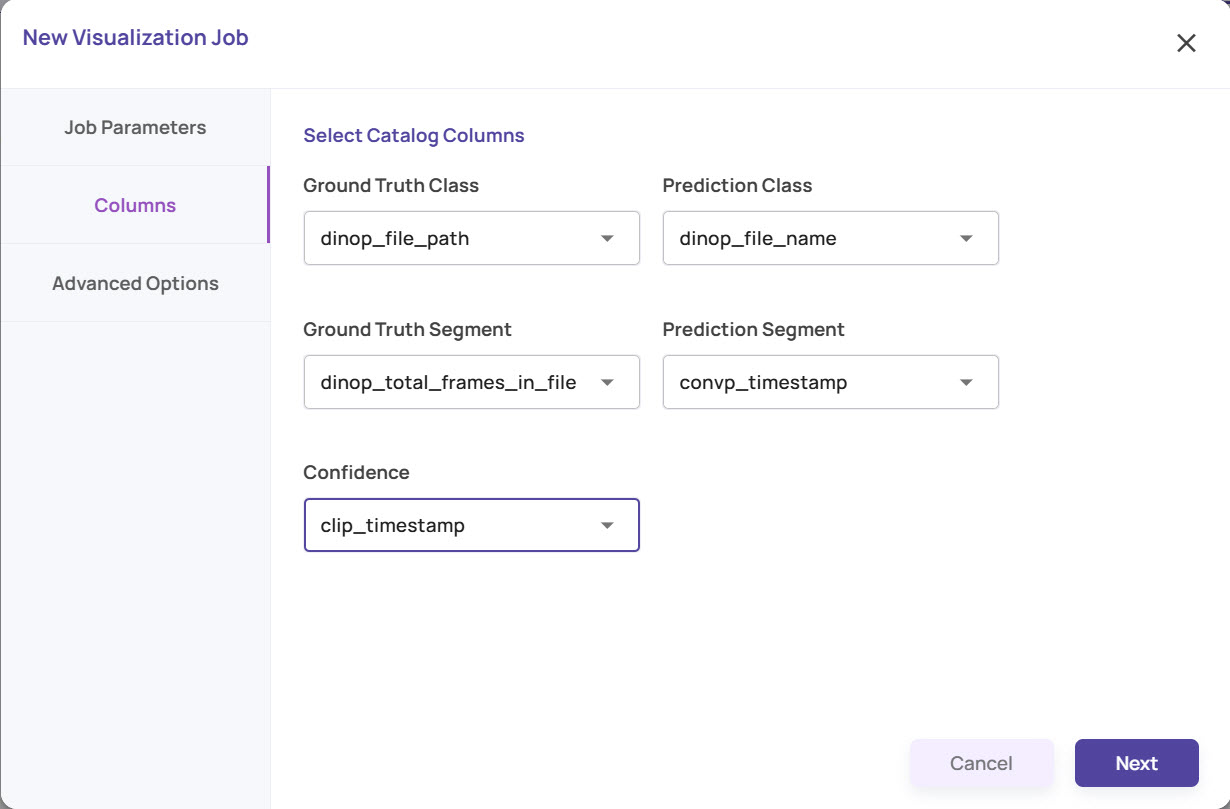
Ground Truth Class: Catalog column that holds the ground truth class label.
Prediction Class: Catalog column that holds the prediction class label from the model being analyzed.
Ground truth segment: Catalog column holding the ground truth segment.
Prediction segment: Catalog column holding the prediction segment.
Confidence: Catalog column holding the prediction confidence.
Click ‘Next’
Under Advanced Options, the IOU Bins and Confidence Bins are pre-selected. The Bins represent a comma-separated list of ranges from 0 to 1 for statistical computation.
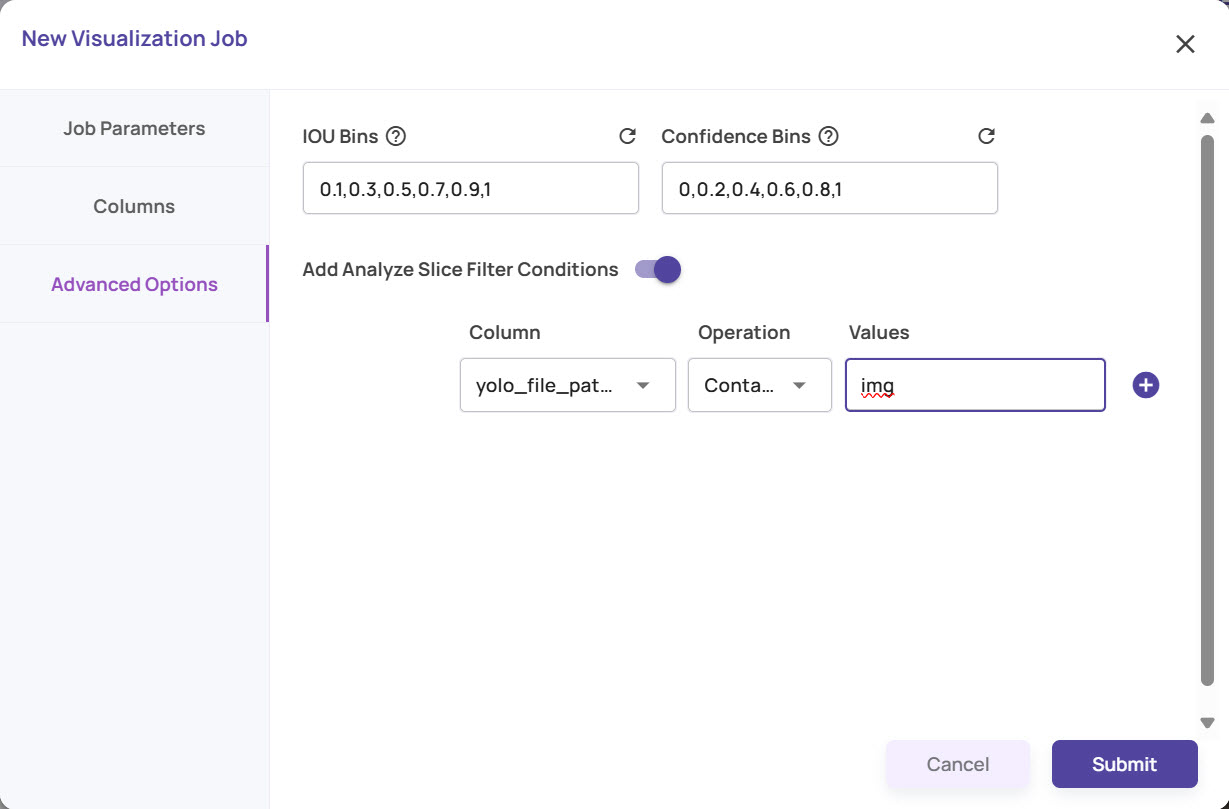
Enter the filter conditions if any to limit the analysis to subset of the images and click Submit to create the Analyze job.
Click the View Jobs link on the Notification, as shown.
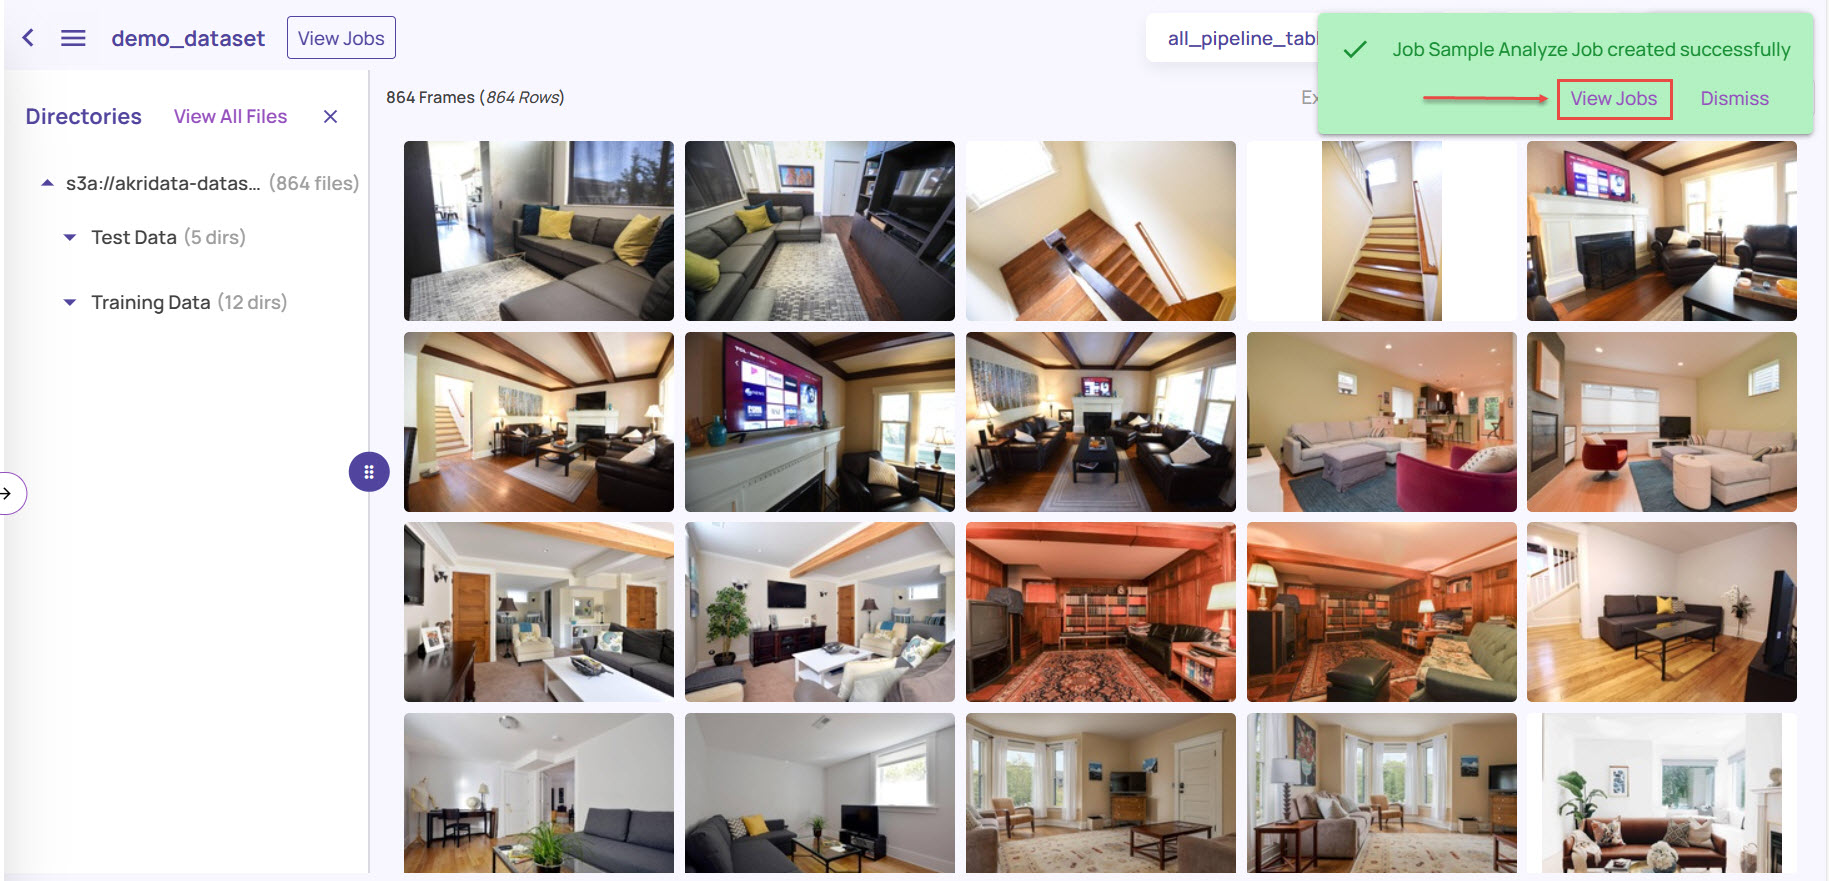
Alternatively, navigate from the left navigation panel. Depending on the job type you had selected, the new job will be listed as Created in the respective job page. Once the job creation is complete, the status changes to 'Ready'.
Depending on the Job Type you had selected, the job cards are indicated with the corresponding labels:AS for Analyze Segmentation
AO for Analyze Object Detection
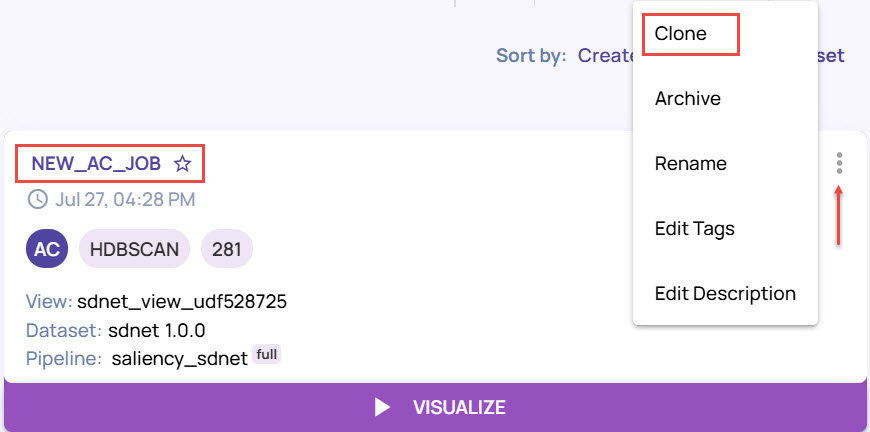
AC for Analyze Classification
.jpg)
Similar to explore jobs, you can search for the analyze jobs based on their status and filter based on the job properties.
Clone an analyze job
If you already have an analyze job in Ready state, you can clone the job to create another job with the same properties. You can make any necessary changes to the job parameters and then submit them for job creation.
In the analyze jobs page, select the job card for which you want to create a clone. Let’s consider cloning an analyze job of type Classification.
Click the vertical 3-dots icon and select Clone.
Enter the Job Name and Description, and click Next.
As you will notice, the ground truth class and prediction class details will be inherited from the job you are cloning. You can change the column details if needed.
The steps for creating a cloned analyze job are similar to those mentioned in the “Create job” section above.