When creating a new anomaly model, you can clone from an existing model to populate the same set of good images and test images in the new model. You can edit the images, remove or add images, and specify the region of interest.
In the Anomaly Models screen, click New.
In the Create Anomaly Model window, enter Name and Description.
Under Clone from, select the existing model from which you want to replicate and click Submit.
.jpg)
The selected model is cloned, and all the good and test images will now be populated under the images tab of the new model.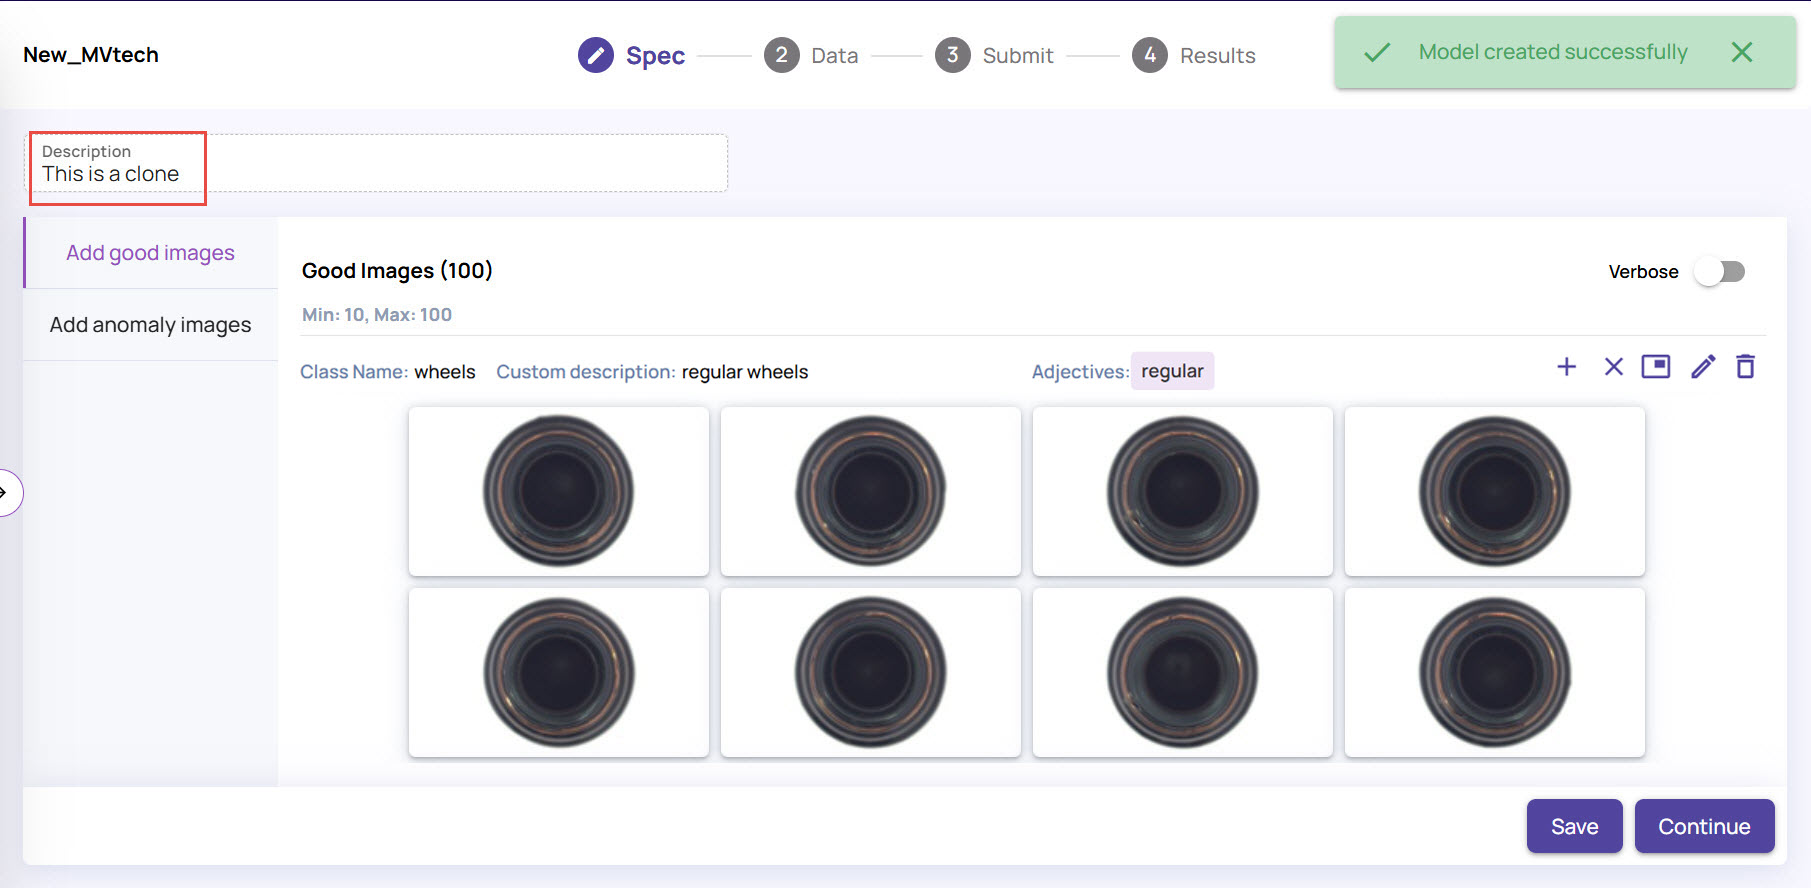
Edit the uploaded data, if needed.
Click the pen icon on the top left to edit the populated images, if needed.
Select an image and click the x icon on the image to remove it, if needed.
Click the rectangular icon adjacent to the pen icon on the top-right corner to draw the Region of Interest (ROI) where anomalies must be detected.
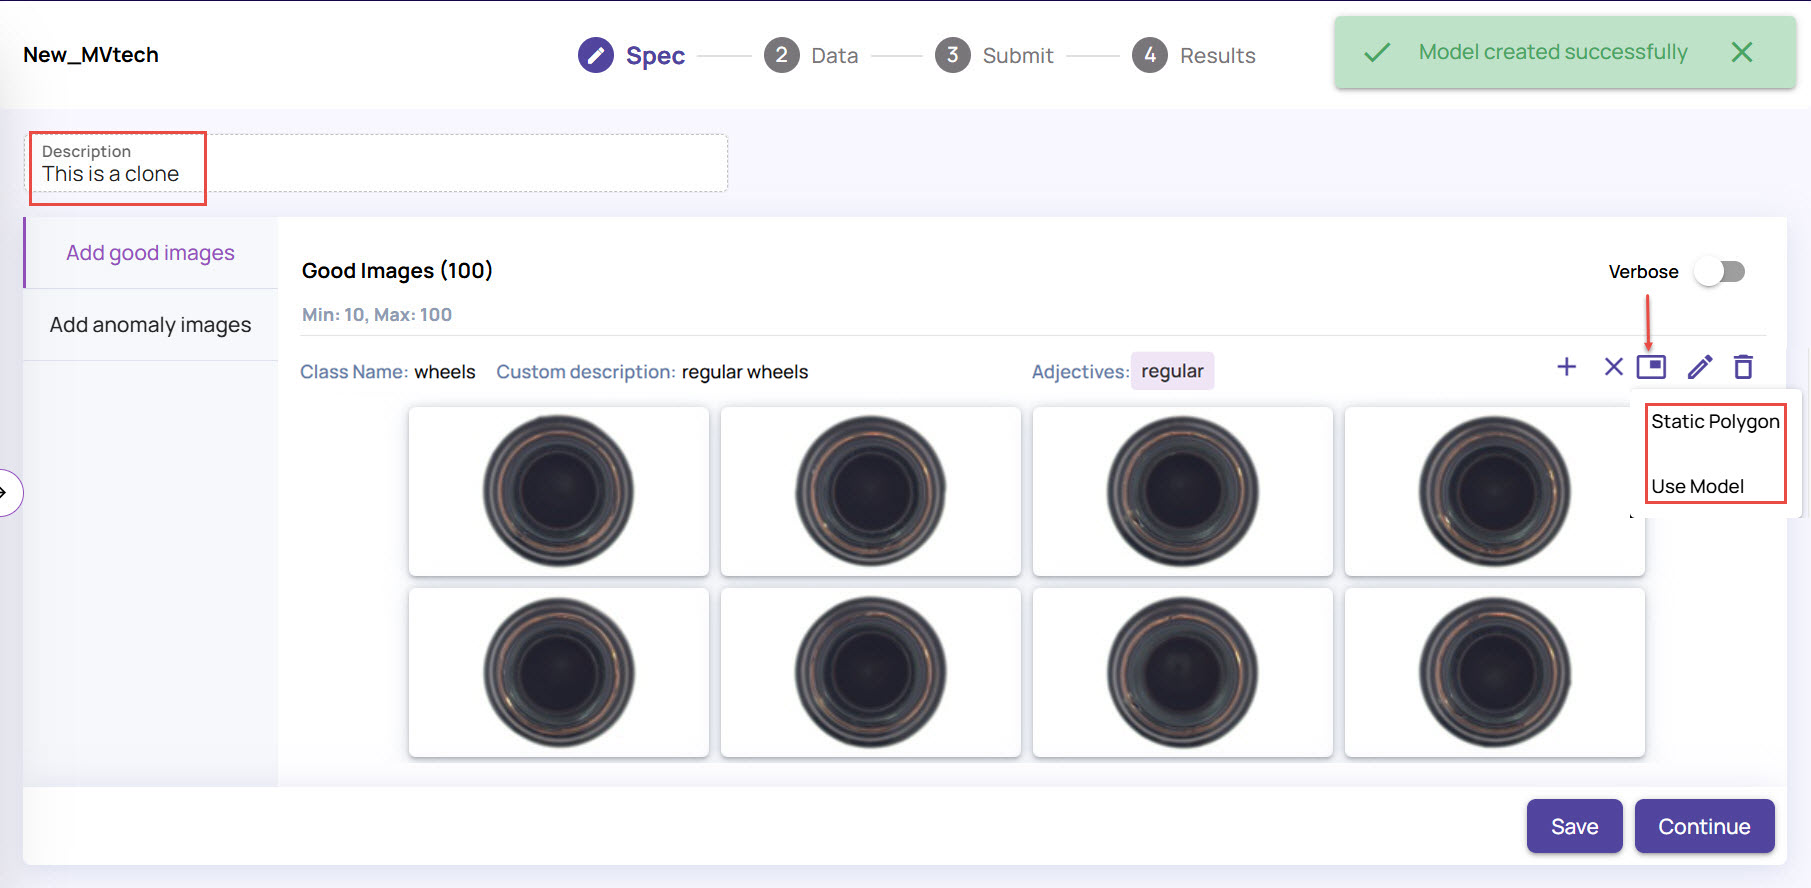
Static Polygon: Allows you to draw a polygon as Region of Interest. In this option, the same ROI is applied to all the images, including good and anomaly images. In the Draw region of interest screen,
Click a point on the image to start marking the box.
Click at different points on the image to form the polygon as the area or interest, as shown below.
Double-click at the starting point to stop the marking.
.jpg)
The same bounding box will be applied to all the images, indicating that the anomaly detection will now occur within the polygon, i.e., the region of interest.
Use Model: This option allows you to use the ROI from an already executed Training Model and run the anomaly detection.
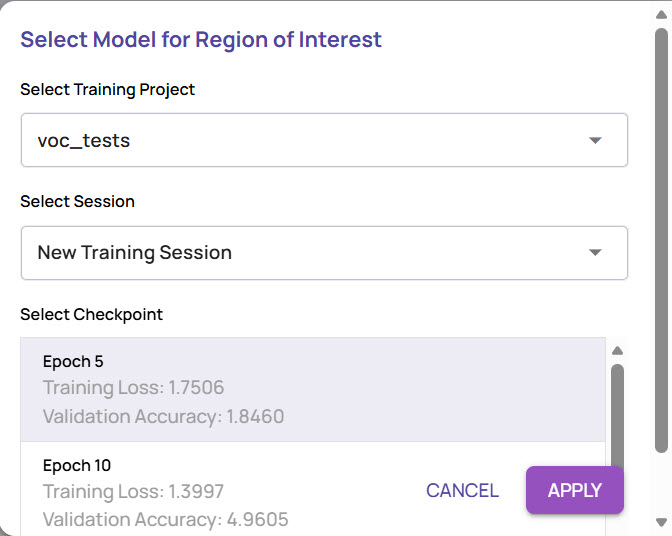
Select the training project from the list of successful projects.
Select the sessions from which you want to capture the ROI.
Select the checkpoint for Epoch, and click Apply.
Based on the setup in the training project, the ROI will be applied to the images being used for anomaly segmentation.
Once you have set the region of interest, click Submit to create the anomaly model.
Once your anomaly results are ready, you can apply the required settings, create rules, and export the model to the catalog, as explained in the next section.