Label specification (Labeling spec) is an entity that captures the details of the labeling task for the classes to be labeled with text and image inputs to describe the class. This is an input to a labeling job. This article explains creating a label spec with only text prompts. Text prompt information is sufficient primarily for natural image datasets comprising common objects (like vehicles, people, etc).
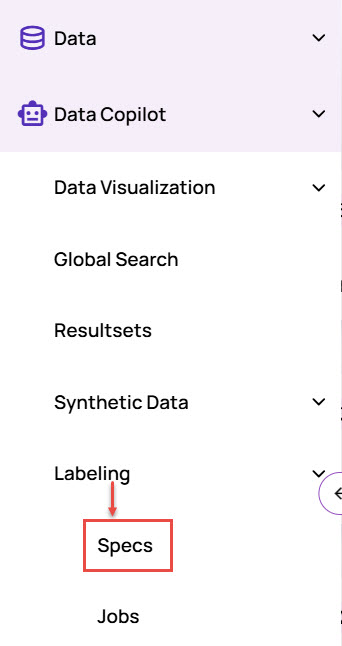
On the left navigation pane, navigate to Labeling > Specs.
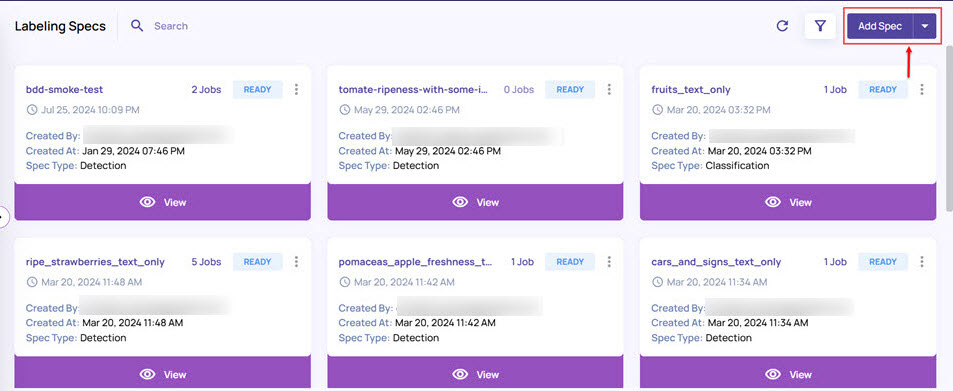
Click the Add Spec button on the top-right corner.
In the Spec Type window, select Classification or Detection, and click Submit.
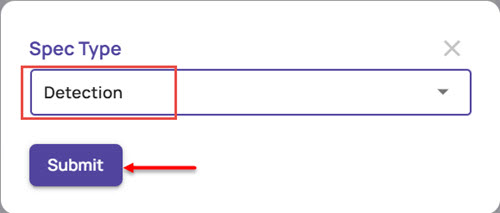
Select Classification to generate a single class label for an image.
Select Detection to generate class labels for multiple objects along with localization information represented using bounding boxes.
In the New Spec screen, enter Spec Description.
Spec Type is prefilled based on your selection in the previous step.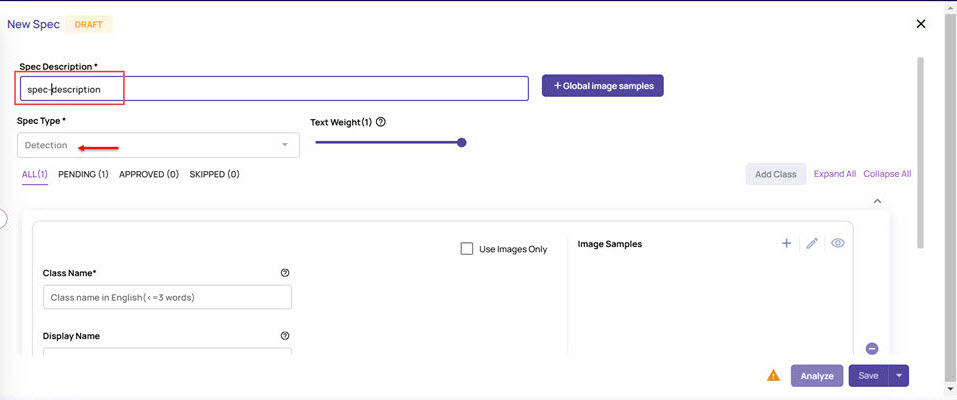
Under the class section, click Add Class to add a new class and describe it with text and image information.
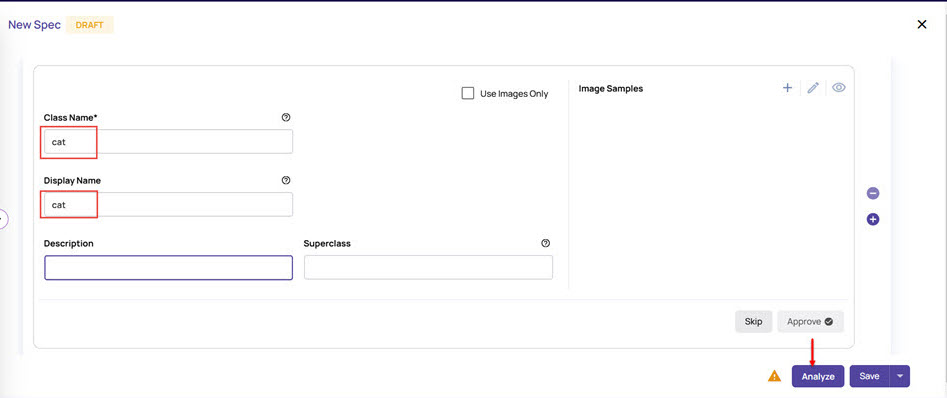
Enter a Class Name. This name is passed to the underlying models to refer to the class, and hence, for best results, it must contain commonly used English name identifiers for the object.
Enter a Display Name for the class. This name represents the class in the output presentation and can differ from the Class name. The Display name has no impact on the quality of results.
Class names can be ambiguous(e.g., apple as a brand Vs. apple as a fruit). With the intent to disambiguate and gather additional descriptions for the class, every class needs to go through the ‘Analyze’ action, where large language models(LLMs) are used. To trigger this analysis, click the Analyze button.
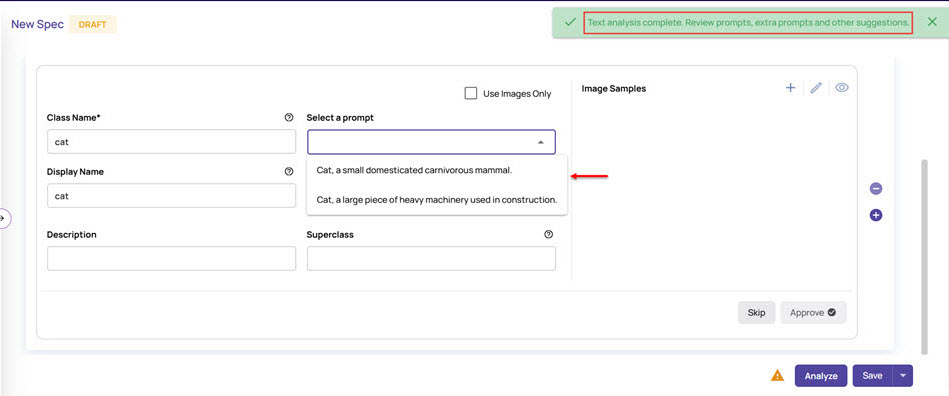
The analysis returns descriptive prompt options. The below shows two prompts to disambiguate the meaning of ‘cat’. Select the Prompt that best matches the Class Name, and click Analyze again to further expand the textual description for the class.
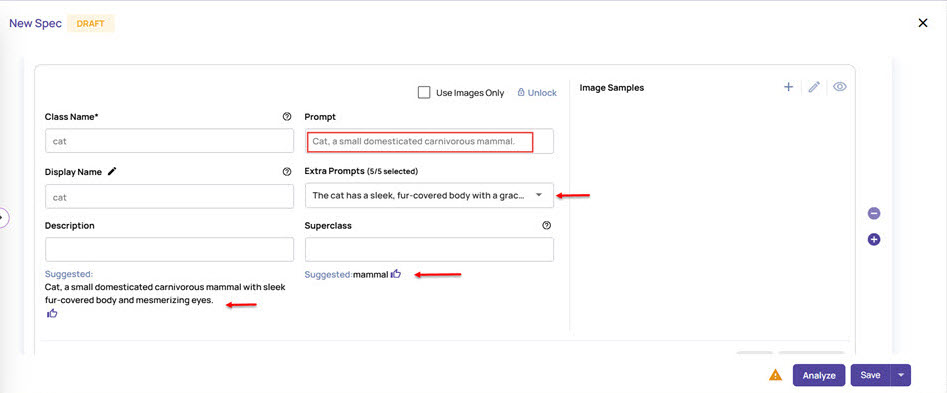
The system populates suggestions for Description and Superclass and up to five extra prompts that further describe the chosen class.
Review the ‘Extra Prompts’ and disable if some don’t accurately describe your intended class.
Review the suggested ‘Description’ and suggested ‘SuperClass’ and accept these if appropriate by clicking the thumbs-up icon against the respective suggestions.
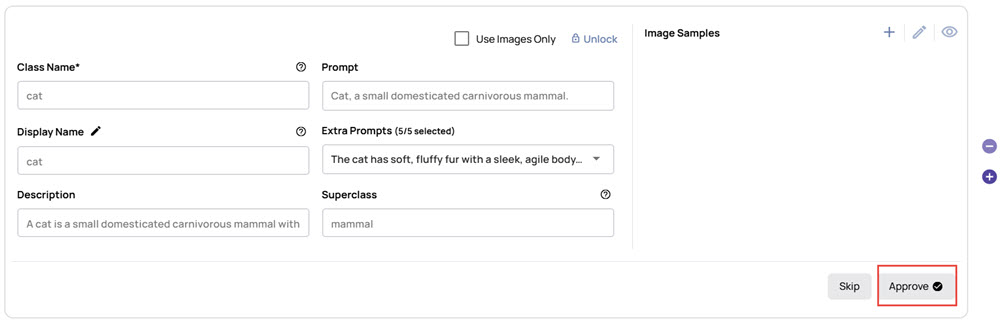
Once the class description is acceptable, click the Approve button.
Add more classes.
Click Add Class or the + (plus) sign, as shown.
.jpg)
Repeat the steps to add more than one class to the page based on your image data, and click Approve for each class.
Once the classes are approved, they appear under the Approved tab, as shown below: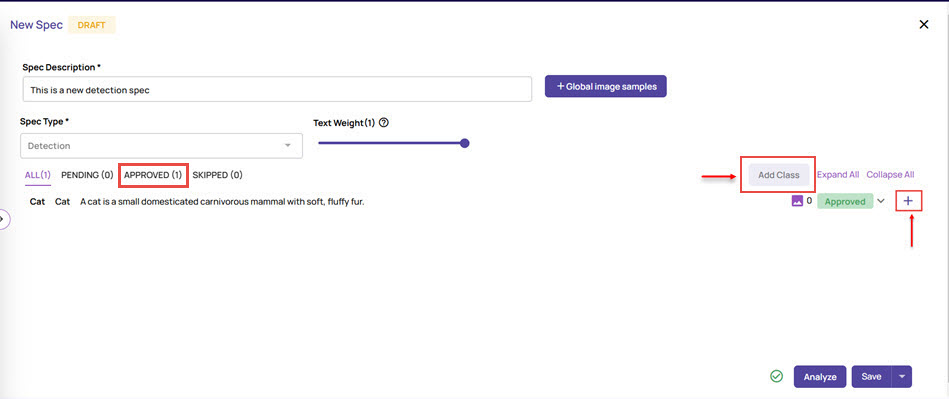
Click Save enter a Spec Name, and then click the "Save" button.
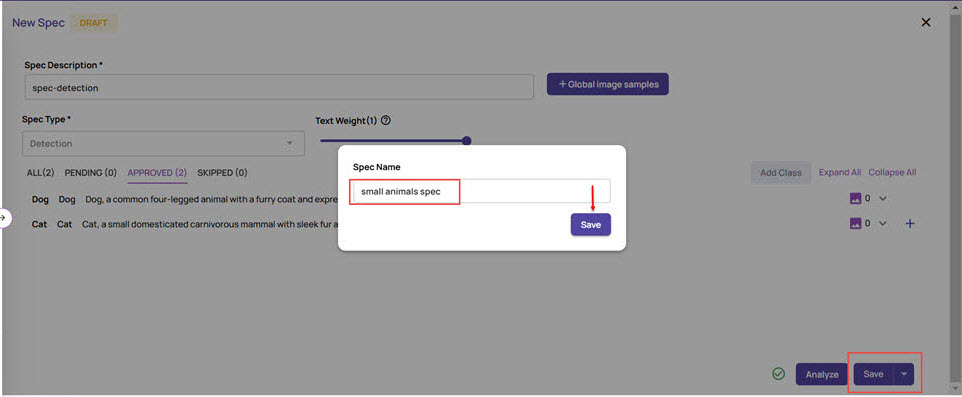
The label spec is listed on the Labeling Specs page, with a status of Ready.