This feature enables you to associate custom key-value attributes, known as “custom tags,” with the images in a job. This is a generic mechanism to categorize images or associate attributes with images as part of visually exploring images in a visualization job. You can later use these tags to filter the images, group images by tag values, etc . The custom tags can be exported into the catalog or downloaded as part of resultset to use these attributes in other operations outside Vision Copilot.
Add Custom Tags
Custom tags enable you to add additional parameters to the image frames, allowing for easy identification and grouping for review. You can add tags to each image separately or in bulk.
Single Image Tagging
Navigate to Data Copilot > Data Visualization > Explore, and select a job.
Select a point from the frames to view the set of images corresponding to the point.
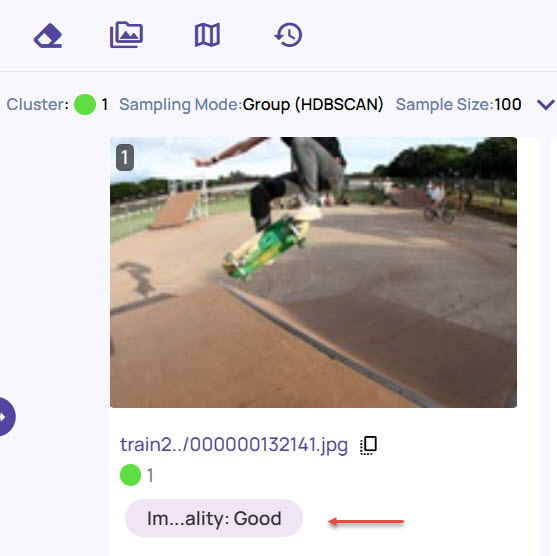
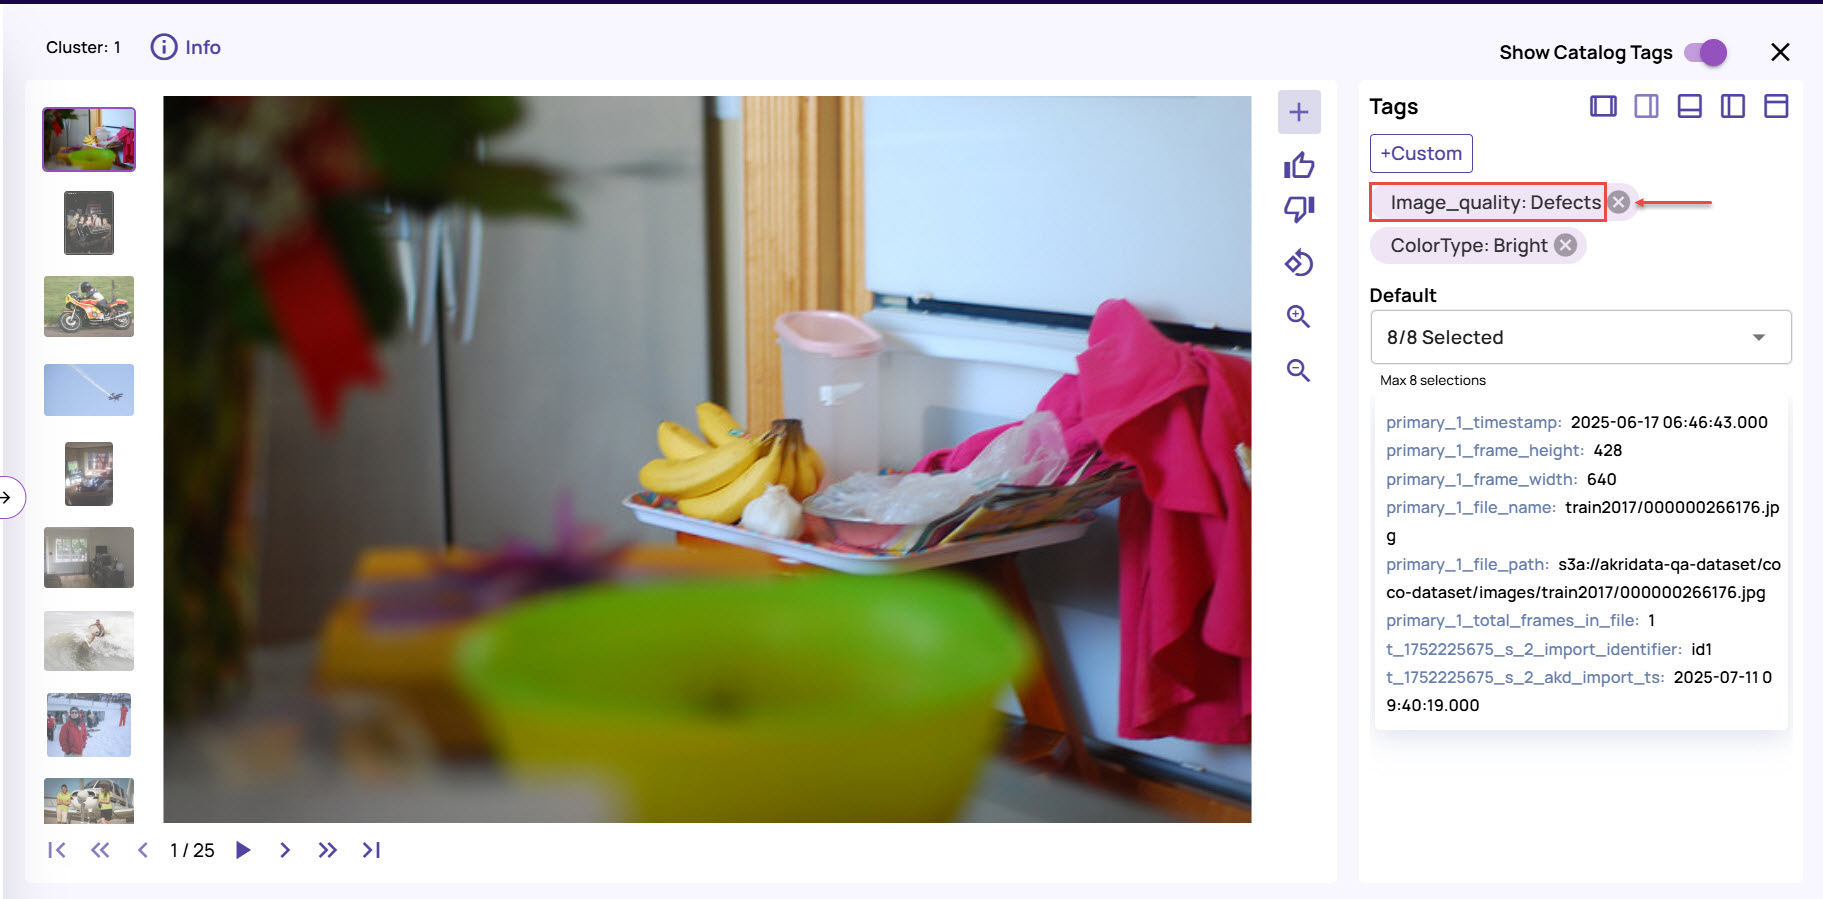
Select an image and click the expand icon to view it in full-resolution mode.
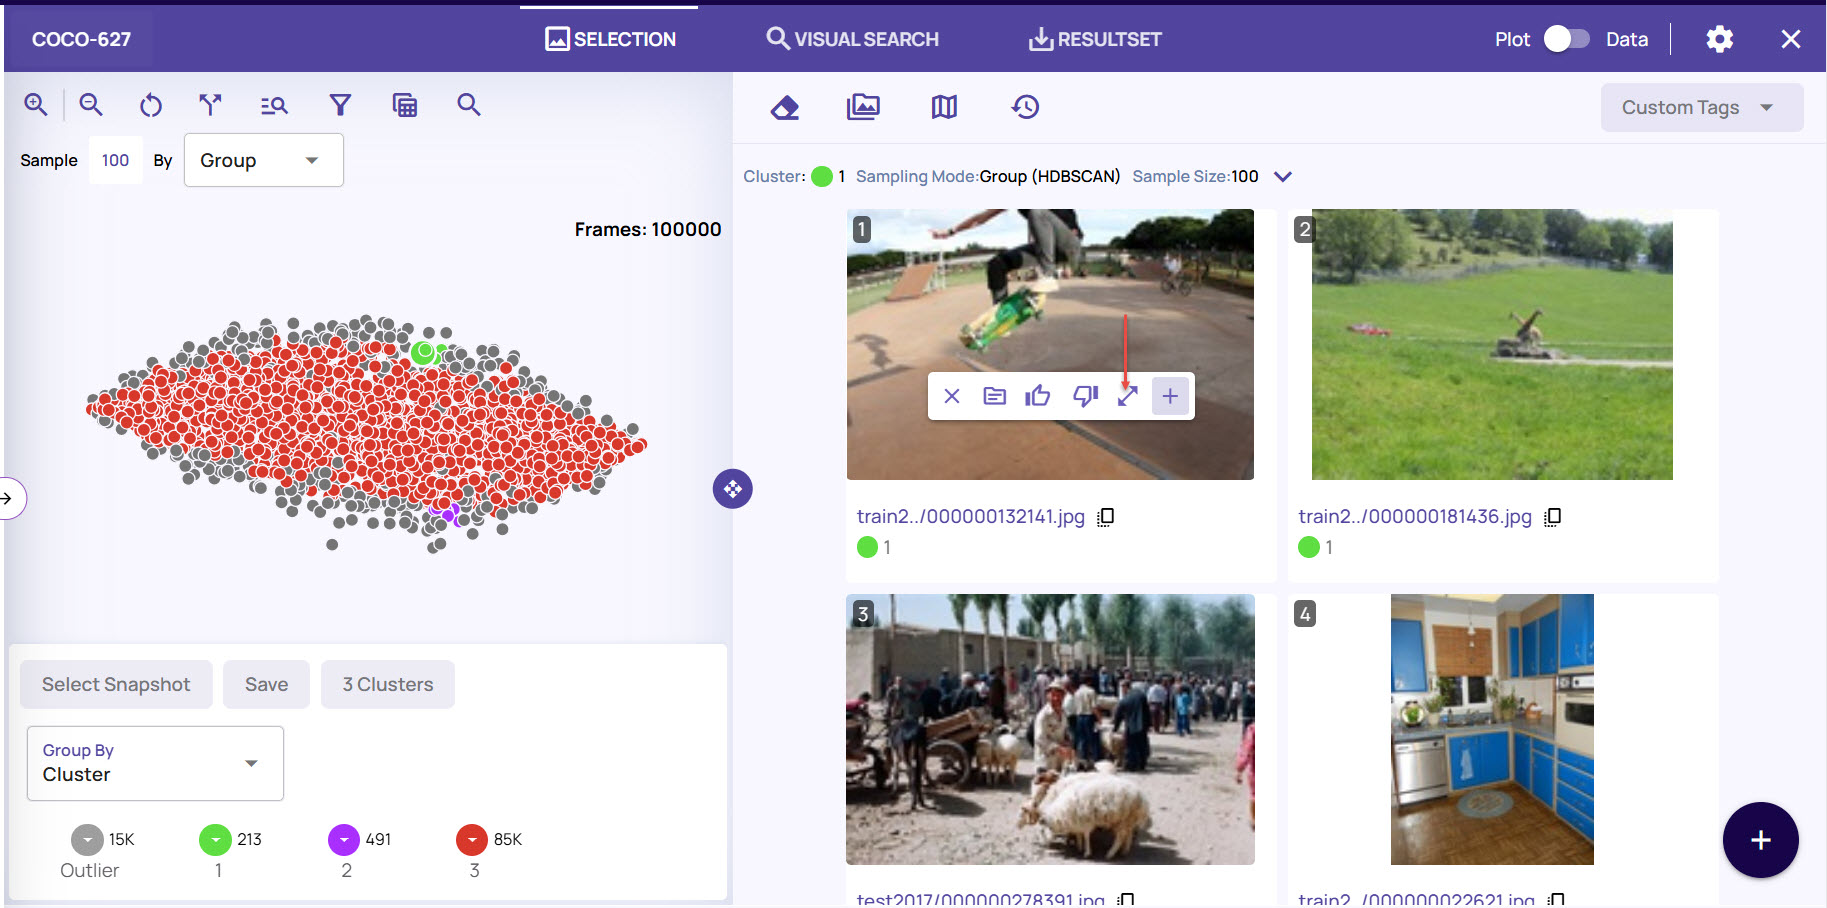
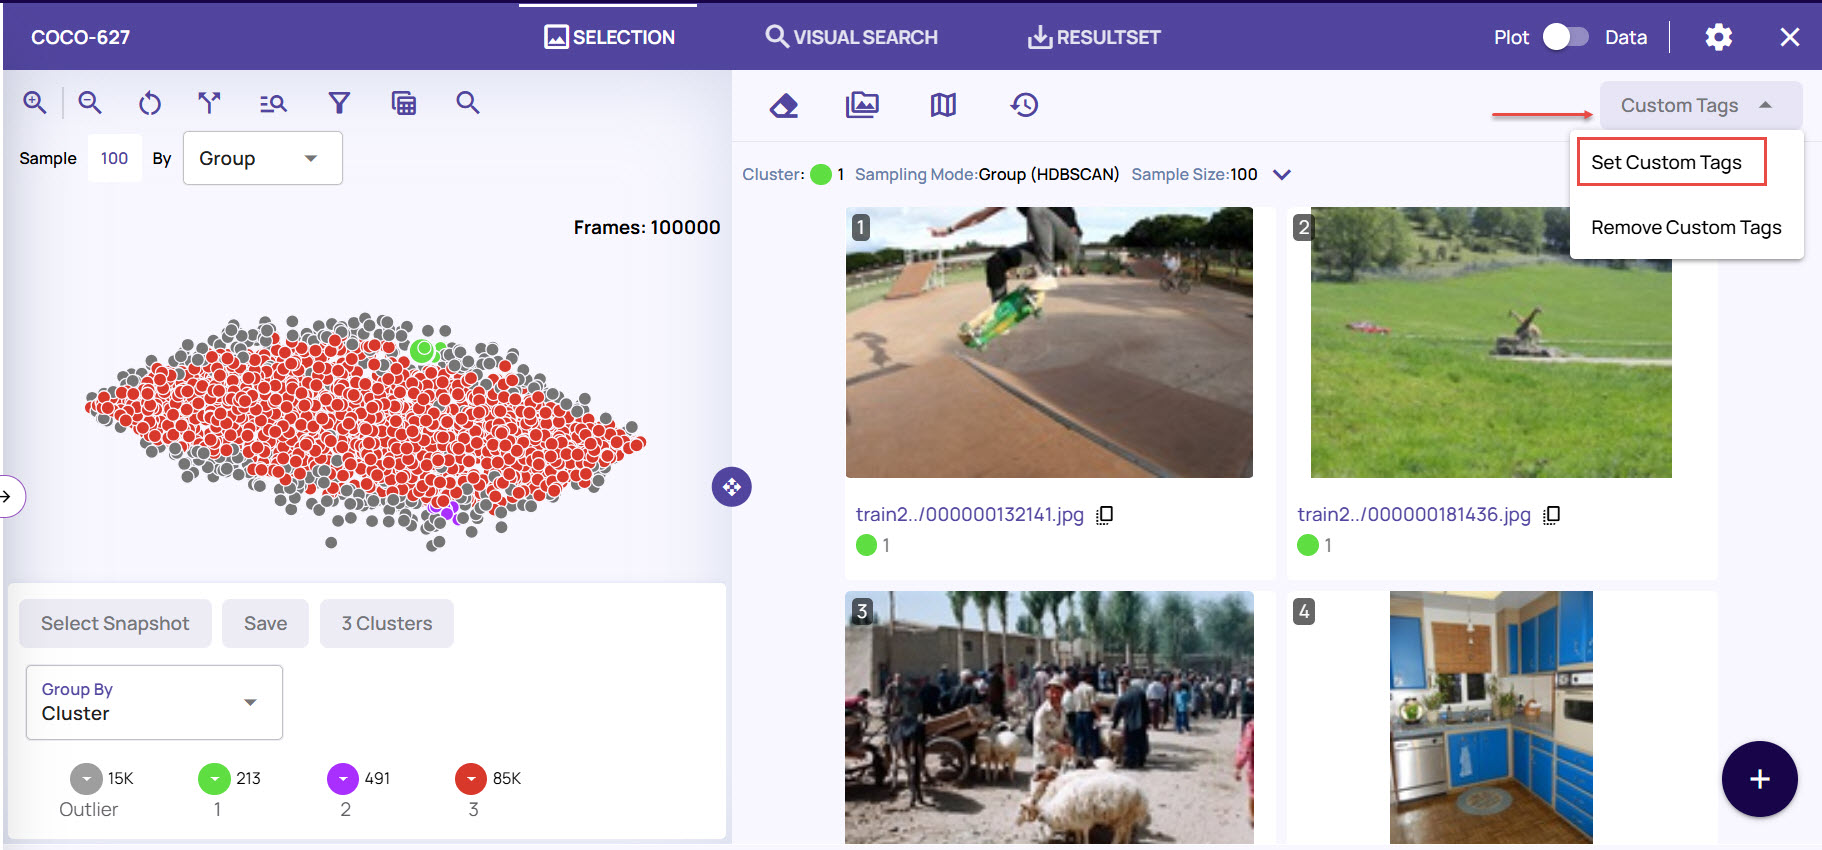
Enable the option Show Catalog Tags on the top-right corner, click Custom Tags > Set Custom Tags.
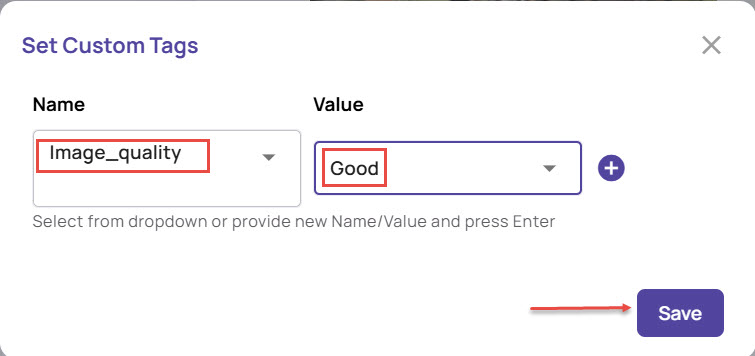
Enter a Name and Value to assign custom tags to the image. For example, add a value as “Good” for the name “Image_quality” to define the property of that image.
.jpg)
You can select a name and value from the existing list or enter a new name and value, and press Enter. The name and value are thereafter added to the drop-down list.Click Save. The image appears with the custom tag on the Jobs page.
You can also add the custom tags to the image frames from the Text Search, Visual Search, and ResultSet tabs.
Bulk Image Tagging
Navigate to Data Copilot > Data Visualization > Explore, and select a job.
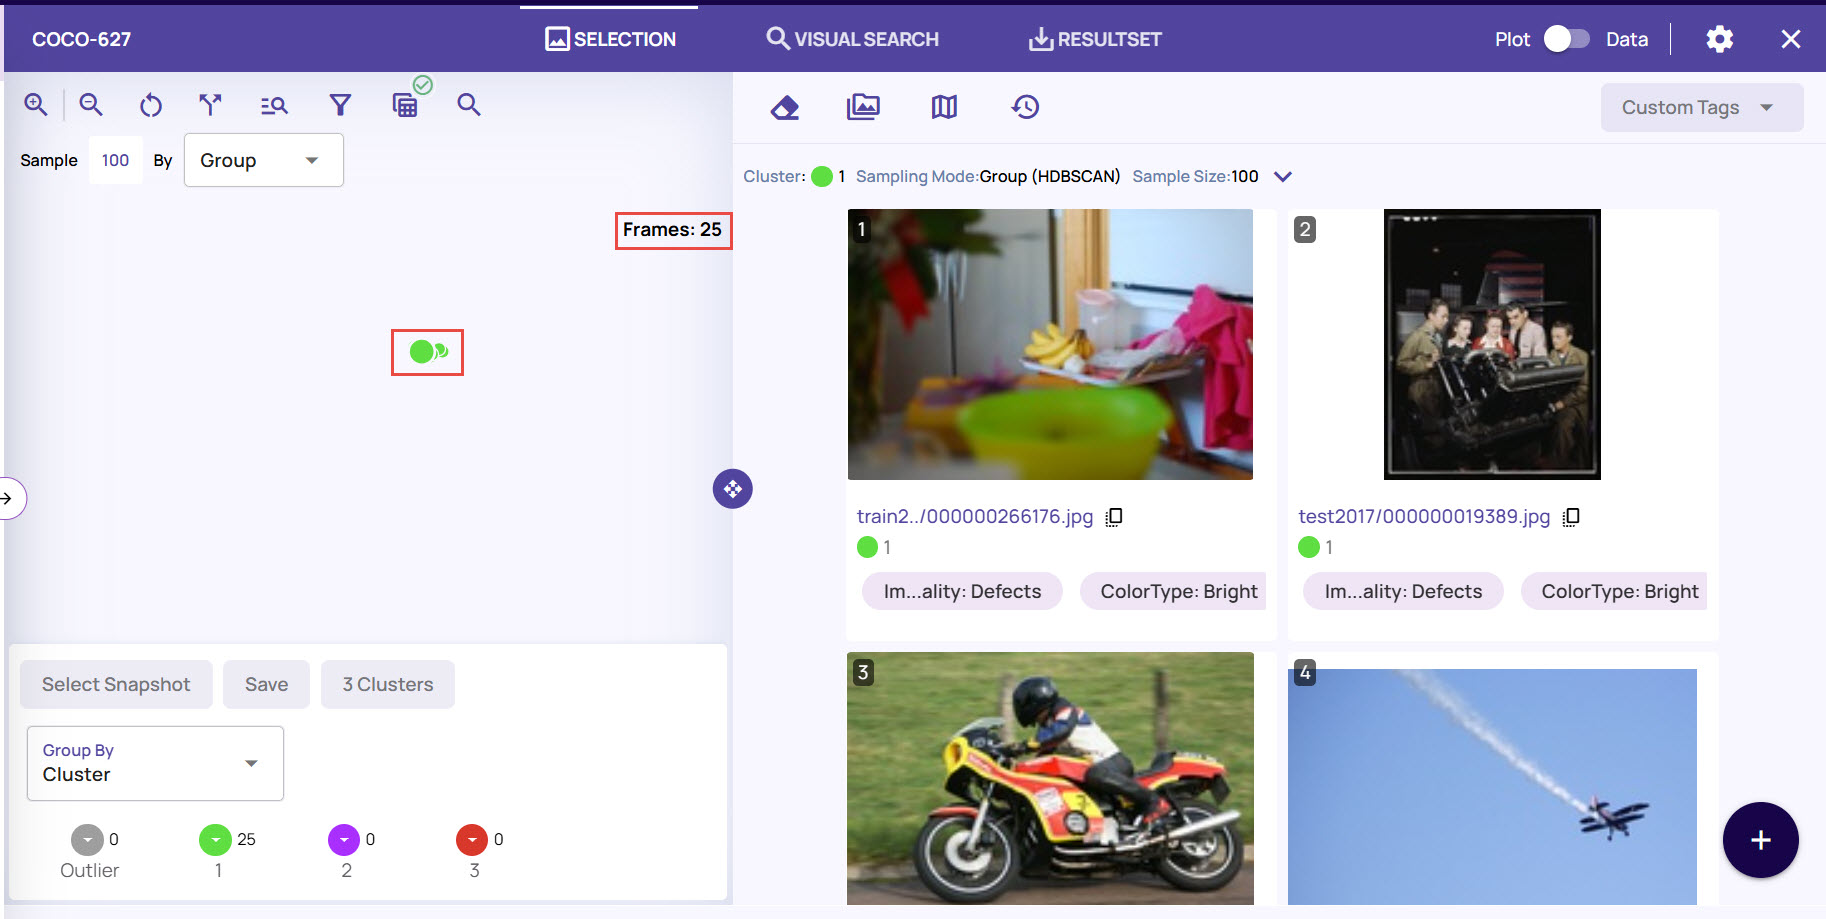
Select a point on from the plot to sample a set of images.
Once the image frames appear, on the top-right corner, click Custom Tags and select Set Custom Tags.
In the Select Images to Add Tags window, select the required images for tagging.

You can select one or more images, depending on the tagging you want to assign. You can also click the Select All check box to select all the images in that set.Enter a Name and Value to set the custom tags for that image. For example, you can add “Good” or “Defects” for the name “Image_quality”.
You can either select a name and value from the existing list or enter a new name and value, and press Enter. The entered name and value will be added to the drop-down list.
Click Save to apply the tags to the selected images.
The tags will appear with the respective images based on the value you have provided.
Once you have reviewed and tagged the images, save the results into a resultset and download the respective resultset along with the custom tags.
Other Custom Tag Options
Download ResultSet with Tags
Tagging images allows you to download a result set in JSON or CSV formats with the tags.
On the jobs page, click the ResultSet menu, and select a resultset that you had created with image tagging.
On the ResultSet page, click the Download file list icon, as shown.
.jpg)
In the Download window, select the file type for Export As, and enable Include Custom Tags at the bottom.
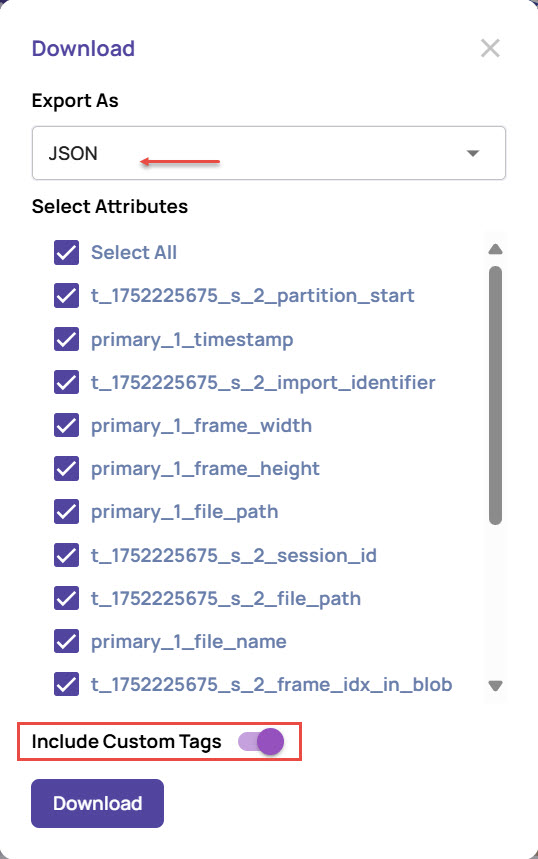
Click Download.
The resultset images are downloaded into the selected file type, including the custom tags you had set for the images.
Group images custom tag-wise
On the ResultSet page, select the Group By option on the bottom-left corner.
Under Add columns for group by, select the Custom Tags tab.
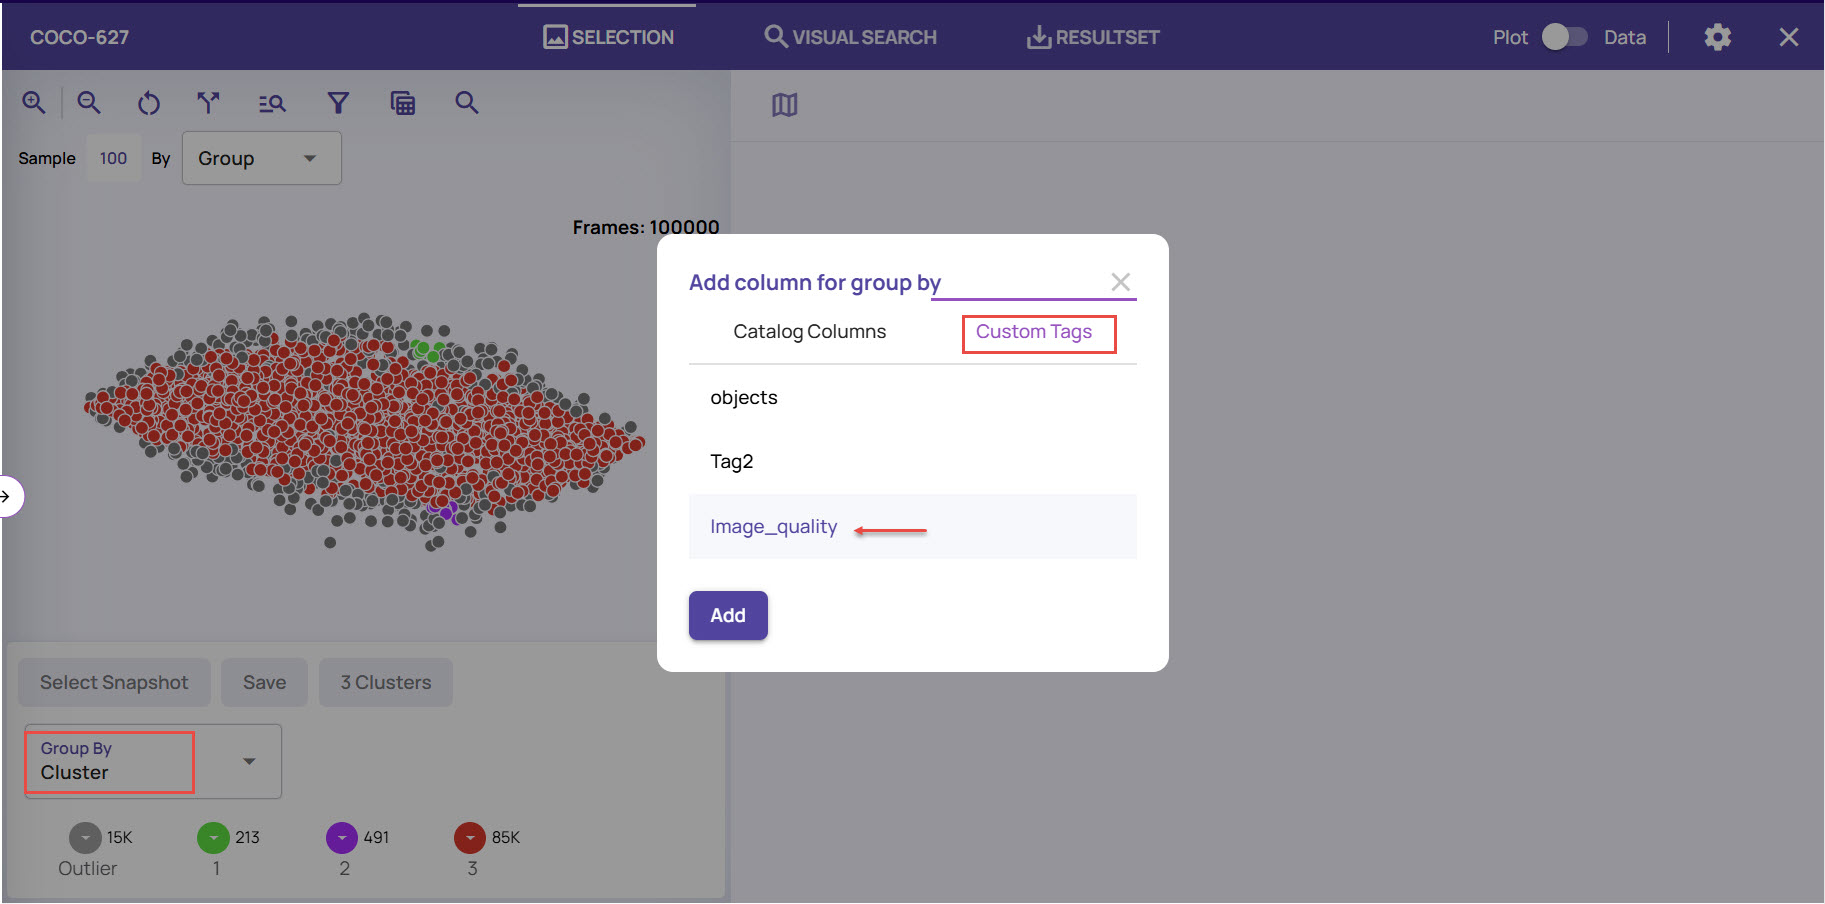
Select the Name of the custom tag that you want to add for grouping and click Add.
Based on the grouping done, you can easily identify the images and click to view the associated image frames.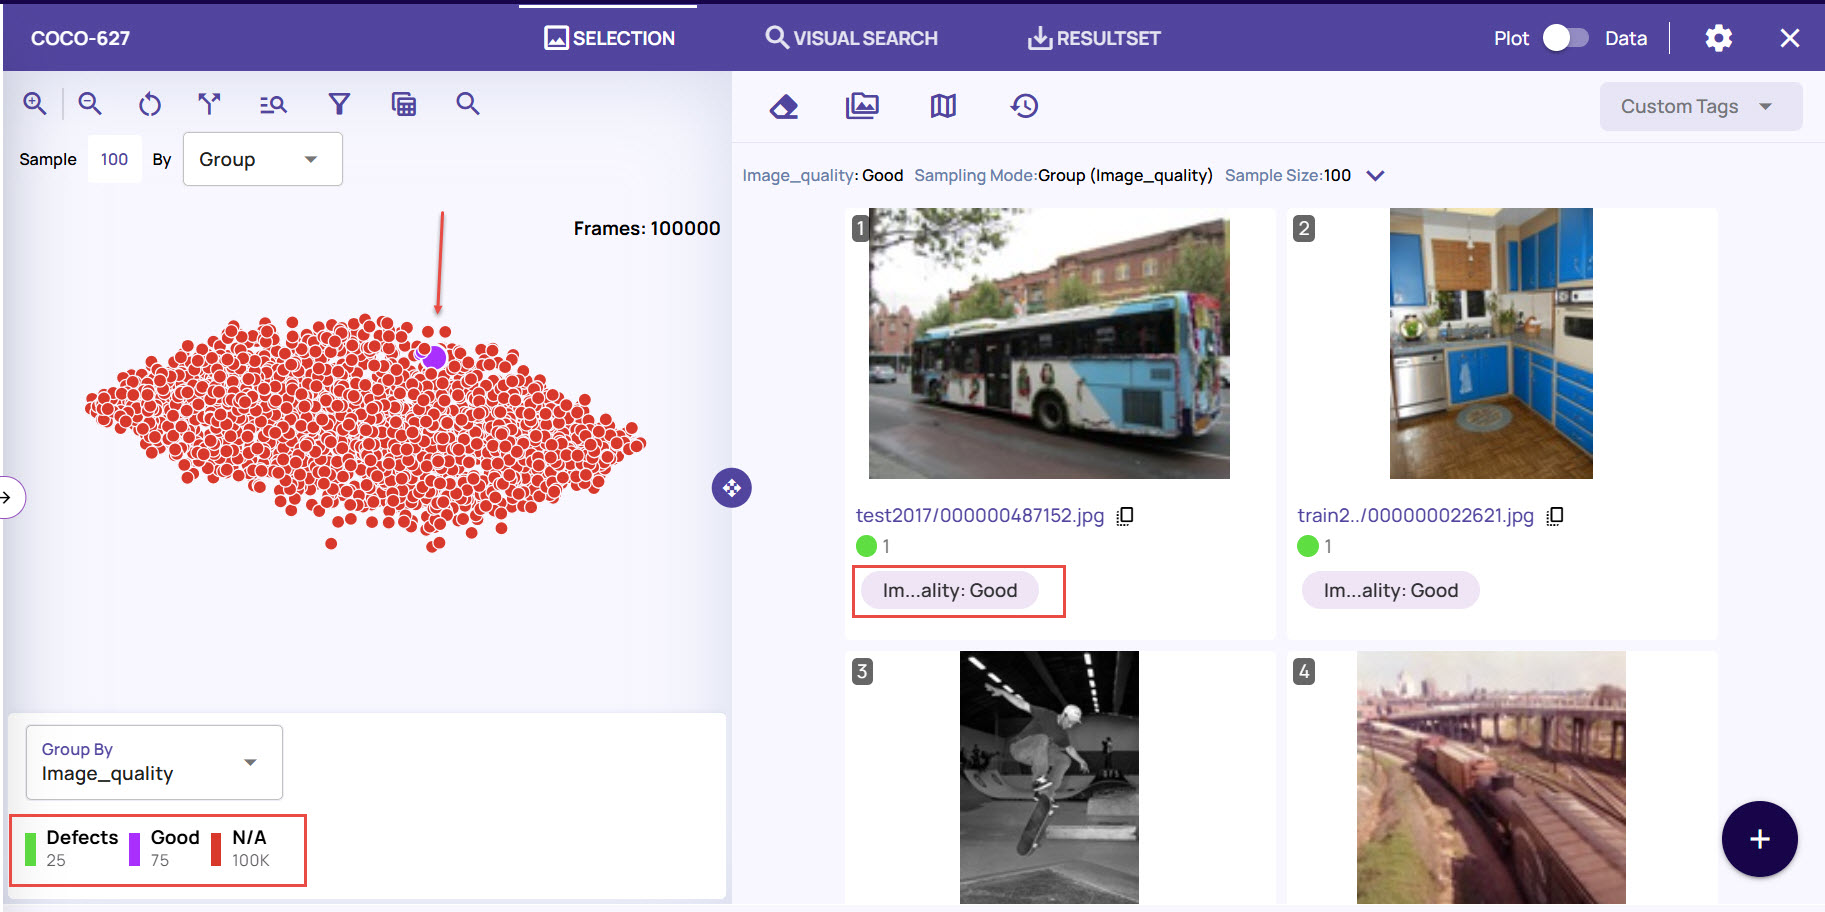
Filter images using custom tags
On the ResultSet page, click the Catalog Property Filter icon.
Click Add Conditions, and select the custom tag name under the Column/Tag drop-down.
Choose the Operation condition and select the tag value.
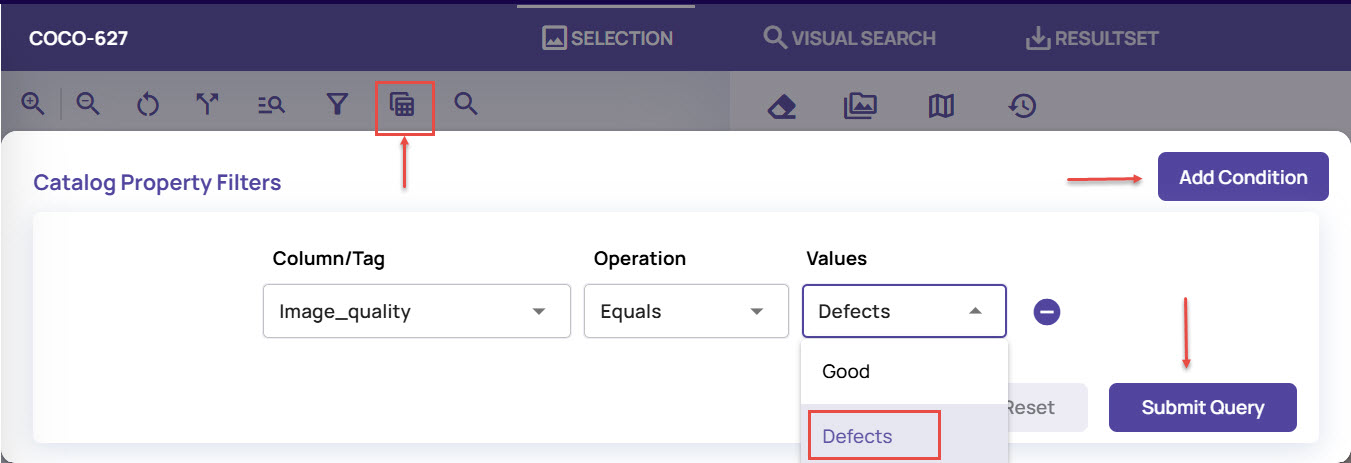
Click the Submit Query button.
On the results page, click a point to view the image frames that match the custom tag filter conditions.
Remove Custom Tags
You can remove the custom tags from the images individually or in bulk, as needed.
To remove the custom tags from a specific image
Click the image to view it in full resolution mode.
Under Tags, identify the tag that you want to remove and click the cross (x) sign.
To remove tags from bulk images together
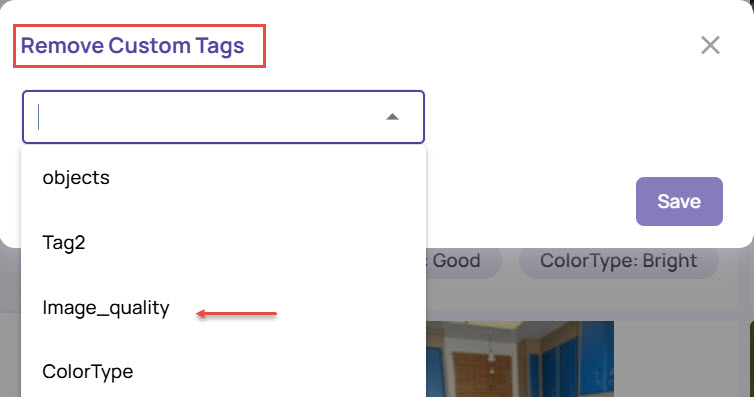
On the jobs page, click Custom Tags > Remove Custom Tags to remove the tags for one or more images.
.jpg)
In the Select Images to Remove Tag window, select one or more images for which you had set the tag, and select Continue.
Select the custom tag name from the drop-down list and click Save.
The tag name, along with its assigned value, gets removed from all the selected images.